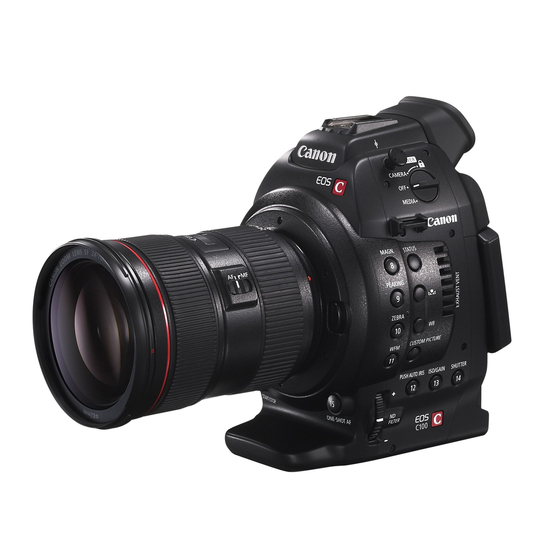
Canon EOS C100 Basic Manual
Hide thumbs
Also See for EOS C100:
- Brochure & specs (2 pages) ,
- Instruction manual (166 pages) ,
- Setting up (6 pages)
Table of Contents
Advertisement
Quick Links
Basic guide to Canon EOS C100 2017
This guide is designed to take you through the basic and essential functions of
the Canon C100 camcorder.
Battery insertion
Have the camera in the off position. The power switch is on the upper left
hand side of the body as you look at the back of the camera.
The battery can only be inserted one way. If force is used then damage
can be made to the battery or camera.
Insert the battery by sliding it in the direction of the arrow until it clicks
into place.
Battery removal
Turn off the camera.
Remove the battery by sliding the battery release lever forward and
removing the battery as shown by the arrow below. While holding the
lever down slide the battery to the right and out.
Basic Guide to the C100
tsanderson@glos.ac.uk
Advertisement
Table of Contents

Summary of Contents for Canon EOS C100
- Page 1 Basic guide to Canon EOS C100 2017 This guide is designed to take you through the basic and essential functions of the Canon C100 camcorder. Battery insertion Have the camera in the off position. The power switch is on the upper left hand side of the body as you look at the back of the camera.
- Page 2 Turning camera on There are two modes. CAMERA for recording and MEDIA for playback. Turn the switch to CAMERA to switch on for recording or MEDIA for playback. The flip-out screen To open the LCD flip screen pull the bottom of the screen up and flip it over to the left.
-
Page 3: Memory Card
Memory card There are two memory card slots, A and B. You can use A or B or both. A memory card is supplied with the camera. Check that it is inserted in the SD slot. This must always be returned with the camera to the stores. Insert or remove the memory card with the camera turned off. - Page 4 In the menu select Other functions > Initialize Media > Select A or B and then press the joystick. Select OK and then press the joystick. Recorded Image Quality It is important that the video you record uses the correct settings. The settings can be found in the menu.
-
Page 5: Shutter Speed
Shutter Speed You can change the shutter speed using the joystick, it appears as a fraction. Generally you will set this to 1/50 (180˚) unless there’s a desired effect you are trying to achieve by lowering it. Changing the shutter speed does changed your exposure but it will effect the movement in your image, so if you are unsure, stick to 1/50. -
Page 6: White Balance
Focus Automatic – Only available on the Zoom lens Continuous AF With compatible lenses that camera can be put into (AF) auto focus mode. One-shot AF With the lens switch set to AF, using the ONE-SHOT AF, button 15, will focus the camera automatically. Manual –... - Page 7 One function which should never be left in automatic is the camera's white balance. To white balance the C100 press the WHITE BALANCE button. You can choose: Custom Preset Set a colour temperature using Kelvin (This is recommended) Auto Colour Temperature Setting Press the WB button The white balance mode will be selected Push the Joystick up/down to select the K icon...
- Page 8 Audio Levels Basic Guide to the C100 tsanderson@glos.ac.uk...
- Page 9 You can record sound using the built-in mics. A useful tip for the internal mic is the low cut feature. Select Audio Input > Int Mic Low Cut > Then LC1 or LC2. LC1 - Will remove low frequencies and let high frequencies through LC2 –...
- Page 10 Adjust the level controls if the audio is too loud or quiet. The audio level indicators on the flip-out screen should peek at 2/3rds of their full scale. Making and playing-back a test recording It is good practice to make a test recording to check that the camera works satisfactorily.
- Page 11 The Play button is on the body of the camera beside the flip-out screen. You can also use the joystick to navigate the footage. Useful menu settings Guide Frame There are a few grids available that may be helpful. This setting enables a grid to be displayed on the flip-out display which is helpful for framing shots.
-
Page 12: Setting The Time Code
In order to focus more accurately, you can use two focus assistance functions – peaking, which creates a clearer contrast by emphasizing the outlines of the subject, and magnification, which enlarges the image on the screen. You can use both functions simultaneously for greater effect. Peaking Select LCD/VF Setup >... - Page 13 This setting enables you to assign your shortcuts. The numbers relate to the back of the camera next to the view finder. Select Other Functions > Assign Button > I would suggest setting Number 1 to PHOTO Number 3 to HEADPHONE + Number 6 to HEADPHONE - Editing your material Before you edit your material you need to create a back up copy.
- Page 14 you reformat the camera card. When it is safe to do so it would be helpful to reformat the camera's media card before returning to the Media School store. Please tell Elly or Graham that you have reformatted the drive to prevent her from having to do so.


