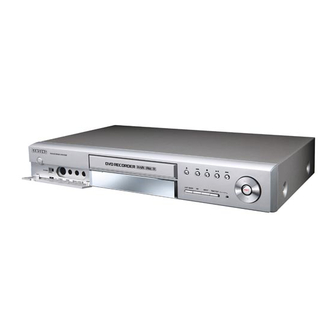
Table of Contents
Advertisement
Quick Links
Quick Setup Guide
Step
Getting Connected
S t e p
Select one of the following three types of connections:
Antenna + DVD Recorder + TV : No Cable Box
Antenna + Set-Top Box or VCR + DVD Recorder + TV : No Cable Box
Antenna + Cable Box + DVD Recorder + TV
The VHF/UHF RF OUT jack of this product sends only signals received through the antenna. It does not output audio/video signals.
You must use one of the following connections on this unit.
Antenna + DVD Recorder + TV : No Cable Box
C Samsung Electronics
Step
Getting Connected
Step
Setup
Step
Basic Operation
Connect the signal source to the DVD
Recorder
Use a TV antenna or coaxial cable to connect the signal
source coming from the antenna or wall to the VHF/UHF
RF-IN jack on the DVD Recorder.
Connect the DVD Recorder to the TV
Use the supplied RF cable to connect RF-OUT on the
DVD Recorder to the ANT jack on the TV. Then use the
Video/Audio Cable to connect ANALOG AUDIO
OUT(R/L)/VIDEO OUT jacks on the DVD Recorder to the
Audio & Video jacks on the TV.
For better picture quality, if your TV has an S-Video
jack, you can use S-Video cable instead of the yellow
video connector on the Video/Audio cable.
For the best picture quality, if your TV has
Component video jacks, you can use component
cables instead of the yellow video connector on the
Video/Audio cable. Set the Component video out
select switch on the back of your DVD recorder to
480p/480i video output mode. If your TV supports
progressive scan, select 480p.
If you have an AV amplifier
Connect either audio cables from the ANALOG AUDIO OUT
jacks on the DVD Recorder to the LINE IN jacks on your AV
amplifier, or a digital cable from the DIGITAL AUDIO OUT
(COAXIAL or OPTICAL) jack on the DVD Recorder to the
DIGITAL AUDIO IN jack on your AV amplifier.
1
This Recorder will only record on
DVD-R, DVD-RW and DVD-RAM discs.
Printed in Korea
Advertisement
Table of Contents

Summary of Contents for Samsung DVD Recorder
- Page 1 Select one of the following three types of connections: Antenna + DVD Recorder + TV : No Cable Box Antenna + Set-Top Box or VCR + DVD Recorder + TV : No Cable Box Antenna + Cable Box + DVD Recorder + TV The VHF/UHF RF OUT jack of this product sends only signals received through the antenna.
- Page 2 Antenna + Set-Top Box or VCR + DVD Recorder + TV : No Cable Box DVD Recorder Antenna + Cable Box + DVD Recorder + TV DVD Recorder Connect the signal source to the STB or VCR Use a TV antenna or coaxial cable to connect the signal source coming from the antenna or wall to the VHF/UHF RF IN jack on the STB or VCR.
-
Page 3: Clock Set
…/† buttons, then press the √ or ENTER button. The DVD Recorder automatically sets the clock by searching for a channel that carries a time signal and sets your time zone and daylight saving(if applicable). If your clock is set to the wrong time zone or daylight saving, you can adjust these settings without turning off the Auto Clock Set function (see page 24). -
Page 4: Audio Setup
Channel Set With the unit in Stop mode, press the MENU button. Select Setup using the …/† buttons, then press the √ or ENTER button. Select System using the …/† buttons, then press the √ or ENTER button. Select Channel Set No Disc using the …/†... -
Page 5: Basic Operation
Wait! Make sure you complete Step with The following instructions will give you a quick overview about how to use the DVD Recorder. Formatting a Disc Recording the current TV program you are watching Making a Timer Recording Finalizing a Disc... - Page 6 Finalizing a Disc After you record programs onto a DVD-RW/DVD-R disc with your DVD recorder, it needs to be finalized before it can be played back on external devices. Press the MENU button with the disc stopped.


