Advertisement
Quick Links
Advertisement

Summary of Contents for FAAC T-MODE TM R Series
- Page 1 T-MODE TM R-W 433 Mhz...
-
Page 2: Declaration Of Conformity
DECLARATION OF CONFORMITY Manufacturer: FAAC S.p.A. Address: Via Calari, 10 - 40069 Zola Predosa BOLOGNA - ITALY Declares that: Operator mod. TM 45 radio 433Mhz • conforms to the essential requirements of the following EEC directives: - 2006/95/EEC - 2004/108/EEC - 99/05/EEC • it thus conforms to the following harmonised standards: - EN 60335-1-95, EN60335-2- 97/10-2000. - EN 61000-3-2, EN61000-3-3, - EN55014-1, EN55014-2 Bologna, 01/12/2012 The Managing Director A. Marcellan WARNINGS FOR THE INSTALLER ATTENTION! To ensure the safety of people, it is important that 14. Keep radio controls or other pulse generators out of reach of... -
Page 3: Technical Specifications
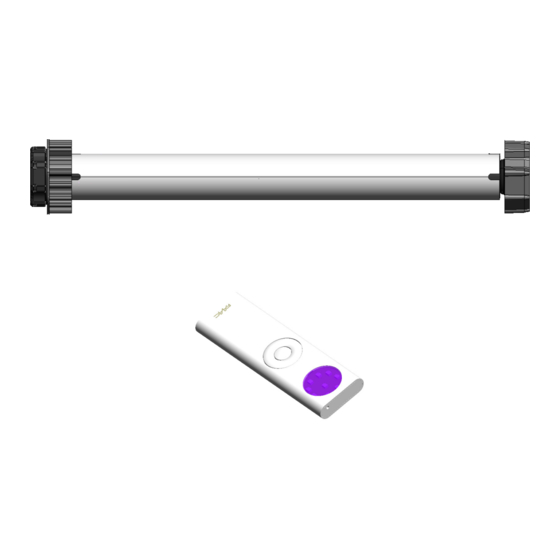
T-MODE TUBULAR MOTORS WITH RADIO AND WIND 433MHz DESCRIPTION a Tubular motor b Example of wheel adapter. (Accessory) c Example of crown adapter. (Accessory) d Travel limit ring nut e Example of motor support (Accessory) Fig. 1 TECHNICAL SPECIFICATIONS T-MODE TORQUE FREQUENCY MAX. SPEED VOLTAGE FREQUENCY POWER CURRENT MOTOR MOTOR “L” LENGTH WITH PROTECTION 45 R (Nm) OF USE USE TIME (Rpm) (Hz) SHAFT MAX. DIAMETER ADAPTER (mm) CLASS... - Page 4 INSTALLATION 1) Measure dimension A on the tubular motor, as shown in figure 3 ref. a. 3.1 ASSEMBLING THE TUBULAR MOTOR 2) Drill a hole with a drill Ø 3 mm on the roller (Fig.3 ref. 1) Fit the crown adapter (Fig.2 ref.a ) in the tubular motor, b ) at the distance A, previously measured on the tubular until it is completely inserted in the guide on the travel motor (Fig.3 ref. a). limit ring nut. 3) Fit the assembled tubular motor inside the roller from the side opposite the cap, until the crown adapter is 2) Fit the wheel adapter (Fig.2 ref. b) in the motor shaft. 3) completely inside the roller (Fig.4 ref.a). Lock the adapter with the supplied stop. (Fig.2 ref. c ) 4) Make sure that the adapter is well secured (Fig.2 ref. 4X10 Fig. 4 4) Secure the wheel adapter to the roller with a tapping...
- Page 5 3.3 ELECTRIC CONNECTIONS 3.3 ELECTRICAL CONNECTIONS 3.3.1 RADIO VERSION 3.3.2 WIND VERSION The series W tubular motor can be controlled both by the The series R tubular motor can be controlled both by the remote control and by a push-button with step-by-step remote control and by a push-button with step-by-step logic. In addition, a wind sensor (anemometer) can be logic. connected to the motor: it commands the closure of the rolling shutter as soon as the wind has reached a speed higher than 20 Km/h.
- Page 6 4 MEMORY STORING THE FIRST RADIO 433Mhz Portable remote control REAR STOP VIEW DOWN CHANGE RADIO CHANNEL PROGRAMMING ENABLE DISABLE PUSH-BUTTON SUN SENSOR Wall-mounted remote control Fig.8 MAX. 20 RADIO DEVICES CAN BE STORED IN THE MEMORY OF THE MOTOR INTERNAL RECEIVER (WALL-MOUNTED REMOTE CONTROLS, RADIO ANEMOMETERS, ETC.).
- Page 7 ADDING FURTHER REMOTE CONTROLS 433Mhz 1) Supply power to the motor. 2) On an already memory-stored remote control, press the PROGRAMMING push-button for 2 seconds and, within 5 seconds, press the STOP push-button. 3) On the remote control to be memory stored, press the STOP push-button within 5 seconds. 4) The motor performs two brief movements in both directions to confirm the performed memory storing of the remote control. REMOTE CONTROL ALREADY MEMORY STORED 2 seconds 2 seconds WITHIN 5 SECONDS REMOTE CONTROL TO MEMORY STORE RADIO DELETING DELETING A SINGLE REMOTE CONTROL 1) Press twice the programming push-button for 2 seconds 2) Within 10 seconds press the STOP push-button for 2 seconds. 3) The motor performs a brief movement in both directions to confirm the performed deletion of the remote control. Every pressing 2 seconds WITHIN 10 SECONDS 2 seconds...
- Page 8 TOTAL DELETION OF THE RECEIVER 1) Cut power to the motor, wait for 10 seconds and connect the RED (or black) wire to the brown wire. (If a “step-by-step” push-button is available, just hold it down without making the connection.) 2) Supply power to the motor, after approx. 10 seconds the motor operates in both directions for 1 second signalling that the memory has been completely deleted. 3) Cut power again to the motor. Disconnect the black and the brown wires. (Release the push-button if the “step-by-step” push-button is available) 230 V ~ Press BROWN RED (or black) 230 V ~ BROWN RED (or black)
- Page 9 ADJUSTING THE TRAVEL-LIMIT STOPS 9.1 CORRELATION BETWEEN ROLLER ROTATION DIRECTION AND TRAVEL-LIMIT ARROWS Roller rotation Roller direction rotation direction Relevant Relevant travel-limit stop travel-limit stop Fig.10 To help you find the travel-limit stop adjustment screws, refer to figures 11 - 12, according to the motor installation side (RH or LH), and to the box configuration (internal or external).
- Page 10 +33 4 72218700 tel. +1 904 4488952 tel. +971 42146733 www.faac.fr www.faacusa.com www.faac.ae FAAC FRANCE - AGENCE PARIS FAAC INTERNATIONAL INC Massy - Paris, France Fullerton, California - U.S.A. tel. +33 1 69191620 tel. +1 714 446 9800 www.faac.fr www.faacusa.com...


