Advertisement
Before operating the monitor please read this manual thoroughly. This
manual should be retained for future reference.
Packing list ------------------------------------------------------
Precautions ------------------------------------------------------
Installation Instructions --------------------------------------
Swivel Base ----------------------------------------------------
Power cord ---------------------------------------------------
Video cable ---------------------------------------------------
Operating Instructions ---------------------------------------
General Instructions ---------------------------------------
Front panel control -----------------------------------------
How to adjust a setting ------------------------------------
Adjusting the picture ---------------------------------------
Plug and play ---------------------------------------------------
Technical Support (FAQ) ------------------------------------
Appendix A - Specifications --------------------------------- 11-12
Appendix B - Factory Preset Timing Table --------------
PACKING LIST
The product package should include the following items:
1. Monitor
2. Owner's Manual
3. Power Cord
4. Swivel Base
41A749-786-1A 英文
Contents
1
1
2
3
3
3
4
5
5
6
6
7-8
9
10
13
Advertisement
Table of Contents

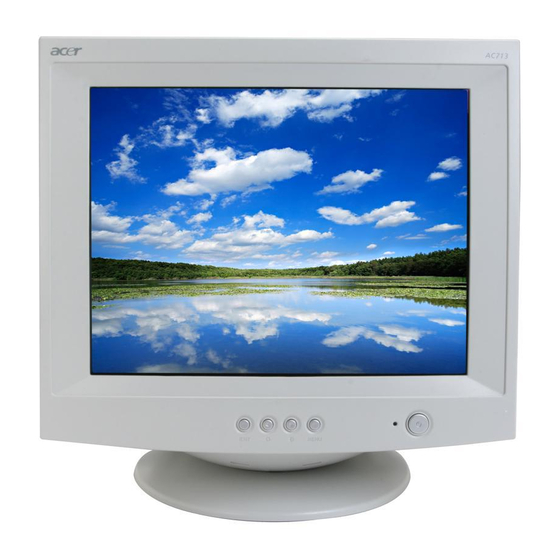
Summary of Contents for Acer AC713
-
Page 1: Table Of Contents
manual should be retained for future reference. Contents Packing list ------------------------------------------------------ Precautions ------------------------------------------------------ Installation Instructions -------------------------------------- Swivel Base ---------------------------------------------------- Power cord --------------------------------------------------- Video cable --------------------------------------------------- Operating Instructions --------------------------------------- General Instructions --------------------------------------- Front panel control ----------------------------------------- How to adjust a setting ------------------------------------ Adjusting the picture --------------------------------------- Plug and play --------------------------------------------------- Technical Support (FAQ) ------------------------------------... -
Page 2: Precautions
PRECAUTIONS Do not use the monitor near water, e.g. near a bathtub, washbowl, kitchen sink, laundry tub, swimming pool or in a wet basement. Do not place the monitor on an unstable cart, stand, or table. If the monitor falls, it can injure a person and cause serious damage to the appliance. -
Page 3: Installation Instructions
INSTALLATION INSTRUCTIONS Swivel Base To attach the swivel base to the monitor, do the following: • Carefully turn the monitor on its side or upside down. ( see figure 1 ) • Locate the cavities at the bottom front of the monitor. •... -
Page 4: Video Cable
Video cable Connecting the Video Cable: The monitor comes with a built-in video cable. Plug the signal cable's 15-pin connector into the computer's video port and tighten the two screws on the cable connector. Caution: Don’t bend the signal cable, otherwise it will break the inner wire. Connecting the Power Cord: Plug the power cord into the monitor's AC power socket. -
Page 5: Operating Instructions
OPERATING INSTRUCTIONS General Instructions The other control knobs are located at the base of the monitor (See Figure 3). By changing these settings, the picture can be adjusted to your personal preferences. • The power cord should be connected. • Connect the video cable from the monitor to the video card. •... -
Page 6: Front Panel Control
Front Panel Control • : Press this knob to switch ON/OFF of monitor’s power. • MENU : Active OSD menu or function adjust confirm. • : Adjust contrast or function adjust. • : Adjust brightness or function adjust. • EXIT : Exit a function or inactive OSD menu. •... -
Page 7: Adjusting The Picture
Adjusting the picture The description for functional control icons 1. CONTRAST Adjust the picture contrast. 2. BRIGHTNESS Adjust the picture brightness. 3. H-CENTER Adjust the horizontal position of the picture. 4. H-SIZE Adjust the picture’s horizontal size. 5. V-CENTER Adjust the vertical position of the picture. 6. - Page 8 14. USER COLOR ( Red / Blue ) If the 9300°K normal white or 6500°K warmer white do not satisfy your desire, properly adjust R . B GAIN controls to obtain your optimum whiteness level. 15. DEGAUSS If color impurity occurs when moving or swiveling the monitor, press MENU Key and degauss to fix the picture condition.
-
Page 9: Plug And Play
THERE IS NO VIDEO INPUT SIGNAL. IN ORDER FOR THIS MONITOR TO OPERATE PROPERLY, THERE MUST BE A VIDEO INPUT SIGNAL. This monitor meets the Green Monitor standards as set by the Video Electronics Standards Association (VESA) and/or the United States Environmental Protection Agency (EPA) and The Swedish Confederation Employees ( NUTEK ). -
Page 10: Technical Support (Faq)
TECHNICAL SUPPORT (FAQ) Problem & Question Power LED is not on No Plug & Play Picture is fuzzy Picture bounces or a wave pattern is present in the picture The power LED is ON (orange) but there’s no video or no picture. Missing one of the primary colors (RED, GREEN, or BLUE) -
Page 11: Appendix A - Specifications
APPENDIX A - SPECIFICATIONS 43.2cm(17"), 90º deflection, 29mm neck, 0.27mm dot pitch non-glare screen. Viewable Image Size 40.6cm (16.0"), diagonal Display Color Unlimited colors Input Signal; Analog input All timing that meets scanning frequencies • Video • Analog R, G, B 0.7Vpp positive/75 ohm •... - Page 12 • CONTRAST Functions ( OSD ) • BRIGHTNESS • H-CENTER • H-SIZE • V-CENTER • V-SIZE • ZOOM • PINCUSHION • TRAPEZOID • PIN-BALANCE • PARALLELOGRAM • ROTATION • 6500°K • USER COLOR • 9300°K • DEGAUSS • MOIRE REDUCE •...
-
Page 13: Appendix B - Factory Preset Timing Table
APPENDIX B – FACTORY PRESET TIMING TABLE STANDARD RESOLUTION 720 × 400 640 × 480 VESA/85 640 × 480 VESA/85 800 × 600 VESA/85 1024 × 768 VESA/60 1280 × 1024 41A749-786-1A 英文 HORIZONTAL VERTICAL FREQUENCY FREQUENCY 31.5kHz 70Hz 31.5kHz 60Hz 43.3kHz 85Hz...


