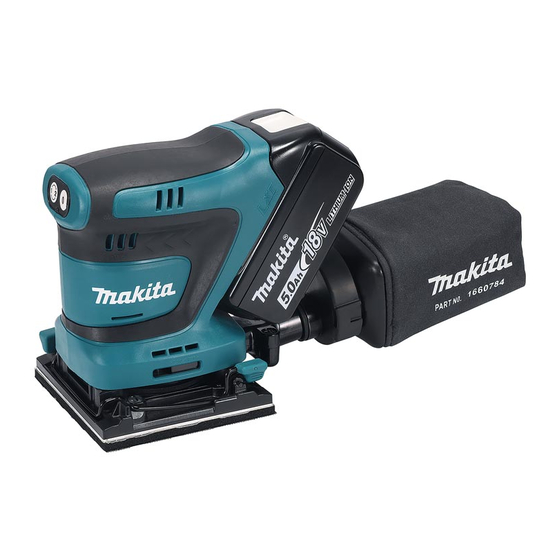
Makita DBO480 Instruction Manual
Cordless finishing sander
Hide thumbs
Also See for DBO480:
- User manual ,
- Instruction manual (87 pages) ,
- Instruction manual (84 pages)
Summary of Contents for Makita DBO480
- Page 1 INSTRUCTION MANUAL Cordless Finishing Sander DBO480 DBO481 DBO482 Read before use.
-
Page 2: Specifications
Read instruction manual. Noise Wear safety glasses. The typical A-weighted noise level determined accord- ing to EN62841-2-4: Model DBO480 Sound pressure level (L ) : 75 dB(A) Uncertainty (K) : 3 dB(A) Only for EU countries Ni-MH Li-ion Due to the presence of hazardous components in the... -
Page 3: Ec Declaration Of Conformity
Keep work area clean and well lit. Cluttered or mined according to EN62841-2-4: dark areas invite accidents. Model DBO480 Do not operate power tools in explosive atmo- Work mode: sanding metal plate (square base) spheres, such as in the presence of flammable Vibration emission (a ) : 2.5 m/s... - Page 4 Use personal protective equipment. Always Disconnect the plug from the power source wear eye protection. Protective equipment such and/or remove the battery pack, if detachable, as a dust mask, non-skid safety shoes, hard hat or from the power tool before making any adjust- hearing protection used for appropriate conditions ments, changing accessories, or storing power will reduce personal injuries.
-
Page 5: Sander Safety Warnings
12. Use the batteries only with the products WARNING: DO NOT let comfort or familiarity specified by Makita. Installing the batteries to with product (gained from repeated use) replace non-compliant products may result in a fire, exces- strict adherence to safety rules for the subject sive heat, explosion, or leak of electrolyte. -
Page 6: Functional Description
To install the battery cartridge, align the tongue on the CAUTION: battery cartridge with the groove in the housing and slip Only use genuine Makita batteries. it into place. Insert it all the way until it locks in place Use of non-genuine Makita batteries, or batteries that have been altered, may result in the battery bursting with a little click. If you can see the red indicator as causing fires, personal injury and damage. It will also shown in the figure, it is not locked completely. void the Makita warranty for the Makita tool and charger. CAUTION: Always install the battery cartridge Tips for maintaining maximum fully until the red indicator cannot be seen. If not,... - Page 7 Let the tool and battery(ies) cool down. and melting the workpiece. Sanding at high orbital speed may heat workpiece and melt it at the point of If no improvement can be found by restoring protection contact. system, then contact your local Makita Service Center. Switch action ASSEMBLY CAUTION: Avoid turning the tool on while it is placed on the workpiece or on your workbench. It may cause personal injury or damage.
- Page 8 Cover the abrasive paper with the punch plate Using abrasive paper without dust- with its positioning stoppers adjacent to the corner well suction hole fit onto two of the side edges of the pad and sanding base. Cut a sheet of abrasive paper down to an appro- priate size. Fig.7 ► 1 . Abrasive paper 2. Punch plate 3. Positioning Fig.5 ► 1 .
- Page 9 Only use hook-and-loop abrasive Fig.12 papers. Never use pressure-sensitive abrasive papers. ► 1 . O-ring 2. Sanding base 3. Circular groove For DBO480 Remove all dirt and foreign matter from the hook- Loosen and remove the four screws securing the and-loop pad.
- Page 10 O-ring back in the circular and-loop pad. hole or the circular groove around the center of the base before installing the optional pad. DBO480, DBO481 Fig.16 Fig.14 ► 1 . Cap 2. Sanding base 3. Circular hole ► 1 .
- Page 11 Re-tighten the screws firmly to secure the triangu- Attach a sheet of optional hook-and-loop abrasive lar/rectangular pad. paper to the triangular/rectangular pad, aligning the dust-suction holes in the paper with those in the pad. Triangular pad Triangular pad Fig.19 ► 1 . Screws 2. Triangular pad 3. Sanding base You can install the abrasive paper on the side of the pad as illustrated.
- Page 12 Installing and removing dust bag Installing and removing dust box Optional accessory Optional accessory Attach the dust bag over the tapered dust spout at the Attach the dust box over the tapered dust spout at the back end of the motor housing. Put the dust inlet of the back end of the motor housing.
- Page 13 Fig.30 ► 1 . Dust nozzle 2. Dust box 3. Locking latch Connecting with vacuum cleaner Optional accessory When you wish to perform clean sanding operation, connect a Makita vacuum cleaner to your tool. Use either an optional hose 28 mm or a combination of the front cuff 22 and hose provided with the cleaner to establish a connection. Fig.28 ► 1 . Paper filter 2. Cardboard opening 3. Upper hook- ing tab 4.
-
Page 14: Operation
OPTIONAL ACCESSORIES CAUTION: These accessories or attachments are recommended for use with your Makita tool specified in this manual. The use of any other accessories or attachments might present a risk of injury to persons. Only use accessory or attachment for its stated purpose. If you need any assistance for more details regard- ing these accessories, ask your local Makita Service Fig.32... - Page 16 Jan-Baptist Vinkstraat 2, Makita Europe N.V. 3070 Kortenberg, Belgium 3-11-8, Sumiyoshi-cho, Makita Corporation Anjo, Aichi 446-8502 Japan 885937-226 www.makita.com 20211004...


