Table of Contents

Summary of Contents for Panasonic H-HS030PP
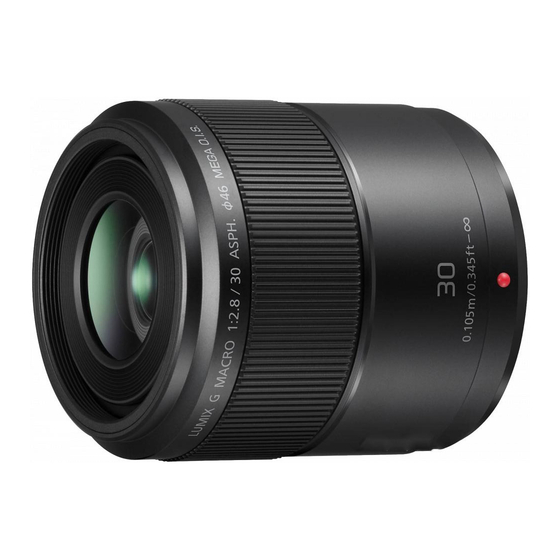
- Page 1 Order No.DSC1504011CE Interchangeable Lens for Digital Camera H-HS030PP Model No. H-HS030E H-HS030GK file:///C|/U...al/Temp/Rar$EXa0.475/viewing/SGML_VIEW_DATA/ALL/H-HS030PP/SVC/DSC1504011CE/doc/DSC1504011CE_cvr.xml[11/12/2018 1:16:24 PM]...
- Page 2 © Panasonic Corporation 2015 Unauthorized copying and distribution is a violation of law. file:///C|/U...al/Temp/Rar$EXa0.475/viewing/SGML_VIEW_DATA/ALL/H-HS030PP/SVC/DSC1504011CE/doc/DSC1504011CE_cvr.xml[11/12/2018 1:16:24 PM]...
-
Page 3: Service Navigation
206), to maintain Serial number of owner's original lens. 3. No adjustment is required when replacing the part mentioned on Fig.1-1. But, when tighten the concerned screws,apply proper torque mentioned on "4. Disassembly and Assembly Instruction" section. file:///C|/U...al/Temp/Rar$EXa0.475/viewing/SGML_VIEW_DATA/ALL/H-HS030PP/SVC/DSC1504011CE/doc/DSC1504011CE_01.xml[11/12/2018 1:16:50 PM]... -
Page 4: Before Use
2 Operating Guide 2.1 Before Use 2.2 Cautions For Use file:///C|/Users/n.shetabi/AppData/Local/Temp/Rar$EXa0.475/viewing/SGML_VIEW_DATA/ALL/H-HS030PP/SVC/DSC1504011CE/doc/DSC1504011CE_02.xml[11/12/2018 1:17:28 PM]... - Page 5 2.3 Components file:///C|/Users/n.shetabi/AppData/Local/Temp/Rar$EXa0.475/viewing/SGML_VIEW_DATA/ALL/H-HS030PP/SVC/DSC1504011CE/doc/DSC1504011CE_02.xml[11/12/2018 1:17:28 PM]...
- Page 6 2.3.1 Accessories 2.3.2 Attaching/Detaching the Lens file:///C|/Users/n.shetabi/AppData/Local/Temp/Rar$EXa0.475/viewing/SGML_VIEW_DATA/ALL/H-HS030PP/SVC/DSC1504011CE/doc/DSC1504011CE_02.xml[11/12/2018 1:17:28 PM]...
- Page 7 file:///C|/Users/n.shetabi/AppData/Local/Temp/Rar$EXa0.475/viewing/SGML_VIEW_DATA/ALL/H-HS030PP/SVC/DSC1504011CE/doc/DSC1504011CE_02.xml[11/12/2018 1:17:28 PM]...
-
Page 8: Service Fixture And Tools
The repair quality is considered, and it is recommended working in the environment of satisfed clean level less than class 10,000 (Federal Standard 209D). [NOTE] Work in the environment of satisfed clean level less than class 10,000 (Federal Standard 209D) when cleaning the inside of a lens. file:///C|/U...al/Temp/Rar$EXa0.475/viewing/SGML_VIEW_DATA/ALL/H-HS030PP/SVC/DSC1504011CE/doc/DSC1504011CE_03.xml[11/12/2018 1:17:57 PM]... -
Page 9: Disassembly And Assembly Procedure
NOTE: 1. When installing the screws, be sure to use the torque driver (RFKZ0456) and tighten the screws with specifed torque, mentioned on the following table. 2. Use small driver (VFK1390) when removing/tightening B208. Interchangeable Lens (H-HS030) file:///C|/U...al/Temp/Rar$EXa0.475/viewing/SGML_VIEW_DATA/ALL/H-HS030PP/SVC/DSC1504011CE/doc/DSC1504011CE_04.xml[11/12/2018 1:19:31 PM]... -
Page 10: Disassembly Procedure
4.2 Disassembly procedure Important: It must be performed inside of satisfed clean level. (Satisfed clean level: Less than class 10,000 (Federal Standard 209D)) 4.2.1 Removal of the Shading frame 1. Remove the 3 screws (A). file:///C|/U...al/Temp/Rar$EXa0.475/viewing/SGML_VIEW_DATA/ALL/H-HS030PP/SVC/DSC1504011CE/doc/DSC1504011CE_04.xml[11/12/2018 1:19:31 PM]... - Page 11 4.2.2 Removal of the L mount unit 1. Remove 1 screw (B) and 4 screws (C). 4.2.3 Removal of the Mount washer 1. Removing the Mount washer by getting it up. file:///C|/U...al/Temp/Rar$EXa0.475/viewing/SGML_VIEW_DATA/ALL/H-HS030PP/SVC/DSC1504011CE/doc/DSC1504011CE_04.xml[11/12/2018 1:19:31 PM]...
- Page 12 4.2.4 Removal of the Rear frame unit 1. Remove 1 screw (D). 4.2.5 Removal of the Earth plate 1. Remove 1 screw (E). file:///C|/U...al/Temp/Rar$EXa0.475/viewing/SGML_VIEW_DATA/ALL/H-HS030PP/SVC/DSC1504011CE/doc/DSC1504011CE_04.xml[11/12/2018 1:19:31 PM]...
- Page 13 4.2.6 Removal of the Lens P.C.B. unit and the Mount contact unit 1. Disconnect 4 connectors. 4.2.7 Removal of the Mount contact unit 1. Disconnect 1 connector. file:///C|/U...al/Temp/Rar$EXa0.475/viewing/SGML_VIEW_DATA/ALL/H-HS030PP/SVC/DSC1504011CE/doc/DSC1504011CE_04.xml[11/12/2018 1:19:31 PM]...
-
Page 14: Assembly Procedure
When tightening the screw, use a torque driver (RFKZ0456) by ordering the screwing order with specifed torque described in each step. 4.3.1 Installation of the Mount contact unit 1. Connect FPC to 1 connector. 4.3.2 Installtion of the Lens P.C.B.unit and the Mount contact unit file:///C|/U...al/Temp/Rar$EXa0.475/viewing/SGML_VIEW_DATA/ALL/H-HS030PP/SVC/DSC1504011CE/doc/DSC1504011CE_04.xml[11/12/2018 1:19:31 PM]... - Page 15 1. Tighten 1 screws (E) by using the torque driver with specifed torque. (Torque Driver : RFKZ0456) (Torque : 11.8±1.2N cm) 4.3.4 Installation of the Rear frame unit 1. Tighten 1 screws (D) by using the torque driver with specifed torque. (Torque Driver : RFKZ0456) file:///C|/U...al/Temp/Rar$EXa0.475/viewing/SGML_VIEW_DATA/ALL/H-HS030PP/SVC/DSC1504011CE/doc/DSC1504011CE_04.xml[11/12/2018 1:19:31 PM]...
- Page 16 4.3.6 Installation of the L mount unit 1. Tighten 4 screws (C) in numerical order by using the torque driver with specifed torque. (Torque Driver : RFKZ0456) (Torque : 21.6±2.2N cm) And, tighten 1 screw (B) by using the small driver. file:///C|/U...al/Temp/Rar$EXa0.475/viewing/SGML_VIEW_DATA/ALL/H-HS030PP/SVC/DSC1504011CE/doc/DSC1504011CE_04.xml[11/12/2018 1:19:31 PM]...
- Page 17 4.3.7 Installation of the Shading frame 1. Tighten 3 screws (A) in numerical order by using the torque driver with specifed torque. (Torque Driver : RFKZ0456) (Torque : 6.9±0.7N cm) file:///C|/U...al/Temp/Rar$EXa0.475/viewing/SGML_VIEW_DATA/ALL/H-HS030PP/SVC/DSC1504011CE/doc/DSC1504011CE_04.xml[11/12/2018 1:19:31 PM]...
- Page 18 file:///C|/U...al/Temp/Rar$EXa0.475/viewing/SGML_VIEW_DATA/ALL/H-HS030PP/SVC/DSC1504011CE/doc/DSC1504011CE_04.xml[11/12/2018 1:19:31 PM]...
-
Page 19: Maintenance
Blow off the dust on the Lens glass surface with the Blower, gently. (Do not Blow too strongly.) b. Wipe out the dirt on the lens glass surface with Lens cleaning KIT (VFK1900BK) if necessary. (Consult the Instruction sheet which is included in the Lens cleaning KIT in details.) file:///C|/U...al/Temp/Rar$EXa0.475/viewing/SGML_VIEW_DATA/ALL/H-HS030PP/SVC/DSC1504011CE/doc/DSC1504011CE_05.xml[11/12/2018 1:20:14 PM]... - Page 20 Print Parts List Model No. : H-H030PP/E/GK Parts list note Model No. : H-H030PP/E/GK Frame and Casing Section file:///C|/U...ocal/Temp/Rar$EXa0.283/viewing/SGML_VIEW_DATA/ALL/H-HS030PP/SVC/DSC1504011CE/mec2/en/html/print_all.htm[11/13/2018 9:08:49 AM]...
- Page 21 Print Parts List Model No. : H-H030PP/E/GK Packing Parts and Accessories file:///C|/U...ocal/Temp/Rar$EXa0.283/viewing/SGML_VIEW_DATA/ALL/H-HS030PP/SVC/DSC1504011CE/mec2/en/html/print_all.htm[11/13/2018 9:08:49 AM]...
- Page 22 Print Parts List Model No. : H-H030PP/E/GK Parts List Ref. Change Safety Part No. Part Name & Description Q'ty Remarks SYF0001 LENS FRONT CAP VFC4605 LENS REAR CAP VFC4456 LENS STORAGE BAG OPERATING INSTRUCTIONS(ENGLISH/GER SQT0685 MAN/FRENCH/SPANISH) file:///C|/U...ocal/Temp/Rar$EXa0.283/viewing/SGML_VIEW_DATA/ALL/H-HS030PP/SVC/DSC1504011CE/mec2/en/html/print_all.htm[11/13/2018 9:08:49 AM]...
- Page 23 VQL1V24 WEEE LABEL VQL1W22 TEN YEARS LABEL B201 0HF4025 SCREW B202 0HF4025 SCREW B203 0HF4025 SCREW B204 0242070 SCREW B205 0242070 SCREW B206 0242070 SCREW B207 0242070 SCREW B208 0B44035 SCREW B209 0257040 SCREW B210 0257025 SCREW file:///C|/U...ocal/Temp/Rar$EXa0.283/viewing/SGML_VIEW_DATA/ALL/H-HS030PP/SVC/DSC1504011CE/mec2/en/html/print_all.htm[11/13/2018 9:08:49 AM]...


