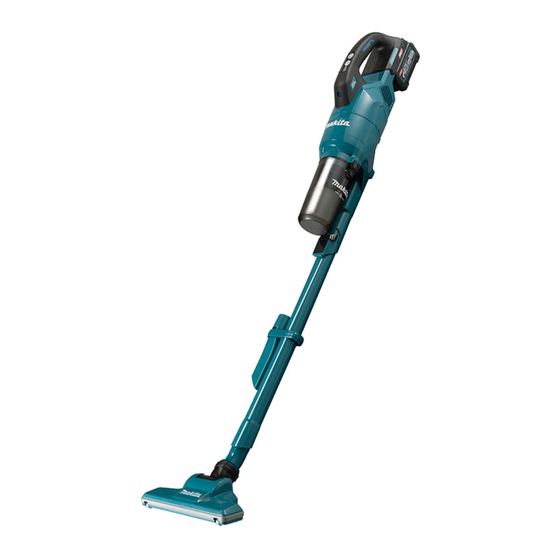
Makita CL003G Instruction Manual
Hide thumbs
Also See for CL003G:
- Instruction manual (109 pages) ,
- Instruction manual (72 pages) ,
- Instruction manual (60 pages)
Table of Contents
Advertisement
Quick Links
Advertisement
Table of Contents

Summary of Contents for Makita CL003G
- Page 1 INSTRUCTION MANUAL Cordless Cleaner CL003G Read before use.
-
Page 2: Specifications
• Do not short the battery cartridge. • See the chapter “MAINTENANCE” for the appropriate details of precautions during user maintenance. SPECIFICATIONS Model: CL003G Capacity 250 mL / 400 mL (country specific) Continuous use 1 (Quiet mode) Approx. 80 min... -
Page 3: Safety Warnings
20. Do not expose a battery pack or appliance Intended use to fire or excessive temperature. Exposure to fire or temperature above 130 °C may cause The tool is intended for collecting dry dust. explosion. 21. Follow all charging instructions and do not charge the battery pack or appliance outside SAFETY WARNINGS the temperature range specified in the instruc-... -
Page 4: Functional Description
Avoid storing battery cartridge in a con- causing fires, personal injury and damage. It will tainer with other metal objects such as also void the Makita warranty for the Makita tool and nails, coins, etc. charger. Do not expose battery cartridge to water or rain. -
Page 5: Installing Or Removing Battery Cartridge
Let the tool and battery(ies) cool down. If no improvement can be found by restoring protection system, then contact your local Makita Service Center. Indicating the remaining battery capacity Press the check button on the battery cartridge to indi- cate the remaining battery capacity. -
Page 6: Parts Description
Switch action NOTE: You can change the suction power before turning on the cleaner. NOTE: The cleaner starts the operation with the same suction power as the last operation. Lighting up the lamp CAUTION: Do not look in the light or see the source of light directly. -
Page 7: Operation
When using attachment without lock ASSEMBLY function NOTICE: To install attachment without lock func- CAUTION: Always be sure that the tool is tion, insert it into the suction inlet of the cleaner switched off and the battery cartridge is removed by twisting it as shown in the figure. - Page 8 You can store the corner nozzle in the nozzle holder. Cleaning (Suction) Nozzle With 250 mL dust case only Attach the nozzle to clean off tables, desks, furniture, etc. The nozzle slips on easily. Fig.13 ► 1. Nozzle holder 2. Corner nozzle CAUTION: Be careful not to trap finger(s) between the corner nozzle and the nozzle holder.
-
Page 9: Maintenance
Never use gasoline, benzine, thinner, alcohol or the like. Discoloration, deformation or cracks may result. To maintain product SAFETY and RELIABILITY, repairs, any other maintenance or adjustment should be performed by Makita Authorized or Factory Service Centers, always using Makita replacement parts. 9 ENGLISH... -
Page 10: After Use
Cyclone unit and filters After use NOTICE: Dust off and clean out inside the CAUTION: Putting the cleaner against the cyclone unit and filters, when suction perfor- wall without any other support may cause the mance becomes less effective regardless of the cleaner to fall down, resulting in personal injury amount of dust collected in the dust case. - Page 11 High performance filter NOTE: Dust may fly out when the cyclone unit is disassembled. It is recommended to place a garbage Optional accessory bag underneath the cyclone unit. Disassemble the cyclone unit from the cleaner body. Dust off inside the cyclone unit and filter. Hold the mounting end of high performance filter and pull it apart from the cleaner body.
- Page 12 Hold the mounting end of high performance filter Wipe and shake dust off the high performance and squeeze it back into the cleaner body. prefilter and HEPA filter by hand. Fig.29 Fig.32 ► 1. High performance filter 2. Cleaner body Wash the high performance prefilter and HEPA filter in soapy water.
- Page 13 Hold the mounting end of HEPA filter (covered with Wipe and shake dust off the sponge sheet by high performance prefilter) and squeeze it back into the hand. cleaner body. Fig.38 Fig.35 Wash the sponge sheet in soapy water when it is ►...
- Page 14 Place the sponge sheet back in the original Condition-based maintenance position. Make sure that the left and right edges of the sponge sheet are secured with stoppers and no gap NOTICE: Clean the mesh filter in the cyclone between the sponge sheet and suction opening. unit when they become clogged.
- Page 15 Disassemble the mesh filter into three compo- Wash the filters and mesh pipe in soapy water nents: prefilter, tubular sponge filter and mesh pipe. when they are clogged with dust and dirt. Dry them out thoroughly in the shade before use. Squeeze the guide stoppers on top of the mesh pipe together.
- Page 16 Attach the mesh filter back into the cyclone body Press and hold the guide stopper on the inlet pipe aligning the hooks on the mesh filter with the ports on down through the locking hole on the cyclone body the suction outlet of the cyclone body. Turn the mesh using the hand tool with a point.
-
Page 17: Troubleshooting
OPTIONAL ACCESSORIES CAUTION: These accessories or attachments are recommended for use with your Makita tool specified in this manual. The use of any other accessories or attachments might present a risk of injury to persons. Only use accessory or attachment for its stated purpose. - Page 20 Makita Europe N.V. Jan-Baptist Vinkstraat 2, 3070 Kortenberg, Belgium Makita Corporation 3-11-8, Sumiyoshi-cho, Anjo, Aichi 446-8502 Japan 885966-229 www.makita.com 20211221...


