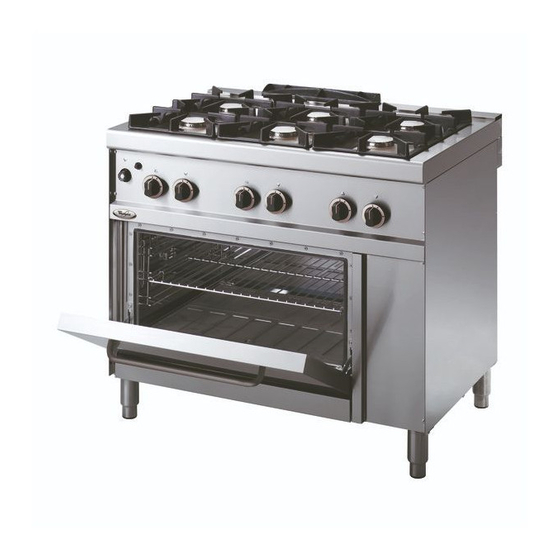
Summary of Contents for Whirlpool ADN 612
- Page 1 0813_GB_42 Instructions for installation, use e maintenance GAS KITCHENS WITH PILOT ADN 612 · ADN 667 ADN 613 · ADN 668 09/2015...
- Page 2 CHARACTERISTICS Supplied by: Date: Customer Service: e-mail 0813_GB_42 - GAS KITCHENS WITH PILOT 2 · 16...
- Page 3 INDEX Diagram 6 Instructions for use 6.1 Safety, cleaning and repair rules Characteristics of the appliances 6.2 Start-up 6.2.1 Lighting and disconnecting flame burner with pilot 3 Technical data 6.3 Lighting and shutdown of gas oven GN 1/1 6.4 Turning the appliance off in case of breakdown 4 Installation instructions 6.4.1 What to do in case of failure 4.1 Safety rules...
- Page 4 1 - DIAGRAM ADN 613 - ADN 668 ADN 612 - ADN 667 1000 Gas 1/2" Data plate Gas 1/2" Gas 1/2" Data plate Data plate 1000 0813_GB_42 - GAS KITCHENS WITH PILOT 4 · 16...
-
Page 5: Characteristics Of The Appliances
THE APPLIANCE MUST BE INSTALLED BY QUALIFIED PERSONNEL. 20 mbar 3 - TECHNICAL DATA Model Description Dimensions in mm. (LxDxH) ADN 612 Gas range 4 burners with pilot flame - gas oven GN 1/1 800 x 700 x 900 51BS3547 ADN 613... - Page 6 GN 1/1 Category II2H3+ Construction type Air necessary for combustion Nominal thermal power Minimum thermal power 0.95 Overall thermal power (gas) Hour consumption G30/G31 kg/h ADN 612 28.4 3,00 2,22 ADN 613 40.8 4,32 3,19 ADN 667 24.4 2,58 1,91 ADN 668 34.8...
- Page 7 4 - INSTALLATION INSTRUCTIONS 4.1 Safety rules Gas version GN 1/1 The tubular burners are in stainless steel and are resistant to ther- • Installation, modifications and maintenance of the appliance mal and mechanical stress. Temperature adjustment between 100°C and 300°C, is made with the thermostat. must be carried out by authorised personnel in compliance with current safety standards.
-
Page 8: Set-Up For Operation
5 - SET-UP FOR OPERATION 5.1 Preparation and Start-up 5.1.5 Power check for operation with liquid gas Check if the type of injectors used meet the data of the table 1. Before starting up the appliance, remove the protective wrapping. Check that the pressure reducer installed in the system has an outlet pressure which is compliant with paragraph 5.1.2 "Check of power"... -
Page 9: Setting Reduced Capacity Power
5 - SET-UP FOR OPERATION Fig. 1 After the replacement check the seal using a leack detector spray. 5.1.15 Setting reduced capacity power oven Loosen screw (pos. 9 fig. 2) by two or three turns after having remo- ved the knob and the control panel cover. 5.1.13 Setting reduced capacity power Light the burner and keep it lit for at least 10 minutes with the The minimum setting screw (pos. -
Page 10: Replacing Parts
5 - SET-UP FOR OPERATION Fig. 2 tool. Rinse and dry. 5.3.5 Thermocouple gas oven GN 1/1 When reassembling the parts, make sure you place them back in the Unscrew the nut (pos. 20 fig. 2) and the nut (pos. 10 fig. 2) fixing right position. -
Page 11: Safety, Cleaning And Repair Rules
6 - INSTRUCTIONS FOR USE 6.3 Lighting and shutdown of gas oven GN 1/1 6.1 Safety, cleaning and repair rules • This appliance is used for the preparation of meals at industri- Press and turn it to the left until position 7 the knob (pos. 14 fig. 2). al level. - Page 12 6 - INSTRUCTIONS FOR USE 6.6 Recommendations for the treatment of soaps or fine-grained sand paper. Larger rust spots can be removed with 2-3% of hot oxalic acid solution. If these cleaning stainless “steel industrial” kitchens products do not do the job, a nitric acid (10%) treatment is required.
- Page 13 6 - INSTRUCTIONS FOR USE 6.6.3 The 2002/96/EC (WEEE) Directive: information to users This informational note is meant only for Fig. A owners of equipment marked with the symbol shown in fig. A on the adhesive label featuring the technical specifica- tions applied on the actual product (the label also giving the serial number).
- Page 14 NOTES 0813_GB_42 - GAS KITCHENS WITH PILOT 14 · 16...
- Page 15 NOTES 0813_GB_42 - GAS KITCHENS WITH PILOT 15 · 16...
- Page 16 THE MANUFACTURER RESERVES THE RIGHT TO MAKE ANY CHANGES DEEMED NECESSARY. THE MANUFACTURER CANNOT BE HELD RESPONSIBLE IF THE INSTRUCTIONS CONTAINED IN THIS MANUAL ARE NOT OBSERVED. WHIRLPOOL EUROPE srl V.le Guido Borghi, 27 I – 21025 Comerio – VA...


