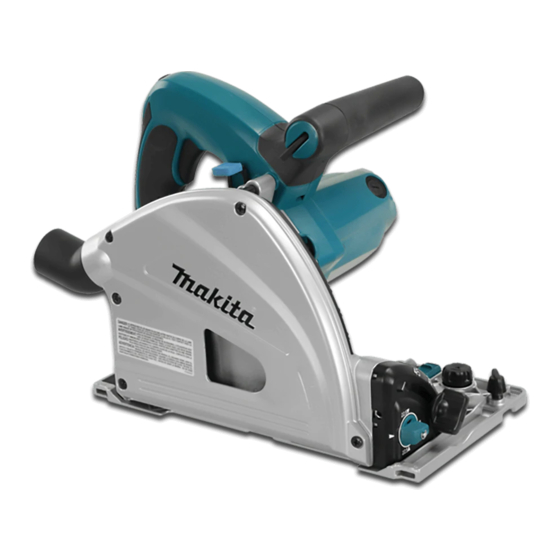
Makita SP6000 Instruction Manual
Plunge cut circular saw
Hide thumbs
Also See for SP6000:
- Instruction manual (89 pages) ,
- Instruction manual (41 pages) ,
- Instruction manual (44 pages)
Summary of Contents for Makita SP6000
- Page 1 INSTRUCTION MANUAL Plunge Cut Circular Saw SP6000 007654 DOUBLE INSULATION IMPORTANT: Read Before Using.
-
Page 2: Specifications
ENGLISH (Original instructions) SPECIFICATIONS Model SP6000 Blade diameter 165 mm at 90° 56 mm Max. cutting depth at 45° 40 mm at 48° 38 mm No load speed (min 2,000 - 5,800 Overall length 341 mm Net weight 4.4 kg Safety class •... -
Page 3: General Power Tool Safety Warnings
Unmodified plugs and matching outlets will EC Declaration of Conformity reduce risk of electric shock. Avoid body contact with earthed or grounded Makita declares that the following Machine(s): surfaces such as pipes, radiators, ranges and Designation of Machine: refrigerators. There is an increased risk of Plunge Cut Circular Saw electric shock if your body is earthed or grounded. -
Page 4: Circular Saw Safety Warnings
GEB031-5 16. Dress properly. Do not wear loose clothing or jewellery. Keep your hair, clothing, and gloves CIRCULAR SAW SAFETY away from moving parts. Loose clothes, WARNINGS jewellery or long hair can be caught in moving parts. Cutting procedures 17. If devices are provided for the connection of DANGER: Keep hands away from cutting dust extraction and collection facilities, ensure area and the blade. - Page 5 Kickback causes and related warnings − kickback is a sudden reaction to a pinched, bound or misaligned saw blade, causing an uncontrolled saw to lift up and out of the workpiece toward the operator; − when the blade is pinched or bound tightly by the kerf closing down, the blade stalls and the motor reaction drives the unit rapidly back toward the operator;...
- Page 6 25. Place the wider portion of the saw base on that part of the workpiece which is solidly supported, not on the section that will fall off when the cut is made. As examples, Fig. 1 illustrates the RIGHT way to cut off the end of a board, and Fig.
-
Page 7: Functional Description
28. Some material contains chemicals which may FUNCTIONAL DESCRIPTION be toxic. Take caution to prevent dust inhalation and skin contact. Follow material supplier safety data. CAUTION: 29. Do not stop the blades by lateral pressure on Always be sure that the tool is switched off and •... -
Page 8: Bevel Cutting
To release the depth of cut from this position for free Tilting to the left depth of cut, just pull the button back. 1. Bevel angle 1. Quick stop shifting lever button 007661 The tool can be tilted to the left 1° bevel angle. To get 007670 the left 1°... - Page 9 Be sure the blade is installed with teeth pointing up 5,800 • at the front of the tool. 014599 Use only the Makita wrench to install or remove the CAUTION: • blade. The speed adjusting dial can be turned only as far •...
-
Page 10: Operation
1. Vacuum cleaner 007674 2. Dust port 007673 When you wish to perform clean cutting operation, connect a Makita vacuum cleaner to your tool. Connect a hose of the vacuum cleaner to the dust port as shown in the figure. - Page 11 When using with guide rail (accessory) Plunge cutting (Cutting-out) 1. Adjusting screws 1. Rear edge of tool base 2. Fixed stop 007685 007686 Place the tool on the rear end of guide rail. Turn two WARNING: adjusting screws on the tool base so that the tool slides To avoid a kickback, be sure to observe the •...
-
Page 12: Maintenance
1. Adjusting screw If you need any assistance for more details regarding for 45 ゚ these accessories, ask your local Makita Service Center. Saw blades • Guide rail • Rip fence (Guide rule) •... - Page 16 Makita Jan-Baptist Vinkstraat 2, 3070, Belgium Makita Corporation Anjo, Aichi, Japan www.makita.com 884683J228...


