Table of Contents
Advertisement
Quick Links
Advertisement
Table of Contents

Summary of Contents for KitchenAid KSM3316XWH0
- Page 1 KSM3311X KSM3316X...
-
Page 2: Parts And Features
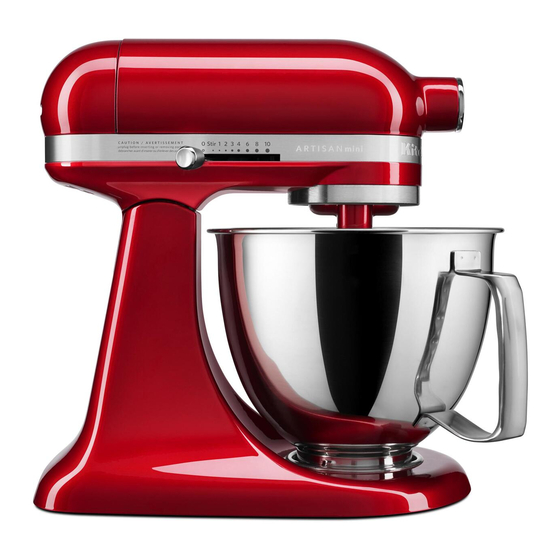
PARTS AND FEATURES PARTS AND ACCESSORIES Attachment hub Motor head Beater shaft Flat beater* Speed control Bowl** Wire whip Dough hook Flex Edge beater* Pouring shield* * Select models only and accessories sold separately. ** Bowl type may vary. Bowls are also available for purchase as separate accessories. 2 | PARTS AND FEATURES... -
Page 3: Stand Mixer Safety
Return appliance to the nearest Authorized Service Facility for examination, repair or adjustment. 7. The use of accessories not recommended or sold by KitchenAid may cause fire, electric shock or injury. 8. Do not use the Stand Mixer outdoors. -
Page 4: Using The Stand Mixer
STAND MIXER SAFETY 10. Do not let the cord contact hot surfaces, including the stove. 11. Remove the flat beater, wire whip, or spiral dough hook from the Stand Mixer before washing. SAVE THESE INSTRUCTIONS THIS PRODUCT IS DESIGNED FOR HOUSEHOLD USE ONLY. ELECTRICAL REQUIREMENTS Voltage: 120 V Frequency: 60 Hz... -
Page 5: Speed Control Guide
NOTE: To move the speed control lever with ease, lift slightly up as you move it across the settings in either direction. FOR DETAILED INFORMATION ON USING THE STAND MIXER: Visit kitchenaid.com/quickstart for additional Instructions with videos, inspiring recipes, and tips on how to use your Stand Mixer. USING THE STAND MIXER | 5... -
Page 6: Assembling The Stand Mixer
USING THE STAND MIXER ASSEMBLING THE STAND MIXER Raise the motor head: Slide the Check to be sure that the Stand locking lever to the unlock position Mixer is unplugged, and the speed and lift the motor head. Once lifted, control is turned to “0”. - Page 7 USING THE STAND MIXER ASSEMBLING THE STAND MIXER Lower the motor head: Slide the locking lever to the unlock position and guide the motor head down. Make sure motor head is completely down, then slide the locking lever to the lock position. Before mixing, test lock by attempting to raise motor head.
-
Page 8: Operating The Stand Mixer
USING THE STAND MIXER OPERATING THE STAND MIXER NOTE: The Stand Mixer may warm up during use. Under heavy loads with extended mixing time, the top of the unit may become hot. This is normal. Plug the Stand Mixer into a grounded 3 prong outlet. -
Page 9: Disassembling The Stand Mixer
USING THE STAND MIXER NOTE: The pouring shield* can be used to avoid ingredients splashing out of the bowl when mixing as well as to easily pour ingredients in the bowl while mixing. (OPTIONAL) Pour ingredients into the bowl through the pouring chute. DISASSEMBLING THE STAND MIXER Raise the motor head: Check to be sure that the Stand Mixer is... -
Page 10: Optional Attachments
USING THE STAND MIXER OPTIONAL ATTACHMENTS KitchenAid offers a wide range of optional attachments such as the spiralizer, pasta cutters, or food grinder that may be attached to the Stand Mixer attachment power hub as shown here. Check to be sure that the Stand... -
Page 11: Care And Cleaning
Do not store the wire whip on the shaft. FOR DETAILED INFORMATION ON CLEANING THE STAND MIXER: Visit kitchenaid.com/quickstart for additional Instructions with videos, inspiring recipes, and tips on how to use your Stand Mixer. * Select models only and accessories sold separately. -
Page 12: Troubleshooting
TROUBLESHOOTING If your Stand Mixer should malfunction, please check the following: 1. The Stand Mixer may warm up during use. Under heavy loads with extended mixing time periods, you may not be able to comfortably touch the top of the unit. This is normal. 2. -
Page 13: Warranty And Service
IF THIS PRODUCT FAILS TO WORK AS WARRANTED, CUSTOMER’S SOLE AND EXCLUSIVE REMEDY SHALL BE REPAIR OR REPLACEMENT ACCORDING TO THE TERMS OF THIS LIMITED WARRANTY. KITCHENAID AND KITCHENAID CANADA DO NOT ASSUME ANY RESPONSIBILITY FOR INCIDENTAL OR CONSEQUENTIAL DAMAGES. This warranty gives you specific legal rights and you may also have other rights which vary from state to state or province to province. -
Page 14: Hassle-Free Replacement Warranty - Canada
For service information in Mexico: Call toll-free 01-800-0022-767. ®/™ © 2016 KitchenAid. All rights reserved. KITCHENAID and the design of the Stand Mixer are trademarks in the U.S. and elsewhere. Used under license in Canada. 14 | WARRANTY AND SERVICE... - Page 18 É.-U. et ailleurs. Utilisé sous licence au Canada. ®/™ © 2016 KitchenAid. Todos los derechos reservados. El diseño de la batidora con base es una marca registrada en EE.UU. y en otras partes. Usada en Canadá bajo licencia.


