Table of Contents
Advertisement
Available languages
Available languages
Quick Links
WV-Q116E_E.qxd
05.2.2
Instructions
Before attempting to connect or operate this product, please read these instructions completely.
PREFACE
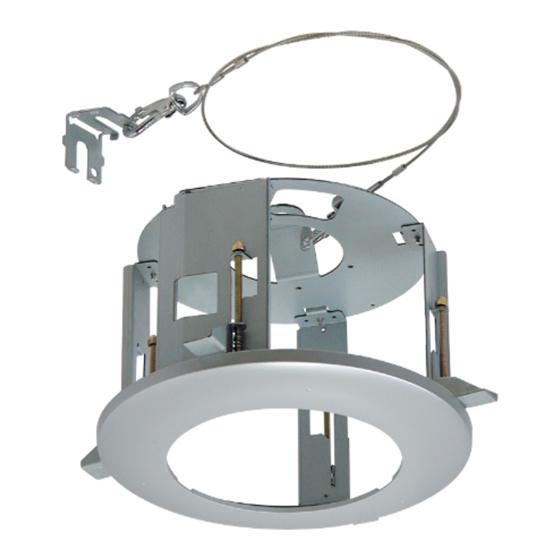
The Panasonic Ceiling Mount Bracket WV-Q116 is provided for the surface mounting of the
Combination Camera WV-CS954 on a suspended (double) ceiling.
PRECAUTIONS
• Before installing the camera, make sure that the
location where the camera is going to be installed
is strong enough to support the entire weight of
the camera (approximately 2.9 kg {6.38 lbs}).
• Mount this bracket in a suspended ceiling having
a minimum of 210 mm {8-9/32"} clearance.
• The ceiling board thickness to mount this brack-
et can be a maximum of 40 mm {1-37/64"} in
thickness.
• Be sure to use the Fall Prevention Wire (provided).
• Be sure to lock the camera with the lock plate,
and make sure that it cannot come off.
• Do not use this bracket with any equipment other
than the WV-CS954.
• Follow all applicable local and national electrical,
fire and safety codes when installing the camera
with this ceiling mount bracket.
INSTLLATION
Be sure to read the "Precautions" before installing the camera.
The model numbers listed in these Instructions have no suffixes attached to them.
11:05
Page 1
Model No.
Inside the ceiling
Fall Prevention Wire
(provided)
Camera Mounting Base
Suspended ceiling
Combination camera
*Refer to the camera's operation manual.
WV-Q116
Ceiling Mount Bracket
Minimum inside ceiling
clearance 210 mm {8-9/32"}
Suspended
ceiling
Maximum 40 mm
{1-37/64"}
Fall Prevention Angle Clip
Advertisement
Table of Contents

Summary of Contents for Panasonic WV-Q116
- Page 1 Instructions Before attempting to connect or operate this product, please read these instructions completely. PREFACE The Panasonic Ceiling Mount Bracket WV-Q116 is provided for the surface mounting of the Combination Camera WV-CS954 on a suspended (double) ceiling. PRECAUTIONS • Before installing the camera, make sure that the...
- Page 2 WV-Q116E_E.qxd 05.2.2 11:05 1. Use Template A (provided) to make four holes in the suspended ceiling. 1-1. Make four holes (φ12 mm {31/64”} × 4) and then cut and remove the area marked “C”. 1-2. Make the hole round (φ220 mm {8-43/64”}) as shown in the following illustration. φ220 mm {8- φ220 mm ”}...
- Page 3 WV-Q116E_E.qxd 05.2.2 11:05 Two spacer nuts are needed to use the exist- ing anchor bolt instead. Spacer nuts Spacer nuts Fall Prevention Angle Clip Fall Prevention Wire Existing anchor bolt 5. Attach the end of the Fall Prevention Wire to the bracket. 5-1.
- Page 4 WV-Q116E_E.qxd 05.2.2 11:05 9. Remove the plate from the camera mounting base (combination camera accessory). Plate 10. Attach the camera mounting base to the bracket. Adjust the lock plate so it is in the orientation show in the following illustration, and then tighten the four M4-L 8 Screws (provided).
- Page 5 WV-Q116E_E.qxd 05.2.2 11:05 13. Secure the camera to the lock plate. Securing the camera After installing the camera, move the lock plate in the direction of the arrow, and secure it with a screw. Make sure that the camera cannot come loose after tightening the screws.
-
Page 6: Specifications
WV-Q116E_E.qxd 05.2.2 11:05 SPECIFICATIONS Ambient operating temperature: Dimensions: Weight: Weight and dimensions indicated are approximate. Specifications are subject to change without notice. ACCESSORIES Fall Prevention Wire ......1 pc. Fall Prevention Angle Clip . -
Page 7: Version Française
11:00 VERSION FRANÇAISE (FRENCH VERSION) PRÉFACE La potence de fixation murale Panasonic WV-Q116 est conçue pour l’installation d’une caméra vidéo WV-CS954 sur un plafond suspendu (double). MESURES DE PRÉCAUTION • Avant d’installer la caméra, veiller à ce que l’empla- cement où elle doit être installée soit assez solide pour supporter son poids total (environ 2,9 kg {6,38 livres}). - Page 8 WV-Q116E_F.qxd 05.2.2 11:00 1. Utiliser le gabarit A (fourni) pour percer quatre trous dans le plafond suspendu. 1-1. Percer quatre trous (φ12 mm {0,47 pouces} × 4) puis découper et retirer la zone “C”. 1-2. Arrondir le trou (φ220 mm {8,66 pouces}) comme indiqué sur l’illustration ci-dessous. φ220 mm {8,66 pouces} φ220 mm {8,66 pouces}...
- Page 9 WV-Q116E_F.qxd 05.2.2 11:00 Deux écrous d’entretoise sont nécessaires pour utiliser plutôt le boulon d’ancrage exis- tant. Écrous d’entretoise Écrous d’entretoise Attache de cornière de fixation de câble de prévention de chute Câble de prévention de chute Boulon d’ancrage existant 5. Fixer l’extrémité du câble de prévention de chute à...
- Page 10 WV-Q116E_F.qxd 05.2.2 11:00 9. Retirer la plaque de la base de fixation de la caméra (accessoire de la caméra combinée). Plaque 10. Attacher la base de fixation de la camé- ra à la potence. Ajuster la plaque de verrouillage de manière qu’elle soit orientée comme sur l’illustration suivante, puis resserrer les 4 vis M4-L 8 (fournies).
- Page 11 WV-Q116E_F.qxd 05.2.2 11:00 13. Fixer solidement la caméra à la plaque de verrouillage. Fixation de la caméra Après avoir installé la caméra, glisser la plaque de verrouillage dans la direction de la flèche et fixer en place avec une vis. Après avoir resserré...
-
Page 12: Caractéristiques Techniques
Unit Company of Panasonic Corporation of North America Security Systems www.panasonic.com/security For customer support, call 1.877.733.3689 Executive Office: Three Panasonic Way 2H-2, Secaucus, New Jersey 07094 Zone Office Eastern: Three Panasonic Way, Secaucus, New Jersey 07094 Central: 1707 N. Randal Road, Elgin, IL 60123 Southern: 1225 Northbrook Parkway, Suwanee, GA 30024 Western: 6550 Katella Ave., Cypress, CA 90630...


