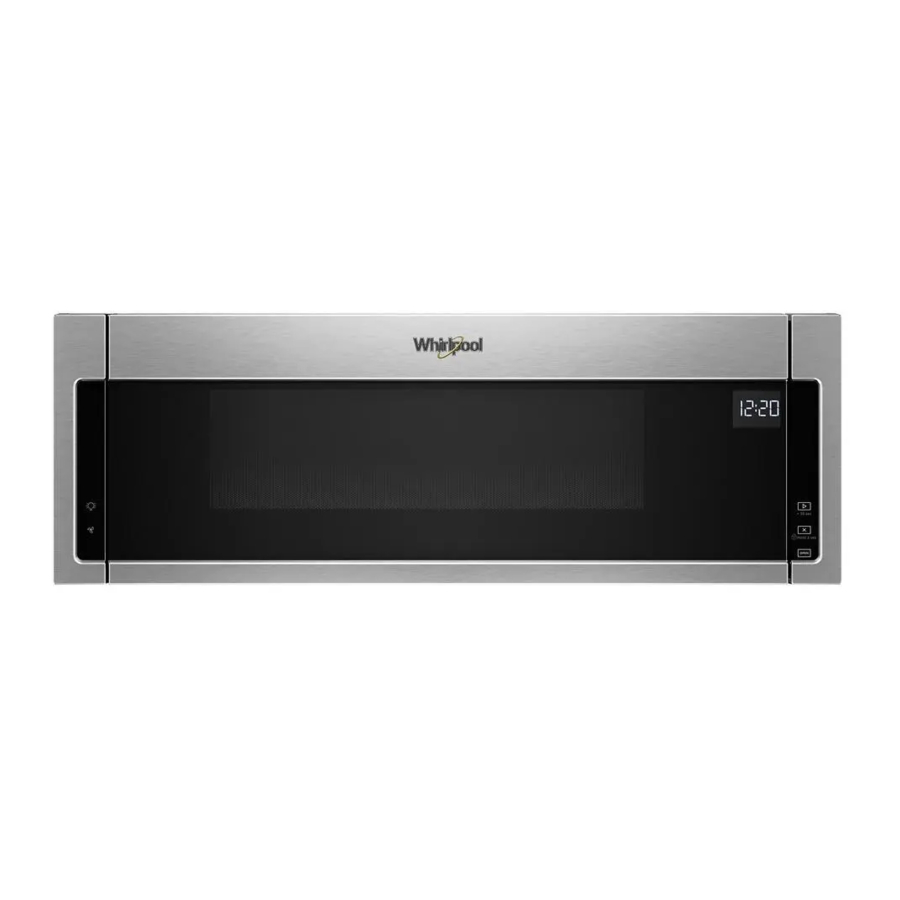
Whirlpool WML55011HS - 1.1 cu. ft. Low Profile Microwave Hood Combination Manual
- Installation instructions manual (28 pages) ,
- Service manual (43 pages) ,
- User manual (8 pages)
Advertisement

Register your microwave oven at www.whirlpool.com.
For future reference, please make a note of your model and serial number located on the front facing of the microwave oven opening, behind the door.
OPERATING YOUR MICROWAVE OVEN
Settings
Clock
The clock is a 12-hour (12:00-11:59) clock. Touch CLOCK, enter time, then touch CLOCK or the Start control.
Timer
With the microwave oven in Standby mode, touch the Timer control, enter time, then touch the Timer control or the Start control. Cook functions may be entered while the Timer is counting down. To cancel timer, touch Timer control while the Timer countdown is active in the display.
Vent Fan
Press the Vent Fan keypad once for High setting. You may press this keypad repeatedly and choose a different speed. There are three available speeds HIGH("HI")--->MEDIUM("H-L")-->LOW("LO")--->OFF. Choose the speed you want.
To keep the microwave oven from overheating, the auto hood fan will automatically turn on at high speed if the temperature from the range or cooktop below the microwave oven gets too hot. When this occurs, the hood fan cannot be turned off.
Vent Light
Pressing Vent Light keypad adjusts the vent light setting among HIGH("HI") -> LOW("LO") -> OFF.
Control Lock
Activate to avoid unintended start. Touch and hold the Cancel keypad for about 3 seconds until 2 tones sound and the CONTROL LOCKED appears in the display. When locked, touching any button on the keyboard (except for the hood control buttons and Cancel) will not work. Repeat to unlock control.
Tones
Open door, press and hold number keypad "4" for 5 seconds to disable button tones. Repeat to turn buttons tones back on. End of cycle & timer tones will still be active.
Demo Mode
Activate to practice using the control without actually turning on the magnetron.
To activate:
- Open door, press and hold number keypad "3" for 5 seconds, "d" icon lights up in the display.
- Press the start button within 5 seconds to turn demo mode on.
- "dOn_" icon lights up in the display.
Note: If start button wasn't pressed within 5 seconds, return to idle normal mode.
To deactivate:
Repeat the procedure as activation during an idle state clock / standby. Once start is pressed, deactivate demo mode, display "dOff" for 5 seconds and return to normal operation.
Standby Power Mode
When no functions are working (12-hour clock is displayed or if the clock has not been set), oven will switch to Standby Power mode and dim the display brightness after 2 minutes. Press any button or open/close the door, and then display will return to the normal brightness.
Turntable
For best cooking results, do not operate the microwave oven without having the turntable in place. Turntable may be turned off for manual cooking only.
Cookware and Dinnerware
Microwave-Safe
- Browning dish (Follow manufacturer recommendations)
- Ceramic glass, glass
- China, earthenware (Follow manufacturer recommendations)
- Melamine (Follow manufacturer recommendations)
- Paper towels, paper plates, napkins (Use non-recycled paper)
- Plastic wraps, bags, covers, dinnerware, containers (Follow manufacturer recommendations)
- Pottery and clay (Follow manufacturer recommendations)
- Silicone bakeware (Follow manufacturer recommendations)
- Wax paper
Do Not Use
- Metal cookware and bakeware
- Straw or wicker
- Gold, silver, or pewter
- Non-approved meat thermometers, skewers
- Twist ties
- Foil liners, such as sandwich wrappers
- Staples
- Objects with gold or silver trim or with metallic glaze
To Test Cookware/Dinnerware: Place dish in microwave oven with 1 cup (250 mL) of water beside it. Program 1 minute of cook time at 100%. If dish becomes hot and the water stays cool, do not use the dish in the microwave oven.
Microwave Oven Use
For list of preset programs, see the Cooking Guide label on the front facing of the microwave oven opening, behind the door. Any invalid entry will cause an Invalid Tone and be corrected to a value that is within range and closest to the entered value.
Manual Cooking
Touch number keypads to enter time, touch POWER (if not 100%), touch number keypads to enter power level (10-90), then touch the Start control.
Preset Cooking
Touch COOK, enter number code of food item, enter quantity, then touch the Start control.
Preset Reheating
Touch REHEAT, enter number code of food item, enter quantity, then touch the Start control.
Preset Defrosting
Touch DEFROST, enter number code of food item, enter quantity, then touch the Start control.
Frozen Entree
Touch FROZEN ENTREE, enter quantity: 10, 20, 40, 60 oz (283, 567, 1134, 1701g), then touch Start control.
Popcorn
Touch Popcorn repeatedly, bag size 1.75, 3.0 (default), 3.5 oz (50, 85 or 99g), close the door, then touch Start control.
Pop only 1 package of popcorn at a time.
Listen for popping to slow to 1 pop every 1 or 2 seconds, then stop the cycle.
Cooking results may vary by brand and fat content.
MICROWAVE OVEN CARE
General Cleaning
Before cleaning, make sure all controls are OFF and the microwave oven is cool. Always follow label instructions on cleaning products.
To avoid damage to the microwave oven caused by arcing due to soil buildup, keep cavity, microwave inlet cover, cooking rack supports, and area where the door touches the frame clean.
Clean with mild soap, water, and a soft cloth or sponge or as indicated below.
- Grease filter: mild soap and water or dishwasher
- Door and exterior: mild soap and water, or glass cleaner applied to paper towel
- Control panel: sponge or soft cloth and water
- Stainless steel (on some models): mild soap and water, then rinse with clean water and dry with soft cloth, or use stainless steel cleaner
- Turntable: mild soap and water or dishwasher
Installing/Replacing Filters and Light Bulbs
Grease filters
Grease filters are underside of microwave oven. The grease filters should be removed and cleaned at least once a month. See the "Settings" section to reset filter status.
NOTE: For recirculation: Do not operate the microwave oven without the filters in place.
For wall and roof ventilation: To ensure good performance of airflow, remove the charcoal filter from the bottom plate before operating the microwave oven.
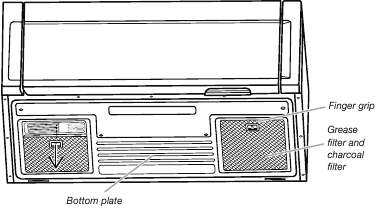
Refer the following steps for replacing grease filter:
- To remove the grease filter, push the finger grip back and then pull down from the bottom plate.
![Whirlpool - WML55011HS - Replacing grease filter Replacing grease filter]()
- Clean the grease filter monthly, or replace with a new grease filter if necessary.
- Put the grease filter back to the bottom plate.
Charcoal filter
Charcoal filters are underside of microwave oven. The charcoal filter cannot be cleaned and should be replaced about every 6 months. See the "Settings" section to reset filter status.
NOTE: For recirculation: Do not operate the microwave oven without the filters in place.
For wall and roof ventilation: To ensure good performance of airflow, remove the charcoal filter from the bottom plate before operating the microwave oven.
Refer the following steps for replacing charcoal filter:
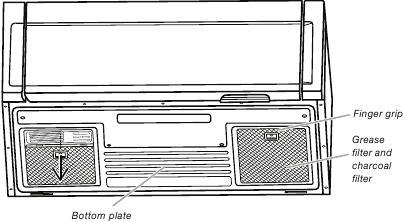
- To remove the grease filter first, push finger grip back and then pull down from the bottom plate, and set aside.
![Whirlpool - WML55011HS - Replacing charcoal filter - Step 1 Replacing charcoal filter - Step 1]()
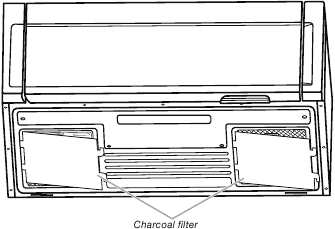
- Take out charcoal filter from the bottom plate.
![Whirlpool - WML55011HS - Replacing charcoal filter - Step 2 Replacing charcoal filter - Step 2]()
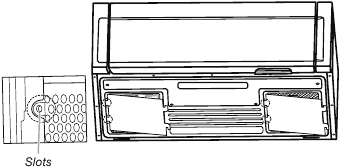
- Replace a new charcoal filter and reattach it back to the bottom plate, and make sure both left and right sides insert into the bottom plate slots.
![Whirlpool - WML55011HS - Replacing charcoal filter - Step 3 Replacing charcoal filter - Step 3]()
- Put the grease filter back to the bottom plate.
Cooktop light
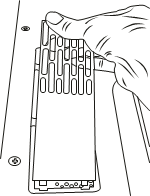
The cooktop light is located on the underside of the microwave oven and is replaceable.
To replace the cooktop light, refer the following steps:
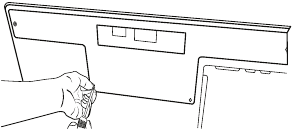
- Using a philips screwdriver, remove the 4 screws from the "T" shaped bottom lighting cover.
![]()
- Pull out the halogen light from the light holder.
- Insert a new halogen.
![]()
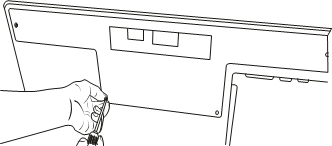
- Reattached the 4 screws to "T" shape bottom lighting cover.
![Whirlpool - WML55011HS - Replacing the cooktop light Replacing the cooktop light]()
Cavity light
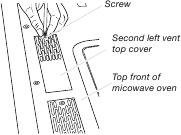
The cavity light bulb is located at the top front of the microwave oven, under the bulb cover, and is replaceable.
To replace the cavity light, refer the following steps:
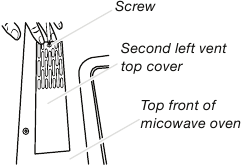
- Using a Phillips screwdriver, remove the second left vent top cover screw from the top front of the microwave oven.
![]()
- Remove the second left top cover.
![]()
- Pull out the halogen light from the light holder.
- Insert a new halogen.
![]()
- Reattach the second top vent cover with the screw removed in step 1.
![]()
ACCESSORIES
Following is a list of available parts and supplies which may be purchased separately. Please refer to the "Warranty" section for contact information.
Replacement Parts
- Turntable
- Turntable support and rollers
- Turntable hub
- Grease filter
- Charcoal filter
- Cooktop light bulb
- Cavity light bulb
Cleaning Supplies
- Heavy-duty degreaser
- Affresh® Kitchen Appliance Cleaner
- Affresh® Stainless Steel Cleaner
- Affresh® Stainless Steel Wipes
TROUBLESHOOTING
First try the solutions suggested here. If you need further assistance or more recommendations that may help you avoid a service call, refer to the warranty page in this manual, or visit http://www.whirlpool.com/product_help.
Contact us by mail with any questions or concerns at the address below:
Whirlpool Brand Home Appliances
Customer eXperience Center
553 Benson Road
Benton Harbor, MI 49022-2692
Please include a daytime phone number in your correspondence.
| If you experience | Recommended Solutions | |
| Microwave oven will not operate | Check the following:
| |
| Arcing in the microwave oven | Check the following:
| |
| Turntable alternates rotation directions |
| |
| Display shows messages |
| |
| Fan running during cooktop usage |
| |
| Radio, TV, or cordless phone interference | Check the following:
| |
MICROWAVE HOOD COMBINATION SAFETY
| Your safety and the safety of others are very important. We have provided many important safety messages in this manual and on your appliance. Always read and obey all safety messages.
All safety messages will tell you what the potential hazard is, tell you how to reduce the chance of injury, and tell you what can happen if the instructions are not followed. |
IMPORTANT SAFETY INSTRUCTIONSWhen using electrical appliances basic safety precautions should be followed, including the following:
SAVE THESE INSTRUCTIONS |
PRECAUTIONS TO AVOID POSSIBLE EXPOSURE TO EXCESSIVE MICROWAVE ENERGY
|
| State of California Proposition 65 Warnings:
|
Electrical Requirements
  |
| Electrical Shock Hazard Plug into a grounded 3 prong outlet. Do not remove ground prong. Do not use an adapter. Do not use an extension cord. Failure to follow these instructions can result in death, fire, or electrical shock. |
Observe all governing codes and ordinances.
Required:
- A 120 V, 60 Hz, AC-only, 15 or 20 amp electrical supply with a fuse or circuit breaker.
Recommended:
- A time-delay fuse or time-delay circuit breaker.
- A separate circuit serving only this microwave oven.
GROUNDING INSTRUCTIONS
Do not use an extension cord. If the power supply cord is too short, have a qualified electrician or serviceman install an outlet near the microwave oven. SAVE THESE INSTRUCTIONS |

Documents / Resources
References
Download manual
Here you can download full pdf version of manual, it may contain additional safety instructions, warranty information, FCC rules, etc.
Download Whirlpool WML55011HS - 1.1 cu. ft. Low Profile Microwave Hood Combination Manual
Advertisement
Thank you! Your question has been received!


 This is the safety alert symbol.


Need Assistance?
Do you have a question about the WML55011HS that isn't answered in the manual? Leave your question here.