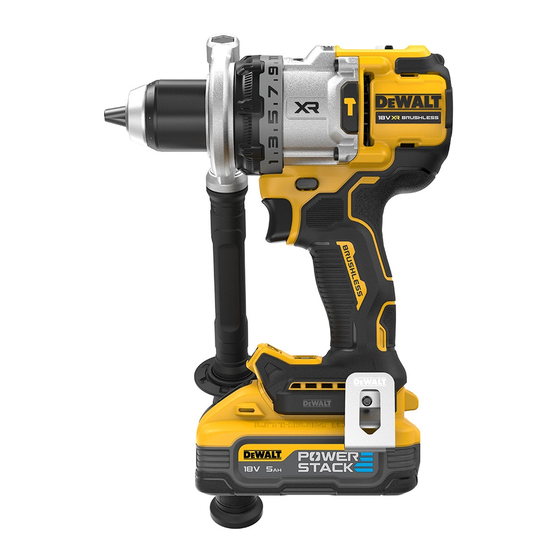
DeWalt DCD1007H2T Original Instructions Manual
Hide thumbs
Also See for DCD1007H2T:
- Original instructions manual (172 pages) ,
- Original instructions manual (56 pages)
Advertisement
Quick Links
Advertisement

Summary of Contents for DeWalt DCD1007H2T
- Page 1 DCD1007...
- Page 2 English (original instructions) Copyright D WALT...
- Page 3 Fig. A Fig. B XXXX XX XX...
- Page 4 Fig. D1 Fig. C Fig. D2 Fig. D3...
- Page 5 Fig. D4 Fig. E Fig. F Fig. G Fig. H...
- Page 6 Fig. I Fig. J...
- Page 7 English DRILL/DRIVER/IMPACT DRILL DCD1007 Congratulations! DCD1007 You have chosen a D WALT tool. Years of experience, thorough Drilling into metal product development and innovation make D WALT one of the Vibration emission value a < 2.5 most reliable partners for professional power tool users. Uncertainty K = Technical Data Impact drilling...
- Page 8 English Batteries Chargers/Charge Times (Minutes)*** DCB112/ DCB115/ Weight (kg) DCB104 DCB107 DCB113 DCB116 DCB117 DCB118 DCB132 DCB119 Cat # DCB1102 DCB1104 DCB546 18/54 6.0/2.0 1.08 DCB547/G 18/54 9.0/3.0 1.46 135* 110* 135* DCB548 18/54 12.0/4.0 1.46 DCB549 18/54 15.0/5.0 2.12 DCB181 0.35 DCB182...
- Page 9 English power tool. Failure to follow all instructions listed below switch or energising power tools that have the switch on invites accidents. may result in electric shock, fire and/or serious injury. d ) Remove any adjusting key or wrench before turning SAVE ALL WARNINGS AND INSTRUCTIONS FOR FUTURE REFERENCE the power tool on.
- Page 10 English 5) Battery Tool Use and Care • Hammer bits and tools get hot during operation. Wear gloves when touching them. a ) Recharge only with the charger specified by the manufacturer. A charger that is suitable for one type • Air vents often cover moving parts and should be of battery pack may create a risk of fire when used with avoided.
- Page 11 English Follow the fitting instructions supplied with good quality plugs. charger is ventilated through slots in the top and the bottom Recommended fuse: 3 A. of the housing. • Do not operate charger with damaged cord or plug— Using an Extension Cable have them replaced immediately.
- Page 12 English hot/Cold Pack Delay dust. Inserting or removing the battery from the charger may ignite the dust or fumes. When the charger detects a battery pack that is too hot or too cold, it automatically starts a Hot/Cold Pack Delay, suspending •...
- Page 13 English circuit. NOTE: Lithium‑ion batteries should not be put in Do not probe with conductive objects. checked baggage. WALT batteries comply with all applicable shipping regulations as prescribed by industry and legal standards, which Do not charge damaged battery packs. include UN Recommendations on the Transport of Dangerous Goods;...
- Page 14 English ASSEMBLY AND ADJUSTMENTS • Take the time to thoroughly read and understand this manual prior to operation. WARNING: To reduce the risk of serious personal Markings on Tool injury, turn tool off and disconnect battery pack before making any adjustments or removing/ The following pictograms are shown on the tool: installing attachments or accessories.
- Page 15 English down if necessary. The red LED indicator 22 illuminates when hear a clicking sound. Continue tightening as far as you the ANTI‑ROTATION System is engaged. can. Your tool is equipped with an automatic spindle lock mechanism. This allows you to open and close the chuck inDiCATOR DiAgnOsis sOlUTiOn with one hand.
- Page 16 English Variable Speed Trigger and Forward/Reverse Performing an Application (Fig. A) Control Button (Fig. A) WARNING: To reduce the risk of personal injury, ALWAYS ensure workpiece is anchored or clamped firmly. The tool is turned on and off by pulling and releasing the WARNING: Always wait until the motor has come to variable speed trigger switch ...
- Page 17 English 5. Hold tool firmly with both hands to control the twisting satisfactory operation depends upon proper tool care and action of the drill. regular cleaning. 6. IF DRILL STALLS, it is usually because it is being overloaded WARNING: To reduce the risk of serious personal or improperly used.
- Page 18 English 2. Remove the protective cover and insert the Tool Connect™ Chip into the empty pocket 25 3. Ensure that the Tool Connect™ Chip is flush with the housing. Secure it with the retaining screws and tighten the screws. 4. Refer to Tool Connect™ Chip Instruction Sheet for further instructions.
- Page 20 Australia / New Zealand Tel: Aust 1800 338 002 www.dewalt.com.au Tel: NZ 0800 339 258 www.dewalt.co.nz support@dewalt.au support@dewalt.co.nz Belgique et Tel: NL 32 15 47 37 63 www.dewalt.be Luxembourg België en Luxemburg Tel: FR 32 15 47 37 64 support@dewalt.be support@dewalt.be.fr Danmark Tel: 70 20 15 10 www.dewalt.dk support@dewalt.dk Deutschland Tel: 06126‑21‑0 www.dewalt.de support@dewalt.de Ελλάς...


