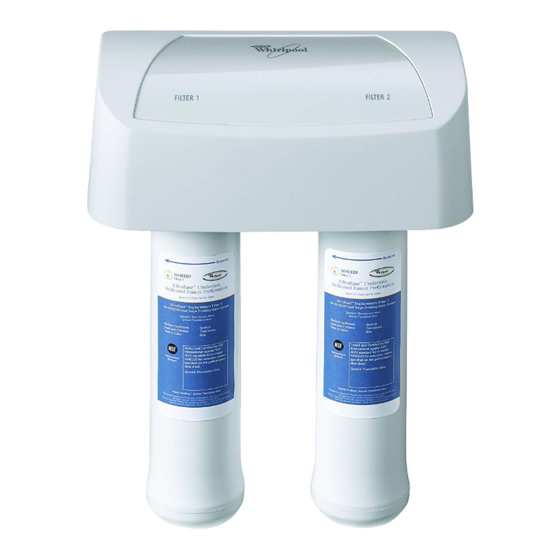
Whirlpool WHED20 Installation And Operation Manual
Undersink drinking water filter system
Hide thumbs
Also See for WHED20:
- Datasheet (2 pages) ,
- Installation and operation manual (11 pages) ,
- Installation and operation manual (11 pages)
Advertisement
Table of Contents
- 1 Table of Contents
- 2 Parts of the System / Materials and Tools Needed / Typical Undersink Installation
- 3 Installation Steps
- 4 Filter Cartridges
- 5 Filter Cartridge Life / Filter Cartridge Replacement
- 6 Faucet Timer / Battery Change
- 7 Troubleshooting the System
- 8 Warranty
- 9 Exploded View / Repair Parts
- 10 Repair Parts List
- Download this manual
Model WHED20
How to install, operate and
maintain your Undersink
Drinking Water Filter System
Do not return unit to store
If you have any questions or concerns when
installing, operating or maintaining your
undersink drinking water filter system,
call our toll free number:
1-866-986-3223
Monday- Friday, 8 AM - 7 PM EST or visit
www.ecodynewatertreatment.com
When you call, please be prepared to provide
the model, date code and serial number of
your product, found on the rating decal,
located inside the cover.
System tested and certified by NSF International
against NSF/ANSI Standards 42 & 53.
See performance data sheet for details.
Manufactured and warranted by
Ecodyne Water Systems
1890 Woodlane Drive
Woodbury, MN 55125
7278646 (Rev. U 6/21/13)
Product No. 8578161
Advertisement
Table of Contents

Summary of Contents for Whirlpool WHED20
- Page 1 Model WHED20 How to install, operate and maintain your Undersink Drinking Water Filter System Do not return unit to store If you have any questions or concerns when installing, operating or maintaining your undersink drinking water filter system, call our toll free number:...
-
Page 2: Table Of Contents
Table of Contents Parts of the System / Materials and Tools Needed / Typical Undersink Installation ....3 Installation Steps ..............4-6 Filter Cartridge Life / Filter Cartridge Replacement . -
Page 3: Parts Of The System / Materials And Tools Needed / Typical Undersink Installation
Parts of the System • filter system assembly • water supply fitting • filtered water faucet for sink or countertop mounting • 3/8" tube bends • 3/8" tubing to make all needed connections Materials and Tools Needed NOTE: Gather the required tools before starting installation. Read and follow the instructions provided with any tools listed here. -
Page 4: Installation Steps
Installation Steps Step 1 - Cold Water Supply Fitting Check and comply with local plumbing codes as you plan, then install a cold feed (supply) water fitting. The fitting must provide a leak-tight connection to the water filter 3/8" tubing. A typical connection using the included water supply fitting is shown in Figure 2A. - Page 5 Installation Steps Step 2 - Make Hole For Filtered Water Faucet IMPORTANT: To avoid damaging the sink, consult a qualified plumber or installer for drilling procedures in porcelain or stainless steel. Special drill bits are made for this. 1. Select one of the following places to install the faucet. Be sure there's room underneath so you can make the needed connections.
- Page 6 Installation Steps Step 4 - Make Tubing Connections NOTE: Remove protective foam plugs before connecting tubes (See Fig. 4). Discard foam plugs. 1. Allowing some slack, measure and cut a length of 3/8" tubing to connect between the supply fitting and the filter system inlet, Figure 1.
-
Page 7: Filter Cartridge Life / Filter Cartridge Replacement
Whirlpool Undersink Drinking Water Filter system model WHED20 with replacement element pack WHEEDF conforms to NSF/ANSI 42 and 53 for the specific performance claims as verified and substan- tiated by test data. -
Page 8: Faucet Timer / Battery Change
Faucet Electronics Faucet Timer Inside the faucet base is a battery operated 6 month timer. An amber LED indicator is also located in the front of the faucet base. This LED will flash continuously after 6 months have passed. This indicates that it is time to replace the battery and filters. Battery Change To change the battery, complete the following steps. -
Page 9: Warranty
This warranty applies to consumer-owned installations only. ® Registered trademark/TM Trademark of Whirlpool, USA. Manufactured under license by Ecodyne Water Systems, Woodbury, Minnesota ©... -
Page 10: Exploded View / Repair Parts
Exploded View Questions? Call toll free 1-866-986-3223 or visit www.ecodynewatertreatment.com... -
Page 11: Repair Parts List
Repair Parts List Key No. Part No. Description 7292674 Faucet, with base & electronics 7276262 Cover, order decal below – 7276270 Decal, Cover 7228536 Tee, Feed Adaptor 7273565 Flow Bend, 3/8” (2 req’d) 7208057 Tubing, 3/8” x 72” long, Yellow 7207962 Tubing, 3/8”...


