Sign In
Upload
Manuals
Brands
JVC Manuals
Camcorder
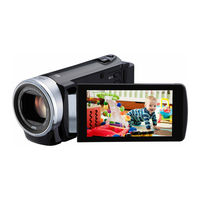
Everio GZ-EX255
JVC Everio GZ-EX255 Manuals
Manuals and User Guides for JVC Everio GZ-EX255. We have
2
JVC Everio GZ-EX255 manuals available for free PDF download: Detailed User Manual, Basic User's Manual
JVC Everio GZ-EX255 Detailed User Manual (217 pages)
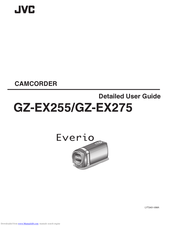
Everio
Brand:
JVC
| Category:
Camcorder
| Size: 60.95 MB
Table of Contents
Table of Contents
2
Beginner's Guide
5
Charging
5
Recording
5
Playback
5
Shooting Tips
5
Holiday Season/Christmas
6
Wedding
7
Travel
8
Amusement Park
10
Using Wi-Fi
12
Wi-Fi Capabilities
12
Operating Environment
13
Precautions on Using Wi-Fi
13
Image Monitoring Via Direct Connection (DIRECT MONITORING)
14
Recording the Location Information
17
Image Monitoring Via an Access Point at Home (OUTSIDE MONITORING)
18
Image Monitoring Via the Internet (OUTSIDE MONITORING)
20
Send Still Images Via E-Mail Upon Detection of Face or Movement (DETECT/MAIL SETTING)
23
Record and Send Videos Via E-Mail (VIDEO MAIL ATTN.)
25
Changing the Settings
26
Setting the Password (out MONITORING SET)
28
Setting the Upnp of this Camera (out MONITORING SET)
28
Obtaining a Dynamic DNS (DDNS) Account
29
Setting Dynamic DNS (DDNS) on this Camera (out MONITORING SET)
29
Setting the Sender's E-Mail Address
30
Registering the Recipient's E-Mail Address
33
Setting the Detection Method of this Camera (DETECT/MAIL SETTING)
34
Setting the Detection Interval of this Camera (DETECT/MAIL SETTING)
34
Setting Self Recording on this Camera (DETECT/MAIL SETTING)
35
Registering the Access Points to Connect ("ACCESS POINTS")
35
Setting the Password (DIRECT MONITORING)
40
Setting the Enforced Group Owner (DIRECT MONITORING)
41
Checking the MAC Address of this Camera
41
Protecting the Network Settings with a Password
42
Initializing the Network Settings
42
Using Smartphone Applications
43
Indications on the Screen
43
Transferring Videos
44
Transferring Still Images
45
Changing the Settings
47
Using the Wi-Fi Function from a Web Browser
49
Indications on the Screen
49
Making Camera Settings from a Web Browser
51
Troubleshooting
56
Wi-Fi Specifications
59
Getting Started
61
Verifying the Accessories
61
Attaching the Core Filter
63
Charging the Battery Pack
64
Grip Adjustment
65
Using as a Hand Strap
65
Inserting an SD Card
65
Types of Usable SD Card
66
Using the Touch Screen
67
Names of Buttons and Functions on the LCD Monitor
68
Clock Setting
69
Resetting the Clock
70
Changing the Display Language
71
Holding this Unit
71
Tripod Mounting
71
Using this Unit Overseas
72
Charging the Battery Pack Overseas
72
Setting the Clock to Local Time When Traveling
73
Setting Daylight Saving Time
73
Optional Accessories
74
Recording
75
Taking Videos in Auto Mode
75
Zooming
77
Capturing Still Images During Video Recording
77
Taking Still Images in Auto Mode
78
Zooming
80
Manual Recording
81
Shooting According to Scene (Subject)
82
Adjusting Focus Manually
84
Adjusting Brightness
85
Setting White Balance
86
Setting Backlight Compensation
87
Taking Close-Up Shots
88
Recording with Effects
89
Recording with Animation Effects
89
Recording with Face Decorations
92
Recording with Decorative Stamps
92
Recording with Personal Handwriting
93
Capturing Subjects Clearly (TOUCH PRIORITY AE/AF)
95
Capturing Smiles Automatically (SMILE SHOT)
96
Capturing Pets Automatically (PET SHOT)
98
Recording While Displaying a Magnified View of a Selected Face (FACE SUB-WINDOW)
99
Registering Human Face Personal Authentication Information
101
Setting SMILE%/NAME DISPLAY
103
Editing the Registered Face Information
104
Reducing Camera Shake
106
Slow-Motion (High-Speed) Recording
106
Recording at Intervals (TIME-LAPSE RECORDING)
107
Recording Automatically by Sensing Movements (AUTO REC)
109
Taking Group Shots (Self-Timer)
110
Recording Videos with Date and Time
112
Checking the Remaining Recording Time
113
Playback
115
Playing Back Videos
115
Checking the Content of Videos Quickly (Digest Playback)
117
Playing a Video with Defective Management Information
118
Playing Back Still Images
118
Slideshow Playback
120
Searching for a Specific Video/Still Image by Date
120
Connecting to and Viewing on TV
121
Connecting Via the HDMI Mini Connector
121
Connecting Via the AV Connector
122
Playing Back Playlists
123
Playing Back a DVD or Blu-Ray Disc Created on this Unit
123
Digest Playback on a Blu-Ray or DVD Player
123
Editing
124
Deleting Unwanted Files
124
Deleting the Currently Displayed File
124
Deleting Selected Files
124
Protecting Files
125
Protecting/Releasing Protection of the Currently Displayed File
125
Protecting/Releasing Protection of Selected Files
126
Capturing a Still Image in the Video During Playback
127
Combining Videos Recorded by Seamless Recording
127
Capturing a Required Part in the Video (TRIMMING)
128
Capturing Videos for Uploading to Youtube
129
Uploading Videos to Youtube
130
Creating Playlists from the Recorded Videos
131
Creating Playlists with Selected Files
131
Creating Playlists by Date
132
Editing Playlists
133
Deleting Playlists
134
Copying
135
Creating Discs with a DVD Writer
135
Preparing a DVD Writer (CU-VD3)
136
Preparing a DVD Writer (CU-VD50)
136
Creating a Disc
137
Playing Back with a DVD Writer
142
Creating Discs with an External Blu-Ray Drive
143
Preparing an External Blu-Ray Drive
143
Creating a Disc
144
Copying Selected Files
149
Playing Back with an External Blu-Ray Drive
150
Creating a Disc Using a Connected Blu-Ray Recorder
151
Dubbing Files to a Disc by Connecting to a DVD Recorder
151
Dubbing Files to a VHS Tape by Connecting to a VCR
152
Copying Files with a USB External Hard Disk Drive
152
Preparing a USB External Hard Disk Drive
153
Copying All Files
153
Playing Back Files in the USB External Hard Disk Drive
154
Deleting Folders in the USB External Hard Disk Drive
155
Formatting the USB External Hard Disk Drive
155
Importing Files from the USB External Hard Disk Drive
156
Copying Files to an SD Card
157
Moving Files to an SD Card
158
Copying to Windows PC
159
Verifying System Requirements (Guideline)
159
Installing the Provided Software
160
Backing up All Files
161
Organizing Files
162
Recording Videos to Discs
163
Backing up Files Without Using Provided Software
165
List of Files and Folders
166
Copying to Mac Computer
167
Menu Settings
168
Operating the Menu
168
Operating the Shortcut Menu
168
Operating the Main Menu
169
Operating the Common Menu
169
Recording Menu (Video)
170
Scene Select
173
Focus
173
Brightness Adjust
173
White Balance
173
Backlight Comp
173
Tele Macro
173
Touch Priority Ae/Af
173
Light
173
Gain up
174
Wind Cut
174
Animation Effect
175
Decorate Face Effect
175
Stamp
175
Handwriting Effect
175
High Speed Recording
175
Time-Lapse Recording
175
Auto Rec
175
Wi-Fi
175
Date/Time Recording
175
Face Sub-Window
175
Video Quality
176
Zoom
176
Seamless Recording
177
Zoom MIC
177
Recording Menu (Still Image)
178
Scene Select
180
Focus
180
Brightness Adjust
180
White Balance
180
Backlight Comp
180
Tele Macro
180
Touch Priority Ae/Af
180
Light
180
Self-Timer
181
Gain up
181
Auto Rec
181
Shutter Mode
182
Smile Shot
182
Smile%/Name Display
182
Face Registration
182
Pet Shot
182
Image Size
183
Playback Menu (Video)
184
Search Date
186
Display Date/Time
186
Digest Playback
186
Playback Playlist
186
Edit Playlist
186
Protect/Cancel
186
Copy
186
Move
186
Trimming
186
Upload Settings
186
K2 Technology
187
Playback Menu (Still Image)
188
Search Date
188
Slide Show Effects
189
Protect/Cancel
189
Copy
189
Move
189
Common Menu
190
Clock Adjust
192
Date Display Style
192
Language
192
Monitor Brightness
192
Rec Media for Video
193
Rec Media for Image
193
Operation Sound
194
Silent Mode
194
Auto Power off
195
Quick Restart
195
Demo Mode
196
Touch Screen Adjust
196
Display on Tv
197
Video Output
198
Hdmi Output
198
Hdmi Control
199
Factory Preset
199
Update
199
Pc Software Update
199
Format Built-In Mem
200
Format Sd Card
200
Erase All Data
201
Open Source Licenses
201
Names of Parts
202
Front
202
Rear
202
Bottom
203
Interior
203
LCD Monitor
204
Indications on the LCD Monitor
205
Common Recording Indications
205
Video Recording
205
Still Image Recording
206
Video Playback
206
Troubleshooting
207
Still Image Playback
207
When the Unit Is Not Working Properly
207
Battery Pack
208
Recording
208
Card
209
Playback
209
Editing/Copying
210
Computer
211
Screen/Image
211
Other Problems
212
Error Message
212
Maintenance
214
Specifications
215
Still Image
216
Advertisement
JVC Everio GZ-EX255 Basic User's Manual (80 pages)
Brand:
JVC
| Category:
Camcorder
| Size: 7.16 MB
Table of Contents
English
4
Table of Contents
4
Names of Parts and Functions
4
Grip Adjustment
5
Charging the Battery Pack
5
Inserting an SD Card
6
Using the Icon Buttons/Thumbnails
6
Clock Setting
7
Video Quality
7
Video Recording
8
Still Image Recording
9
Playing Back/Deleting Files on this Unit
10
Playing Back on TV
11
Dubbing Files by Connecting to a DVD Recorder or VHS
12
Changing Menu Settings
13
Troubleshooting
14
Cautions
16
Recordable Time/Number of Images
18
Specifications
19
汉语
24
安全注意事项
22
零部件名称和功能
24
握带调整
25
电池充电
25
使用图标按钮/缩略图
26
插入 Sd 卡
26
时钟设定
27
视频质量
27
视频录制
28
静像录制
29
在本机上播放/删除文件
30
在电视上播放
31
连接至 DVD 录像机或 Vhs 来复录文件
32
更改菜单设定
33
故障排除
34
注意事项
36
可录制时间/图像数
38
Русский
44
Зарядка Аккумуляторного Блока
45
Регулировка Ручного Ремня
45
Использование Кнопок Значков/Эскизов
46
Установка SD-Карты
46
Качество Видео
47
Настройка Часов
47
Видеосъемка
48
Запись
48
Фотосъемка
49
Воспроизведение/Удаление Файлов На Аппарате
50
Воспроизведение На Экране Телевизора
51
Копирование Файлов С Подключением К DVD-Рекордеру Или VHS
52
Изменение Настроек Меню
53
Поиск И Устранение Неисправностей
54
Внимание
56
Время Записи/Количество Фотографий
58
Технические Характеристики
59
Advertisement
Related Products
JVC GZ-EX250BUS
JVC Everio GZ-EX275
JVC Everio GZ-EX250
JVC GZ-EX215 Everio
JVC GZ-EX210 Everio
JVC GZ-EX210BUA
JVC GZ-EX210BUB
JVC Everio GZ-EX210U
JVC Everio GZ-EX215U
JVC Everio GZ-EX250U
JVC Categories
Car Receiver
Camcorder
TV
VCR
Stereo System
More JVC Manuals
Login
Sign In
OR
Sign in with Facebook
Sign in with Google
Upload manual
Upload from disk
Upload from URL