Sign In
Upload
Manuals
Brands
JVC Manuals
Camcorder
GZ-VX855
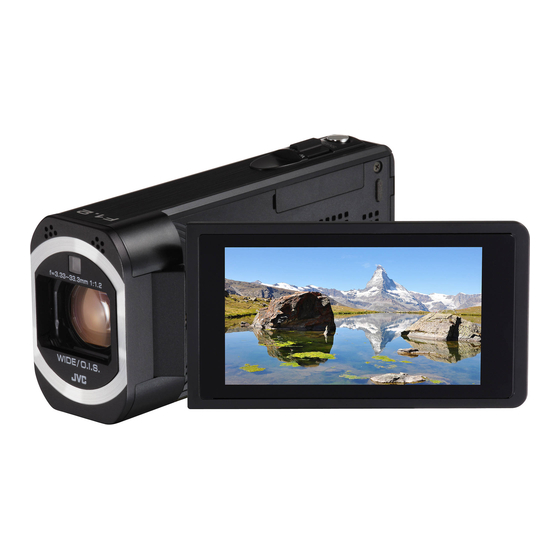
User Manuals: JVC GZ-VX855 Camcorder
Manuals and User Guides for JVC GZ-VX855 Camcorder. We have
1
JVC GZ-VX855 Camcorder manual available for free PDF download: Detailed User Manual
JVC GZ-VX855 Detailed User Manual (260 pages)
Brand:
JVC
| Category:
Camcorder
| Size: 15.21 MB
Table of Contents
Table of Contents
2
Beginner's Guide
4
Useful Shooting Techniques
5
Holiday Season/Christmas
5
Wedding
6
Travel
8
Amusement Park
10
Getting Started
12
Verifying the Accessories
12
Charging the Battery Pack
13
Grip Adjustment
14
Using as a Hand Strap
14
Inserting an SD Card
15
Types of Usable SD Card
15
Using the Touch Screen
16
Adjusting the Touch Panel
17
Names of Buttons and Functions on the LCD Monitor
18
Clock Setting
20
Resetting the Clock
21
Changing the Display Language
22
Holding this Unit
22
Tripod Mounting
23
Using this Unit Overseas
23
Charging the Battery Pack Overseas
23
Setting the Clock to Local Time When Traveling
24
Setting Daylight Saving Time
24
Optional Accessories
25
Recording
26
Taking Videos in Auto Mode
26
Capturing Still Images During Video Recording
28
Taking Still Images in Auto Mode
29
Zooming
32
Manual Recording
32
Shooting According to Scene (Subject)
34
Adjusting Focus Manually
35
Adjusting Brightness
36
Setting Shutter Speed
37
Setting Aperture
38
Setting Backlight Compensation
39
Setting White Balance
40
Taking Close-Up Shots
41
Recording with Effects
42
Recording with Animation Effects (ANIMATION EFFECT)
43
Recording with Face Decorations (DECORATE FACE EFFECT)
45
Recording with Decorative Stamps (STAMP)
46
Recording with Personal Handwriting (HANDWRITING EFFECT)
47
Capturing Subjects Clearly (TOUCH PRIORITY AE/AF)
48
Capturing Smiles Automatically (SMILE SHOT)
49
Capturing Pets Automatically (PET SHOT)
50
Registering Human Face Personal Authentication Information
52
Setting SMILE%/NAME DISPLAY
54
Editing the Registered Face Information
55
Reducing Camera Shake
56
Marking the Video While Recording
57
Slow-Motion (High-Speed) Recording
57
Recording at Intervals (TIME-LAPSE RECORDING)
58
Recording Stop-Motion Videos (STOP-MOTION REC)
60
Recording Automatically by Sensing Movements (AUTO REC)
61
Taking Group Shots (Self-Timer)
62
Recording Videos with Date and Time
64
Checking the Remaining Recording Time
65
Playback
68
Playing Back Videos
68
Normal Playback
69
Checking the Recording Date and Other Information
71
Marking Playback
71
Digest Playback
75
Playback Playlist
77
Playback Other File
78
Playing Back Still Images
79
Slideshow Playback
81
Searching for a Specific Video/Still Image by Date
81
Connecting to and Viewing on TV
82
Connecting Via the HDMI Mini Connector
83
Connecting Via the AV Connector
84
Playing Back a DVD or Blu-Ray Disc Created on this Unit
85
Digest Playback on a Blu-Ray or DVD Player
85
Editing
86
Deleting Unwanted Files
86
Deleting the Currently Displayed File
86
Deleting Selected Files
86
Protecting Files
87
Protecting/Releasing Protection of the Currently Displayed File
87
Protecting/Releasing Protection of Selected Files
88
Capturing a Still Image in the Video During Playback
89
Combining Videos Recorded by Seamless Recording (GZ-VX875/GZ-VX855)
89
Capturing a Required Part in the Video (TRIMMING)
90
Creating Playlists from the Recorded Videos
91
Creating Playlists with Selected Files
91
Creating Playlists by Date
93
Editing Playlists
94
Deleting Playlists
96
Copying
97
Creating Discs with a BD Writer (External Blu-Ray Drive)
97
Preparing a BD Writer (External Blu-Ray Drive)
97
Creating a Disc
98
Playing Back with a BD Writer (External Blu-Ray Drive)
104
Creating Discs with a DVD Writer
105
Preparing a DVD Writer (CU-VD3)
105
Preparing a DVD Writer (CU-VD50)
106
Creating a Disc
106
Playing Back with a DVD Writer
111
Creating a Disc Using a Connected Blu-Ray Recorder
112
Dubbing Files to a Disc by Connecting to a DVD Recorder
112
Dubbing Files to a VHS Tape by Connecting to a VCR
113
Using a USB External Hard Disk Drive
114
Preparing a USB External Hard Disk Drive
115
Copying All Files
115
Playing Back Files in the USB External Hard Disk Drive
116
Deleting Folders in the USB External Hard Disk Drive
117
Formatting the USB External Hard Disk Drive
117
Importing Files from the USB External Hard Disk Drive
118
Copying Files to an SD Card (GZ-VX875/GZ-VX855)
119
Moving Files to an SD Card (GZ-VX875/GZ-VX855)
120
Copying to Windows PC
121
Verifying System Requirements (Guideline)
121
Installing the Provided Software
122
Backing up Files
123
Recording Videos to Discs
124
Backing up Files Without Using Provided Software
126
List of Files and Folders
127
Copying to Mac Computer
128
Using Wi-Fi
129
Wi-Fi Capabilities
129
Operating Environment
130
Precautions on Using Wi-Fi
130
Image Monitoring Via Direct Connection (DIRECT MONITORING)
131
Image Monitoring Via an Access Point at Home (INDOOR MONITORING)
134
Image Monitoring Via the Internet (OUTDOOR MONITORING)
139
Sending Still Images Via E-Mail Upon Detection of Face or Movement (DETECT/MAIL)
142
Record and Send Videos Via E-Mail (VIDEO MAIL)
143
Image Monitoring on TV (TV MONITORING)
145
Easy Storage
146
Recording the Location Information
147
Using the Pan Cradle (Sold Separately)
150
Changing the Settings
152
Setting the Password (DIRECT MONITORING/INDOOR MONITORING/OUTDOOR MONITORING)
155
Setting the Enforced Group Owner (DIRECT MONITORING)
156
Changing the HTTP Port (DIRECT MONITORING/INDOOR MONITORING/OUTDOOR MONITORING)
156
Setting the Upnp of this Camera (OUTDOOR MONITORING)
157
Obtaining a Dynamic DNS (DDNS) Account
157
Setting Dynamic DNS on this Camera (OUTDOOR MONITORING)
158
Setting the Sender's E-Mail Address of the Camera
159
Registering the Recipient's E-Mail Address of the Camera
161
Setting the Detection Method of this Camera (DETECT/MAIL SETTING)
163
Setting the Detection Interval of this Camera (DETECT/MAIL SETTING)
163
Setting Self Recording on this Camera (DETECT/MAIL SETTING)
164
Registering the Access Points of the Camera to Connect (ACCESS POINTS)
164
Enabling the MAC Address Filter (TV MONITORING)
170
Registering the MAC Address (TV MONITORING)
170
Checking the MAC Address of this Camera
171
Protecting the Network Settings with a Password
171
Initializing the Wi-Fi Settings
172
Changing the Panning Speed
173
Using Smartphone Applications
174
Indications on the Screen
174
Using the Markings
175
Using the Game Score
176
Transferring Videos (AVCHD Format)
178
Transferring Videos (Iframe Format)
181
Transferring Still Images
183
Smartphone Application Settings
185
Using the Wi-Fi Function from a Web Browser
187
Indications on the Screen
187
Troubleshooting
190
Wi-Fi Specifications
194
Using Wi-Fi by Creating a QR Code
197
Direct Monitoring
197
Indoor Monitoring
201
Outdoor Monitoring
205
Detect/Mail
210
Video Mail
214
Tv Monitoring
218
Settings Menu
222
Operating the Menu
222
Operating the Top Menu
222
Operating the Shortcut Menu
223
RECORD SETTING Menu (Video)
224
SPECIAL RECORDING Menu (Video)
228
RECORD SETTING Menu (Still Image)
229
SPECIAL RECORDING Menu (Still Image)
232
PLAYBACK SETTING Menu (Video)
233
EDIT Menu (Video)
234
PLAYBACK SETTING Menu (Still Image)
235
EDIT Menu (Still Image)
236
SETUP (Video/Still Image)
237
CONNECTION SETTINGS (Video/Still Image)
240
MEDIA SETTINGS (Video/Still Image)
241
Usb Connection Menu
242
Names of Parts
243
Indications on the LCD Monitor
246
Troubleshooting
249
When the Unit Is Not Working Properly
249
Battery Pack
250
Recording
250
SD Card
251
Playback
251
Editing/Copying
252
Computer
253
Screen/Image
253
Other Problems
254
Error Message
255
Advertisement
Advertisement
Related Products
JVC GZ-VX815B
JVC Everio GZ-VX815BEK
JVC Everio GZ-VX875AH
JVC Everio GZ-VX815AH
JVC GZ-VX875
JVC Everio GZ-VX855AG
JVC Everio GZ-VX755
JVC GZ-VX715
JVC Everio GZ-VX500
JVC Everio GZ-VX715BEK
JVC Categories
Car Receiver
Camcorder
TV
VCR
Stereo System
More JVC Manuals
Login
Sign In
OR
Sign in with Facebook
Sign in with Google
Upload manual
Upload from disk
Upload from URL