Sign In
Upload
Manuals
Brands
Oki Manuals
All in One Printer
ES4192dn
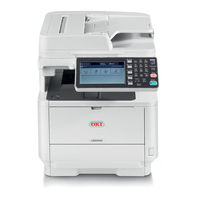
Oki ES4192dn Mono Multifunction Printer Manuals
Manuals and User Guides for Oki ES4192dn Mono Multifunction Printer. We have
1
Oki ES4192dn Mono Multifunction Printer manual available for free PDF download: User Manual
Oki ES4192dn User Manual (1229 pages)
Brand:
Oki
| Category:
All in One Printer
| Size: 13.71 MB
Table of Contents
Table of Contents
2
Using the Fax Functions
5
Basic Information
7
Troubleshooting
8
For Your Safety
14
Specifications
16
Using the Copy Functions
17
Names and Functions of Screen Items for Copy
18
[Copy] Tab
18
[Basic] Tab
18
[Image Settings] Tab
19
[Function Settings] Screen
19
Copying
20
Cancelling Copying
21
Changing Settings before Copying
22
Changing the Number of Copies
23
Copying on both Sides of Paper (Duplex Copy)
24
Simplex Document
25
Combining Multiple Pages on One Sheet of Paper (N-In-1)
27
Specifying the Paper Feed Tray (Paper Feed)
30
Setting the Paper Feed Tray to Tray 1 or Tray 2
30
Using the MP (Multi-Purpose) Tray
31
Making Enlarged or Reduced Copies (Zoom)
33
Changing the Scan Size (Scan Size)
35
Sorting each Set in Page Order (Sort)
37
Adjusting the Density (Density)
38
Selecting the Document Type (Document Type)
39
Specifying the Scan Resolution (Resolution)
41
Copying a Document with a Colored Background Clearly (Background Removal)
42
Adjusting the Contrast (Contrast)
44
Changing the Document Orientation (Direction)
45
Making Multiple Copies on a Sheet of Paper (Repeat)
47
Copying both Sides of a Card to One Side (ID Card Copy)
49
Enabling Continuous Scan Mode (Continuous Scan)
51
Document Glass
51
Copying Different Size Documents (Mixed Size)
53
Setting Margins (Margin)
55
For Portrait Printing
55
For Landscape Printing
55
Copying with Margins on One Side
55
Erasing Edge Shadows (Edge Erase)
59
Initializing or Resetting Copy Setting
60
Resetting Copy Settings (Reset)
61
Auto Reset
61
Using [RESET] on the Touch Panel
61
Cancelling a Setting
62
Checking the Menu Hierarchy (Menu Tree)
63
Using the Scan Functions
64
Sending Scanned Data as an E-Mail Attachment (Scan to E-Mail)
65
About Scan to E-Mail
66
Touch Panel for Scan to E-Mail
66
[Scan to E-Mail] Tab
66
Using Scan to E-Mail
69
Specifying a Destination
71
Using Direct Entry
72
Selecting from the Address Book or Group List
73
Using a One-Touch Button
74
Selecting from the Transmission History
75
Specify a Destination by Searching the LDAP Server
76
For Simple Search
76
For Advanced Search
76
Setting the Transmission and Reception Settings
78
Specifying a Sender and Reply Destination
79
Setting a Sender's Address
79
Setting a Reply Address
79
Specifying a Subject and Body Text
80
Registering a Subject
80
Registering Body Texts
80
Using a Template
81
Scanning Data to a Computer (Scan to PC)
82
About Scan to PC
83
Touch Panel for Scan to Computer
83
For Windows
84
For Mac os X
84
Setting to Use Scan to PC
85
Sending Scanned Data to a Computer
86
For the Network Connection
86
For the USB Connection
87
For WSD Scan Connection (Windows Only)
87
Registering or Removing a Computer that Is Connected for Scan to PC
89
Registering a Computer that Is Connected
90
Deleting a Registered Computer
91
Saving Scanned Data in USB Memory (Scan to USB Memory)
92
About Scan to USB Memory
93
Touch Panel for Scan to USB Memory
93
Using Scan to USB Memory
96
Saving Scanned Data in a Shared Folder (Scan to Shared Folder)
98
About Scan to Shared Folder
99
Touch Panel for Scan to Shared Folder
99
Using Scan to Shared Folder
102
Scanning from a Computer (Remote Scan)
103
About Remote Scan
104
Setting to Use Remote Scan
105
Selecting a Remote Scan Mode
106
Simple Scan Mode
107
Secure Scan Mode
113
Network Connection
114
USB Connection
116
Using WSD Scan
118
About WSD Scan
119
Setting to Use WSD Scan
120
Installing this Machine as a WSD Device to a Computer
121
Installing this Machine in a Computer
121
Checking that the Machine Is Connected to a Computer
121
Setting a Binding Position for Duplex Scanning
123
Scanning from the Operator Panel
124
Scanning from a Computer
125
Manual Scan Mode
125
Setting to Scan a Document
127
Specifying a Document Type
128
Specifying a Scan Resolution
130
Scanning Multiple Documents Continuously (Continuous Scan)
131
Adjusting the Density
133
Specifying a Scan Size
135
Scanning a Duplex Document (Duplex Scan)
136
Scanning a Document with a Colored Background Clearly (Background Removal)
138
Adjusting the Contrast
140
Adjusting the Hue
141
Adjusting the Saturation
142
Adjusting RGB
143
Specifying a File Name
144
Specifying a Color Mode
145
Specifying a File Format
146
Encrypting a PDF File
148
Setting a Document Open Password and Permission Password
149
Setting a Document Open Password Only
153
Registering the Default Password in this Machine
155
Specifying a File Compression Rate
156
Using the Scan Utility
159
Using the Oki Data Scan Tool, Actkey (Windows Only)
160
About Actkey
161
Installing Actkey
162
Scanning from Actkey
163
Sending Scanned Data by Fax
164
Setting to Start Actkey When Using Scan to PC
165
Changing the Setting of each Actkey Button
166
Using Network Configuration (Windows Only)
167
About Network Configuration
167
Registering the Machine (New Machine) to Network Configuration
167
Changing the Scanner Driver Name of the Registered Machine
168
Changing the Setting Information of the Registered Machine
168
Setting Scan to PC
169
Unregistering Computer Information that Is Registered to the Machine
170
Using the Network Scanner Setup Tool (Mac os X Only)
172
About Network Scanner Setup Tool
173
Selecting a Device that Is Connected for Network Scan
174
Using the TWAIN Driver
175
Scanning
176
Changing Settings in Simple Mode
176
Changing Settings in Advanced Mode
177
Using the WIA Driver (Windows Only)
180
Using Windows Fax and Scan
180
Using Image Capture (Mac os X Only)
182
Changing Settings
182
Cancelling Scanning
183
Cancelling Scanning from the Operator Panel
184
Cancelling Scanning from a Computer
185
Checking the Menu Hierarchy of the Scan Functions (Menu Tree)
186
Using the Print Functions
189
Names and Functions of Screen Items for Print
190
Printing from a Computer
191
Printing
192
For Windows PCL Printer Driver
193
For Windows XPS Printer Driver
194
For Windows PS Printer Driver
195
For Mac os X PCL Printer Driver
196
For Mac os X PS Printer Driver
197
Cancelling a Print Job
198
About Screens and Functions of each Printer Driver
199
Windows PCL Printer Driver
200
Windows XPS Printer Driver
202
Windows PS Printer Driver
204
Mac os X PCL Printer Driver
206
Mac os X PS Printer Driver
209
Printing with Various Settings from a Computer
211
Printing on Envelopes
212
Loading Envelopes
212
Printing on Labels
215
Loading Labels
215
Printing on Long Paper
218
Loading Long Paper
218
Printing on Custom Size Paper
221
Printing Manually One by One
224
Printing on both Sides of Paper (Duplex Printing)
227
Combining Multiple Pages Onto One Sheet of Paper
229
Collating a Multiple Page Document in Units of Copies
231
Enlarging or Reducing to Fit the Specified Paper Size
233
Printing from the Last Page of a Document
235
Printing Only the Cover from a Different Tray
236
Making a Booklet
238
Dividing a Document to Print on some Sheets for Making a Poster
240
Adding Semi-Transparent Text (Watermarks)
242
Overlaying Forms or Logos (Overlay)
244
Printing with a Specified Resolution
246
Emphasizing Fine Lines
247
Adjusting the Image Finished Quality
249
Selecting a Tray Automatically for the Specified Paper
250
Set the Paper Tray to be Used
250
Switching to Another Paper Feed Tray Automatically When a Tray Runs out of Paper
252
Setting Trays for the Auto Tray Switching
252
Registering Frequently-Used Settings
254
Registering the Windows PCL Driver Settings
254
Registering the Windows XPS Driver Settings
254
Registering the Mac os X Printer Driver Settings
254
Printing with Registered Settings
256
Changing the Default Settings with a Printer Driver
257
Saving Toner
258
Storing Print Data in this Machine before Printing
260
Specifying the Font to Use
261
Print Using the Printer Fonts
262
Print Using the Fonts of Computer
264
Printing Confidential Document Safely
265
Setting a Password to the Print Data (Authentication Print)
266
Setting a Password from a Computer (Windows PCL Only)
266
Setting a Password from a Computer (Windows PS Only)
266
Printing a Password-Protected Document from this Machine
266
Setting a Password and Encrypting the Print Data (Encrypted Authentication Print)
268
Setting the Password/Encrypting a File on a Computer (Windows PCL/PS Only)
268
Printing an Encrypted/Password-Protected Document from this Machine
268
Outputting a Document to a File Instead of Printing on Paper
270
Storing Frequently-Printed Documents in the Printer
271
Storing from a Computer in this Machine (Windows PCL Only)
271
Storing from a Computer in this Machine (Windows PS Only)
271
Printing the Stored Document from this Machine
271
Printing Without Opening a PDF File (PDF Print Direct)
273
Adjusting the Tone of Photographs for Printing (PS Gamma Adjuster)
274
Registering an Adjusted Halftone
275
Printing with a Registered Halftone
275
Printing E-Mail Attachment Files
277
Setting a POP Server
277
Setting an SMTP Server
277
Printing Data in USB Memory (Basic Operation)
279
Printing Data in USB Memory
280
Printing Data in USB Memory with Various Settings
283
Specifying the Number of Copies (Number of Copies)
286
Printing to Fit the Paper Size (Fitting)
290
Printing with OKI LPR Utility
292
Sending a File to a Printer that Is Registered in OKI LPR Utility
293
Deleting an Unnecessary Print Job
294
Using the Printer Offline
295
Checking the Menu Hierarchy of the Print Functions (Menu Tree)
296
Using Google Cloud Print
297
About Google Cloud Print
298
Setting Google Cloud Print
299
Printing with Google Cloud Print
303
Printing Automatically
303
Printing Manually
303
Changing Printing Settings
304
Cancelling Printing
304
Managing Google Cloud Print
305
Checking Google Cloud Print Registrations
306
Checking from the Management Screen of Google Cloud Print
306
Checking from the Web Page
306
Checking or Changing the Use of Cloud Service Settings
308
Checking the Use of Cloud Service Settings
308
Changing from the Web Page
308
Changing from the Operator Panel
309
Deleting the Registered Information
310
Checking that Deletion Is Complete
311
Checking from the Operator Panel
312
If the Registration Information Remains on the Google Cloud Print Administrator Screen
312
If You Deleted the Information on the Google Cloud Print Administrator Screen
312
About Importing the CA Licenses of the Proxy Server
313
Using Airprint (Print/Scan/Faxout Service)
314
About Airprint (Print/Scan/Faxout Service)
315
Setting Airprint (Print/Scan/Faxout Service)
316
Registering the Machine in a Computer (Mac os X)
317
Printing with Airprint (Print)
318
Printing from an Ios Device
318
Printing from a Computer (Mac os X)
318
Scanning with Airprint (Scan)
320
Sending a Fax with Airprint (Faxout Service)
322
Using the Fax Functions
323
Names and Functions of Screen Items for Fax
324
Basic Procedure for Fax
327
Sending a Fax
328
Cancelling a Fax Transmission
329
Cancelling During a Transmission
329
Cancelling a Reserved Transmission
329
Receiving a Fax
331
About Reception Modes
332
Fax Ready Mode
332
When Receiving Calls and Faxes (Tel/Fax Ready Mode)
332
When Connecting an Answering Machine (Ans/Fax Ready Mode)
333
When Using as a Telephone Normally (Tel Ready Mode)
333
When Using the DRD Function (DRD)
333
Printing a Received Fax
334
Selecting a Tray to Use
334
If You Cannot Print a Received Fax
334
Checking the Communication Status/Transmission and Reception History
335
Checking the Communication Status
336
Checking the Transmission History and Reception History
337
Setting the Fax Functions
338
About the Dial Function
340
Selecting from the Phone Book
342
Selecting from the Transmission History and Reception History
344
Deleting a Specified Destination
345
Setting Scanning for Transmission
346
Scanning Multiple Documents Continuously on the Document Glass (Continuous Scan (Glass))
347
Scanning Multiple Documents Continuously with the ADF (Continuous Scan (ADF))
349
Specifying a Scan Resolution (Resolution)
353
Sending a Fax to Multiple Destinations at the same Time
355
Specifying a Scan Size (Scan Size)
356
Erasing Edge Shadows When Sending (Edge Erase)
360
Disclosing a Sender Name (Originator) to the Recipient
362
Changing the Sender Name that Is Printed on Faxes
364
Printing Transmission Results Automatically (Transmit Conf. Report)
365
Sending at a Specified Date and Time (Delayed Tx)
367
Sending While a Document Is Being Scanned (Memory Transmission/Real Time Transmission)
369
Setting Transmission Behavior
371
Editing the Sender Name (Originator)
372
Registering the Originator Name
372
Changing the Standard Originator Name
372
Adding a Prefix (Prefix)
374
Registering a Prefix
374
Using a Prefix When Sending a Fax
374
Using a Prefix When Registering a Speed Dial Number
374
Setting the Number of Redial Attempts and Redial Intervals
376
Sending a Fax after Calling (Manual Transmission)
377
Manual Sending (On-Hook Dial)
378
Setting for Receptions
379
Setting a Tray to Print Received Documents
380
Setting a Print Method for When a Received Image Exceeds Paper Size
381
Specifying a Reduction Ratio
381
Specifying a Threshold Value
381
Forwarding a Fax to Another Fax Number
383
Setting so that You Can Hear Line Monitor Sound
384
Setting the Waiting Time from When an Incoming Call Arrives to When Reception Starts (Response Waiting Time)
385
Setting Telephone Priority Mode
386
Setting Fax Detection Mode
387
Setting the T/F Timer
388
Setting TAD Mode
389
Instructing a Fax Reception from a Telephone Remotely (Remote Switchover Number)
390
Setting Secure Reception
391
Setting Secure Reception (if You Do Not Set a Password)
391
Setting Secure Reception (if You Set a Password)
391
Block Junk Fax
393
Registering (if Selecting [OFF] or [Mode1])
393
Deleting a Registered Number
394
Performing Confidential Communication and Bulletin Board Communication
396
About Fcode Communication
397
Registering an Fcode Box
398
Registering a Confidential Box
398
Registering a Bulletin Board Box
399
Deleting a Registered Fcode Box
401
Sending a Fax to a Destination Confidential Box (Fcode Transmission)
402
Printing a Document that Is Received in the Confidential Box of this Machine
403
Receiving a Document that Is Saved in a Destination Bulletin Board Box by Fax
404
Saving a Document in a Bulletin Board Box of this Machine
405
Deleting a Document in a Bulletin Board Box of this Machine
406
Names and Functions of Screen Items for Internet Fax
407
Basic Procedure for Internet Fax
410
About the Internet Fax Function
411
Sending an Internet Fax
412
Cancelling an Internet Fax Transmission
414
Receiving an Internet Fax
415
Setting the Internet Fax Function
417
Checking, Deleting or Changing a Specified Destination
425
Changing the Destination Type
425
Specifying a File Name (File Name)
441
Specifying a File Compression Rate (Compression Rate)
444
Forwarding Received Document Data to an E-Mail Destination or Shared Folder
445
Saving Sent and Received Data (Transmission Data Save)
449
Sending a Fax from a Computer (PC Fax) (Windows Only)
451
Sending a PC Fax
452
Sending a Fax from a Computer with a Cover Sheet
453
Sending a PC Fax to Multiple Destinations at the same Time
455
Cancelling a PC Fax Transmission
456
Managing the PC Fax Phone Book
460
Registering a Destination Fax Number
461
Registering Multiple Destinations as a Group
462
Exporting the Phone Book Data to a CSV File (Export)
463
Importing the Phone Book Data that Is Exported to a CSV File (Import)
464
Importing the Phone Book Data
464
Associating a New Definition with the Phone Book Format
464
Basic Procedure for Scan to Fax Server
467
Sending Data to the Fax Server
468
Enabling the Scan to Fax Server Function
469
Editing a Destination E-Mail Address
470
Editing E-Mail Body Text
471
Checking the Menu Hierarchy of the Fax Functions (Menu Tree)
472
Basic Information
474
Names of Components
475
Front of the Main Unit
476
Rear of the Main Unit
478
Inside the Main Unit
479
Basic Operations on the Operator Panel
480
Names and Functions
481
Name of each Component on the Touch Panel and How to View the Screen
482
Home Screen
482
Entering Characters
484
Entering with the Touch Panel
485
About the Entry Screen
485
Entering Characters
485
Switching the Entry Mode
486
Deleting an Entered Character
486
Entering with the 10-Key Pad
487
Checking the Device Information and Status
488
Setting or Checking by Opening the Web Page of this Machine
489
About the Web Page of this Machine
490
About the Operating Environment
490
Opening the Web Page from a Computer
490
Logging in as the Administrator
490
About Items that Can be Set or Checked
493
View Information
493
Paper Setup
493
List
494
Admin Setup
494
Fax Setup
495
Faxserver Function
495
Scanner Setup
495
Copy Setup
495
Internet Fax Setup
495
Print from USB Memory Setup
496
Print Setup
496
Management
496
Job List
496
Direct Print
497
Links
497
Transmission Settings
497
Loading Paper or Envelopes in a Tray
499
About Paper Types that Can be Loaded and Storage Methods
500
Available Paper Types
500
Recommended Paper
500
Paper Storage
501
About Paper Sizes, Weight, and Number of Sheets that Can be Loaded
502
Loading in Tray 1
502
Loading in Tray 2 (Optional)
502
Loading in the MP Tray
502
Loading Paper
504
Loading in Tray 1 or Tray 2
505
Registering the Loaded Paper Size or Other Information in the Machine
511
Registering the Paper Size, Type, or Weight
512
Registering a Custom Size
513
About Paper Output
514
Outputting with the Print Side down (Facedown Stacker)
514
Outputting with the Print Side up (Faceup Stacker)
514
Setting a Document
516
About Documents that Can be Set
517
About Where to Set a Document
517
About Documents that Cannot be Set
517
About the Scannable Area When Copied
518
Setting in the ADF
519
Setting on the Document Glass
520
Saving Power Consumption with the Power Save Function
521
Setting Power Save Mode
522
Exiting Power Save Mode to Standby Mode
522
Opening the Web Page of this Machine from a Computer
523
Using Configuration Tool (Windows Only)
524
Using the Operator Panel
525
Setting Sleep Mode
526
About Restrictions in Sleep Mode and Deep Sleep Mode
530
The Machine Does Not Enter Deep Sleep Mode
530
Cannot Print
530
Cannot Search or Set
530
Reducing Power Consumption by Automatically Turning the Machine off
531
About the Auto Power off Function Setting Items
532
Setting Auto Power off
533
Enabling Auto Power off
536
Setting the Transition Time
536
How to Customize the Touch Panel
537
Setting a Home Icon on the Home Screen
537
Setting a Shortcut Button of each Function
538
Operating a Frequently-Used Setting with a One-Touch Button (JOB MACRO)
539
Registering a Frequently-Used Setting as a Macro
540
Registering Newly
540
Using a Registered Macro
541
Checking the Macro Content
542
Editing a Macro Title
543
Deleting a Registered Macro
544
Adjusting Volume
545
Adjusting the Key Touch Tone Volume on the Operator Panel
546
Adjusting the Fax Monitor Sound
547
Adjusting the Fax and Phone Ring Volume
548
Adjusting the Fax Completion Volume
549
Switching this Machine Online
550
Windows Operation
551
Displaying the Property Screen of the Printer Driver
552
Windows 8.1
553
Windows Vista
554
Windows Server 2012 R2
555
Windows Server 2008 R2
556
Windows Server 2008
557
Displaying the Print Setup Screen of the Printer Driver
558
Troubleshooting
565
Is an Error Code or Error Message Displayed on the Operator Panel?
565
If an Error Message Is Displayed on the Operator Panel
566
Checking an Error Message (Error Message Search)
567
If a "Paper Jam" Message Is Displayed
568
If the Error Code Is "372"
569
If the Error Code Is "380", "381", "382", "385" or "389"
573
If the Error Code Is "390"
579
If the Error Code Is "391" or "392"
583
If the "Document Jam" Message Is Displayed
586
If a Document Is Visible in the Duplex Paper Path
587
If a Document Jams in the ADF (Automatic Document Feeder)
588
If the STATUS Button Lights up or Flashes on the Operator Panel
590
Checking the Problem Status
590
Checking the Device Situation and Job Status
590
If Paper in the Tray or the Set Document Is Not Fed Properly
591
If You Cannot Install a Printer Driver
593
USB Connection Problems (for Windows)
593
If Configuration Tool Has a Problem
594
[Device Setting] Tab
594
[User Setting] Tab
594
If a Power Failure Occurs
596
The Operation of the Machine
596
Stored Fax Data
596
About Problems of each Function
597
Copy Problems
598
Unable to Copy
598
The Copied Output Is Different from the Original Document
599
Problems after Starting Copying
599
Scan Problems
600
Print Problems
602
General Causes
602
Network Connection Problems
602
Usb Connection Problems
603
Fax Problems
604
Unable to Send a Fax
604
Unable to Receive a Fax
604
Airprint Problems
606
Google Cloud Print Problems
607
An Error Code Is Displayed on the Panel
607
About Problems with Printing Results
609
List of Examples of Problems
610
Vertical White Lines Appear
612
Printed Images Are Fading Vertically
613
Printed Images Are Light
614
White Spots and Lines Appear
615
Vertical Lines Appear
616
Horizontal Lines and Spots Appear Periodically
617
White Area on Paper Is Lightly Stained
618
The Periphery of Characters Is Smudged
619
The Entire Paper Area Is Lightly Stained When Printing on Envelopes or Coated Paper
620
Toner Comes off When Printed Paper Is Rubbed
621
Uneven Gloss
622
Black or White Dots Appear
623
Dirt Is Printed
624
The Entire Page Is Printed Black
625
Nothing Is Printed
626
White Patches Appear
627
The Entire Page Is Dirty
628
The Peripheral Area of the Page Is Dirty
629
The Printed Image Is Skewed
630
Other Problems
631
About Restrictions on each os
633
Windows Server 2003 Service Pack 1
635
Restrictions on Windows Firewall
635
Mac os X
636
Checking and Changing the Settings of this Machine
637
Setting Menu Items and Functions of this Machine
638
Reports
639
Address Book
643
Phone Book
644
Profile
645
Configure One Touch Button
648
Network Scan Destination
649
Store Document Settings
650
Easy Setup
653
Airprint
655
Google Cloud Print
656
Wireless Setting
657
Enabling Wired Communications
658
Administrator Setup
659
Copy Setup
660
Internet Fax Setup
666
Network Menu
675
Configure Home Screen
678
Setting Menu Hierarchy of this Machine (Menu Tree)
684
Using the Web Page of this Machine
720
Changing the Administrator Password
720
Changing the Settings of this Machine
720
Obtaining the Date Automatically
721
About Configuration Tool
723
Configuration Tool
723
List of Icons Used in Configuration Tool
725
Installing Configuration Tool
728
Registering and Removing this Machine
733
Importing and Exporting Destination E-Mail Addresses
735
Exporting Addresses to a File
735
Importing Addresses from a File
735
Importing and Exporting Speed Dials of Destinations
737
Exporting Speed Dials to a File
737
Importing Speed Dials to a File
737
Setting Profiles
739
Exporting Profiles to a File
739
Importing Profiles from a File
739
Setting a Network Scan
741
Exporting Network Scan Settings to a File
741
Importing Network Scan Settings from a File
741
Deleting Network Scan Settings
741
Setting the Device Setting Plug-In
743
Saving Settings to a File
743
Restoring Settings from a File
743
Setting a Password
744
Setting the Alert Info Plug-In
745
Basic Settings
745
Device Settings
745
Filter Settings
746
Checking Logs
746
Setting the Network Setting Plug-In
748
Searching for the Machine on a Network
748
Specifying Search Conditions
748
Changing the IP Address
748
Cloning Settings
750
Cloning the Settings of this Machine
750
Cloning User Settings
750
Setting the Storage Manager Plug-In
751
Registering Forms (Form Overlay)
752
Creating a Form
752
Registering the Form to the Machine Using Configuration Tool
752
Checking the Free Space in Memory
754
Deleting Unnecessary Jobs from Memory
755
Using Network Extension (Windows Only)
757
About Network Extension
757
Starting the Utility
757
Checking the Settings of the Machine
757
Set Options Automatically
758
Uninstall the Utility
758
Changing the Detailed Settings of a Network
759
Network Setting Items
760
Device Information
761
Tcp/Ip
762
Nbt
763
Mail Server Settings
764
E-Mail Reception Settings
766
E-Mail Alert Settings
767
Snmp
769
SNMP Trap
770
Ipp
771
Windows Rally
772
Ieee802.1X
773
Secure Protocol Server Settings (Kerberos)
774
LDAP Server Settings
775
Security
776
IP Filtering
777
MAC Address Filtering
778
Encryption (SSL/TLS)
779
Ipsec
780
Maintenance
781
Time Setup (SNTP Settings)
782
Opening the Web Page of this Machine from the Computer
784
Using Network Card Setup in Mac os X
786
Setting the IP Address
787
Configuring Web Settings
788
Enabling Web Settings
788
Opening the Web Page
788
Quitting Network Card Setup
789
Changing the Display Language on the Operator Panel
790
Checking or Changing the Image Quality
799
Adjusting the Contrast When Copying
801
Adjusting the Contrast When Scanning
802
Adjusting the Scan Color
803
Adjusting the Hue (Hue)
804
Adjusting the Saturation (Saturation)
805
Adjusting RGB (RGB)
806
Adjusting the Density When Copying
808
Adjusting the Density When Scanning
809
Adjusting the Density When Printing
810
Adjusting the Density When Faxing
811
About the Included Utility Software
812
Installing Software
813
Installing from the "Software DVD-ROM"
814
List of Utility Software
815
Windows Utilities
815
Mac os X Utilities
815
Replacing Consumables
818
Cautions When Replacing
819
Replacing the Toner Cartridge
821
Replacing the Image Drum
825
Before Replacing
826
Replacing the Image Drum Only
827
Replacing the Image Drum and Toner Cartridge at the same Time
830
Cleaning each Part of the Machine
834
Cleaning the Surface of the Machine
835
Cleaning the Document Glass
836
Cleaning the Document Feed Roller
837
Cleaning the Paper Feed Rollers
839
Tray 1 and Tray 2 (Optional)
840
Cleaning the LED Head
844
Updating Installed Drivers
846
Updating Drivers (Windows)
847
Updating the Printer Driver
848
Updating the Fax Driver
849
Updating the Scanner Driver
850
Updating Drivers (Mac os X)
851
Removing Drivers (Windows)
855
Removing the Printer Driver
856
Removing the Fax Driver
857
Removing the Scanner Driver
858
Removing Drivers (Mac os X)
859
Preparations Required
863
Installing this Machine
864
Installation Requirements
865
Installation Environment
865
Installation Space
865
Checking the Accessories
867
Unpacking and Installing the Machine
868
Installing Options (Purchasers Only)
873
Installing the Second Tray Unit (Optional) to the Machine
874
Installing the Second Tray Unit (Optional)
874
Setting the Printer Driver
876
Setting Tray 2 (Optional) to the Windows PCL Printer Driver
877
Setting Tray 2 (Optional) to the Windows XPS Printer Driver
877
Setting Tray 2 (Optional) to the Mac os X Printer Driver
878
Turning the Machine on or off
879
About the Power Supply
880
Turning the Machine on
881
Turning the Machine off
883
What You Should Do if You Do Not Use this Machine for an Extended Period of Time
884
Checking the Operations of this Machine
885
Performing a Test Print
886
Checking Copy Operation
887
Connecting this Machine to a Network
890
Connecting to a Wireless LAN (Network Connection) (Mb562Dnw, Es5162Dnw Only)
891
Preparations to Use a Wireless LAN
891
Checking the Wireless LAN Setting Method
891
Connecting with WPS
892
Selecting a Wireless LAN Access Point from the Operator Panel to Connect
895
Setting from the Operator Panel Manually to Connect
898
Checking that Connection Is Established Correctly
901
Connecting with a LAN Cable (Network Connection)
902
Setting an IP Address from the Operator Panel on this Machine
904
Obtaining Automatically
905
Setting Manually
906
Using the Software DVD-ROM (for Windows)
908
Connecting a Computer to this Machine Via a USB Interface
915
Register the E-Mail Address of the Machine and Server Information
916
Using Configuration Tool
917
Setting [From]
918
Setting the Reception Protocol to [POP3]
920
Setting the Reception Protocol to [SMTP]
922
Setting the Reception Protocol to [Disable]
924
Registering from the Web Page
926
Registering from the Operator Panel
933
Using the Software DVD-ROM with Network Connection (for Windows)
937
Setting the Reception Protocol to [None]
944
Using the Software DVD-ROM with USB Connection (for Windows)
947
Registering or Deleting a Destination E-Mail Address
957
Registering an E-Mail Address
959
Registering Multiple Addresses as a Group (E-Mail Group)
961
Deleting a Registered Destination
963
Deleting an E-Mail Address
963
Deleting an E-Mail Group
964
Registering or Deleting from the Operator Panel
966
Registering an Address by Entering Characters One by One
967
Registering a Specified Destination (History)
968
Installing a Driver and Software to a Computer
978
Installing Software with Recommended Install
980
Installing Software You Want to Use with Custom Install
982
Installing the Scanner Driver
993
Installing the Printer Driver
994
Installing the Scanner Driver
997
Functions that You Use and Required Drivers
999
Items to Set and Setting Methods
999
Setting the Print Functions
1000
Setting Scan to E-Mail
1001
Without Using the Software DVD-ROM
1002
Creating a Shared Folder in a Computer
1006
Setting Information Sheet
1006
Registering a Destination (Profile)
1014
Registering a Destination (Profile) from Configuration Tool
1015
Registering a Destination (Profile) from the Web Page
1017
Registering a Destination (Profile) from the Operator Panel
1019
Changing or Deleting a Registered Destination (Profile)
1020
Changing a Profile
1021
Deleting a Profile
1022
Deleting a Profile
1025
Registering or Deleting a Destination (Profile) from the Operator Panel
1027
Setting Remote Scan
1035
About the Fax Functions
1037
Setting the Country Code
1038
Connecting a Telephone Line
1039
Connecting to the Public Line (if Using Only for Faxes)
1040
Connecting to the Public Line (if Connecting a Telephone to the Machine)
1041
Connecting to the ADSL Environment
1043
Connecting the Optical IP Telephone
1044
Connecting a CS Tuner or Digital Television
1045
Connecting PBX, Home Telephone or Business Phone
1046
Connecting as an Extension Telephone
1047
Registering the Date and Time
1048
Registering the Fax Numbers and Sender Name
1050
Setting the Telephone Line Type to Use
1051
Setting for Using a Private Branch Exchange (PBX)
1052
Changing the Super G3 Setting
1053
Setting a Reception Mode
1054
Registering or Deleting a Fax Number
1055
Registering Speed Dial
1056
Registering Multiple Addresses as a Group (Group Dial)
1057
Deleting a Registered Speed Dial Number
1058
Deleting a Registered Group Dial Number
1059
Registering Fax Numbers by Entering One by One
1061
Registering a Destination that was Specified before (History)
1061
Setting Internet Fax
1072
For Your Safety
1082
Cautions Related to Safety
1083
General Cautions
1084
Operating Management Tips
1086
Changing from a Computer
1088
Changing from Configuration Tool
1088
Changing from this Machine
1090
Checking the Status of this Machine
1091
Checking the Remaining Amount of Consumables
1092
Checking from a Computer
1093
Checking from Configuration Tool (for Windows)
1093
Checking the Device Status
1094
Checking the Status of this Machine by Printing a Menu Map
1094
Check the Number of Scanned Pages and Number of Printed Pages
1095
Checking the Status of this Machine and Error by E-Mail
1098
Setting to Send an E-Mail from this Machine
1099
Setting to Send an E-Mail from this Machine Regularly
1100
Setting to Send an E-Mail from this Machine Only if an Error Occurs
1101
Checking the Network Setting Information
1102
Checking the Status of this Machine by Using Snmpv3
1105
Checking the Print Status
1106
Preventing Wrong Fax Transmissions
1107
Matching the Number of the Destination and the Specified Number
1108
Setting this Machine
1109
Sending with ID Check Transmission
1110
Checking the Specified Multiple Destinations (Checking Broadcast Destinations)
1111
Checking Broadcast Destinations before Sending
1113
Entering the Fax Number Twice (Confirm Dial)
1114
Sending by Using Confirm Dial
1116
Checking the Transmission and Reception Results
1117
Checking the Scan Transmission History
1118
Printing the Fax Communication Results (Communication Management Report)
1119
Convenient Settings for Transmission and Reception
1120
Checking the Delivery Status of the Transmitted Data
1121
Notifying the Sender of the Processing Status of the Received Data
1122
Changing the Basic Settings of this Machine
1123
Changing the Initial Value of each Function
1124
Limiting the User by Using the PIN (Personal Identification Number)
1125
About User Authentication
1126
Registering a PIN from Configuration Tool (Windows Only)
1128
Creating a New PIN
1128
Changing PIN Settings
1128
Deleting a PIN
1128
Exporting a PIN to a File
1129
Importing a PIN from a File
1129
Enabling the User Limit
1130
About Operation if the PIN (Personal Identification Number) Is Enabled
1131
Logging in and Logging out
1132
Logging in to the Machine (for General Users)
1132
Logging in to the Machine (for the Administrator)
1132
Logging out from the Machine
1132
Printing in the Windows Environment
1134
Printing in the Mac os X Environment
1136
Using the Mac os X PS Printer Driver
1136
Using the Mac os X PCL Printer Driver
1136
Faxing in the Windows Environment
1138
Limiting Users with User Names and Passwords
1139
Registering a User Name and Password from the Web Page of this Machine on a Computer
1141
Registering a User Name and Password from Configuration Tool (Windows Only)
1142
Creating a New User
1142
Changing User Settings
1142
Deleting a User
1143
About Operation if the User Name and Password Are Enabled
1145
Logging in to the Machine
1146
Limiting Computers that Can Access this Machine
1151
Limiting by Using an IP Address (IP Filtering)
1152
Limiting by Using a MAC Address (MAC Address Filtering)
1153
Setting the User Name and Job Account ID to the Printer Driver (Print Job Accounting Client)
1154
Setting in the Windows Environment
1155
Setting the User Name and Job Account ID
1155
Setting Popup Mode
1155
Setting a Job Account ID for each User in Hide Mode
1156
Setting in the Mac os X Environment
1157
Registering a User ID
1157
Registering Multiple Users at the same Time
1157
Changing a User ID and User Name
1158
Deleting a User ID and User Name
1158
Improving Security by Encrypting Communication over a Network
1159
Encrypting Communication with SSL/TLS
1160
Creating a Certificate
1161
Importing a Certificate
1162
Enabling Encryption Settings
1163
Setting this Machine as the IPP Printer in a Windows Environment
1164
Setting this Machine as the IPP Printer in a Mac os X Environment
1165
Encrypting Communication with Ipsec
1166
Creating an IP Security Policy
1168
Setting Key Exchange
1168
Setting an IP Filter
1169
Setting Filter Actions
1169
Assigning an IP Security Policy
1170
Connecting this Machine to the Authentication Network by Using IEEE802.1X
1171
Setting by Using PEAP
1172
Setting by Using EAP-TLS
1173
Setting the Network According to the Usage Environment and Application
1174
Setting the LDAP Server
1175
Setting Secure Protocol
1176
Using DHCP
1177
Setting the DHCP Server
1178
Using this Machine in the Ipv6 Environment
1182
About Ipv6
1183
Checking the Ipv6 Address
1184
Changing the Operation Mode of the Printer (Emulation)
1185
Printing by Using OKI LPR Utility
1186
Starting OKI LPR Utility
1187
Registering a Printer to OKI LPR Utility
1188
Adding a Comment to a Registered Printer
1189
Checking the Status of a Registered Printer
1190
Forwarding Print Jobs to a Registered Printer
1191
Forwarding the Selected Print Jobs
1192
Forwarding Print Jobs Automatically
1193
Printing the same Document from the Registered Multiple Printers
1194
Opening the Web Page of the Registered Printer
1195
Following the IP Address of the Registered Printer Automatically
1196
Setting the OKI LPR Utility Port Number
1197
Uninstalling OKI LPR Utility (Uninstall)
1198
Moving or Transporting this Machine
1199
Moving this Machine
1200
Transporting this Machine
1201
Initializing Memory and Settings
1203
Initializing Flash Memory
1204
Initializing the Equipment Settings
1205
Initializing the Network Settings
1206
Initializing from Setting Menus of this Machine
1206
Initializing from the Operator Panel of this Machine (Boot Menu)
1206
Initializing the Job Macro and Fax Transmission and Reception Data
1208
Specifications
1209
General Specifications
1210
Copier Specifications
1211
Fax Specifications
1212
PC Fax Specifications
1213
Internet Fax Specifications
1214
Scanner Specifications
1215
Scan to E-Mail Specifications
1216
Scan to Network PC Specifications
1217
Scan to USB Memory Specifications
1218
Scan to Local PC Specifications
1219
Printing Specifications
1220
Printing from USB Memory Specifications
1222
Network Specifications
1223
Wireless LAN Specifications
1224
Environmental Information
1227
Advertisement
Advertisement
Related Products
Oki ES 1624n MFP
Oki ES1624n MFP
OKI ES9470 MFP
Oki ES1624nCCS
Oki ES9160 MFP
Oki ES8462MFP
Oki ES3032a4
Oki ES9170
Oki ES8451+
Oki ES8453 MFP
Oki Categories
Printer
All in One Printer
Printer Accessories
Fax Machine
Label Maker
More Oki Manuals
Login
Sign In
OR
Sign in with Facebook
Sign in with Google
Upload manual
Upload from disk
Upload from URL