Sign In
Upload
Manuals
Brands
Panasonic Manuals
Camcorder
AJ-D400P
Panasonic AJ-D400P Manuals
Manuals and User Guides for Panasonic AJ-D400P. We have
4
Panasonic AJ-D400P manuals available for free PDF download: Service Manual, Operating Instructions Manual
Panasonic AJ-D400P Service Manual (867 pages)
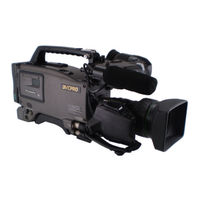
DVCPRO Series Camera Recorder
Brand:
Panasonic
| Category:
Camcorder
| Size: 42.59 MB
Table of Contents
Service Information
3
Table of Contents
3
Setting Menu
4
1 Service Menu
5
How to Open the Service Menu
5
Service Adj Menu Screen
5
Vtr D/A Data Menu Screen
6
Battery Setting Menu Screen
7
White Shading Menu Screen
8
2 Design Menu Screen
9
How to Reset the HOUR METER
10
Hour Meter Reset Menu Screen
10
Sbc Option Menu Screen
11
3 Option Menu Screen
12
How Open the Option Menu
12
Auto off Information
13
Maintenance/Disassembly Procedures & Mechanical Adjustment
14
Maintenance Parts
16
Maintenance Schedule
16
Parts Location
17
JIG & Tools
18
Recommended Test and Service Equipment
21
Boards Location
22
Alignment Tapes
23
Disassembly Procedures
24
Removal of Cassette Cover
24
Removal of Left Side Panel
24
Removal of Right Side Panel
24
Removal of Mechanical Chassis Unit
25
Removal of Drum Unit
26
Removal of Cassette up Unit
26
Removal of Camera Unit
27
Emergency Eject
28
Cleaning Procedures
29
Cleaning of Head Chips: (Daily)
29
Cleaning of Drum Lead: (Weekly)
29
Cleaning of A/C Head: (Weekly)
29
Cleaning of Pinch Roller and Capstan: (Weekly)
29
Cleaning of Post: (Weekly)
29
Mechanical Parts Replacement and Adjustment Procedures
30
Drum Unit Replacement
30
Adjustment Flow Chart after Drum Unit Replacement
32
A/C Head Replacement
33
Replacement
33
Adjustment Flow Chart after A/C Head Replacement
34
Supply Reel Rotor Unit and Take up Reel Rotor Unit Replacement
35
Loading Motor Unit Replacement
37
Pinch Arm Unit Replacement
37
M Cassette Brake Base Unit Replacement
38
Mode Select Switch Unit Replacement
38
Cleaning Arm Unit Replacement
39
T1 Guide Position Adjustment
39
S & T Brake Arm Unit Replacement
40
Pinch Solenoid Replacement
41
MIC Base Unit Replacement
41
S1 Post Loading Arm Unit Replacement and Adjustment
42
T1 Boat Unit Replacement
43
Cleaner Solenoid Replacement and Adjustment
43
Cleaner Solenoid Position Adjustment
44
Cleaner Roller Position Adjustment
45
S5 Post Base Unit Replacement
45
Tension Arm Unit Replacement
46
Main Cam Gear Replacement
47
T4 Post Phase Adjustment
47
Thrust Adjustment Screw Replacement
48
Mechanical Adjustment
49
Mechanical Adjustment Procedures
49
Pinch Solenoid Position Adjustment
50
Main Brake Torque Confirmation
51
Post Height Pre-Adjustment
52
Tension Adjustment Flowchart
53
Tension Offset Adjustment
54
Tension Arm Neutral Position Adjustment
55
Tension Arm PLAY and REV Voltage Adjustment
56
Tension Regulator Spring Adjustment
57
REV Tension Confirmation
58
Tension Confirmation
59
Tape Pass Adjustment Procedure
60
Envelope Waveform Adjustment
61
Post Limit Confirmation (PLAY)
62
A/C Head Adjustment Method
63
A/C Head Tilt Adjustment
64
A/C Head Height Adjustment
65
A/C Head Azimuth Adjustment
66
A/C Head Tilt Confirmation
67
A/C Head Height Confirmation
68
A/C Head Azimuth and X-Value Adjustment
69
REV Tape Pass Confirmation and Adjustment (T4 Post Height Adjustment)
70
CTL Self Recording Level Confirmation
71
PLAY Tape Pass Limit Confirmation
72
Confirmation of Envelope on REV, REW and FF Mode
73
Confirmation of Play Start Envelope
74
Tape Pass Limit Confirmation
75
FF, REW Tape Pass Limit Confirmation
76
Screw Lock Tight of A/C Head and T3, T4 Post
77
LISTA Adjustment Procedure
78
LISTA Connection and Boot up
79
How to Entry the Attachment Data of Alignment Tape
80
LISTA Sensitivity Adjustment
81
LISTA Sensitivity Detection
82
LISTA Linearity Adjustment and Waving Measurement
83
Self-Recording Playback Envelope Waveform Confirmation
85
Electrical Adjustment
87
Recommended Test and Measuring Equipment
91
Electrical Adjustment Procedures
91
Function (Ver.3.2)
92
Setup of EVR Tool
92
Direct Functions
93
Start Adjustment
93
Camera Section> 1. Head Optical Ass'y 1
94
Reset Pulse Adjustment
94
Clamp Pulse Adjustment
94
Sample Pulse Adjustment
95
Reset DC Adjustment
95
Carrier Leak Adjustment
96
CDS out DC Adjustment
96
SUB Voltage Adjustment 1
97
SUB Voltage Adjustment 2
97
2 Video Main and DSP
98
Initial Setting
98
D3.0V Adjustment
98
Ref DC for A/D Adjustment
98
3 Encoder
99
Y & SYNC Levels Adjustment 1
99
Pr Level Adjustment
99
Pb Level Adjustment
100
CAM DC Adjustment
100
Carrier Balance Adjustment
101
Y & SYNC Levels Adjustment 2
101
Burst Level & Vector Adjustment
102
Video out & Sync Adjustment
102
Return Video Level Adjustment
103
Mon Enc Level Adjustment
103
4 Sync
104
Connection
104
4Fsc VCO Adjustment
104
SCH Phase Adjustment
104
System Phase Adjustment 1
105
System Phase Adjustment 2
105
REF SCH Adjustment (for PAL Only)
106
REF SCH Adjustment (for NTSC Only)
106
Test Signal Level Adjustment
106
5 Head Optical Ass'y 2
107
AWB Preset Level Adjustment
107
RGB Pedestal Adjustment
107
0% ABB Adjustment
107
RGB Test Signal Level Adjustment
108
RGB A/D Input Level Adjustment 1
108
RGB A/D Input Level Adjustment 2
109
Shading Balance Adjustment
109
RGB Pedestal Tracking Adjustment
110
RGB Sample & Hold Level Adjustment 1
110
Vertical Pattern Noise Confirmation & Adjustment
111
CDS DC Adjustment
111
High-Light Carrier Level Adjustment
111
Analog White Shading Adjustment
112
Digital White Shading Adjustment
112
Auto Dark Shading Adjustment
113
Digital Dark Shading Adjustment
113
Flare Correction Adjustment
113
Modulation Adjustment
115
Modulation Confirmation
115
VTR Section
116
6 Video Main & Video I/F
116
Audio VCO Adjustment
116
DA C Level Adjustment (for NTSC Only)
116
Sync Level Adjustment (for NTSC Only)
117
Y Level Adjustment (for NTSC Only)
117
Burst Level Adjustment (for NTSC Only)
118
Y Frequency Adjustment (for NTSC Only)
118
Y/C Timing Adjustment (for NTSC Only)
119
Video AD Input Level Adjustment (for NTSC Only)
119
APC Adjustment (for NTSC Only)
120
Out Bias Adjustment (for NTSC Only)
120
Hue Adjustment (for NTSC Only)
121
PLL POS Adjustment
121
ENC & Sync Level Adjustment (for PAL Only)
122
Carrier Balance Adjustment (for PAL Only)
122
Burst Phase Adjustment (for PAL Only)
123
QUAD Adjustment (for PAL Only)
123
Burst Level Adjustment (for PAL Only)
123
Croma Level Adjustment (for PAL Only)
123
Y/C Timing Adjustment (for PAL Only)
124
Pb Timing Adjustment
124
Pr Timing Adjustment
125
Y Clamp DC Adjustment
125
Y Level Adjustment
126
DEC y Level Adjustment (for NTSC Only)
126
Camera Input Vector Adjustment
127
Video Input Vector Adjustment (for NTSC Only)
127
7 Servo
128
Reel Torque Offset Adjustment
128
Tension Offset Current Adjustment
128
System Hook up Setting
129
PLL VCO Adjustment
129
R/P Envelope Level Confirmation
130
PB Envelope Level Adjustment
130
HSE Input Confirmation
130
PB Equalizer Adjustment (Auto)
130
Confidence PB Envelope Level Adjustment
132
Final Confirmation
133
Auto Adjustment System Normalization (Calibration) Procedures
133
[ Manual Adjustment ]
134
Initial Setting (Manual)
134
PB Equalizer Adjustment 1 (Manual)
135
PB Equalizer Adjustment 2 (Manual)
135
Rec. Curr. & Freq. (L Ch) Adjustment (Manual)
136
Rec. Curr. & Freq. (R Ch) Adjustment (Manual)
136
9 Audio LCD
138
Initial Setting
138
Playback Level Adjustment
138
Recording Level Adjustment
139
Meter Adjustment
139
Test SG Adjustment
140
CUE Recording Level Adjustment
140
CUE Recording Current Adjustment
141
Final Setting
141
10 Evf
142
Preparation
142
H Free Run Adjustment
142
Free Run Adjustment
142
Sub Bright Adjustment
142
Rotation Adjustment
143
Centering Adjustment
143
Size Adjustment
144
Linearity Adjustment
144
Balance Adjustment
144
Bright Adjustment
144
Focus Adjustment
144
Block Diagrams
147
Schematic Diagrams
148
Table of Contents
369
Features of the Camera Section
371
General and Features
371
Features of the VTR Section
374
System Configuration
375
Controls and Their Functions
376
Power Supply Section
376
Accessory Mounting Section
377
Audio Function Section
378
Shooting (Recording)/Playback Function Section (1
380
Menu Operation Section
386
Time Code-Related Section
386
Warning/Status Display Section
388
Power Supply
389
Using an Anton Bauer Battery
389
Pack
389
Using the Panasonic AU-BP402
390
Using a Sony Battery Pack
392
Using the Sony BP-90 Battery Pack
393
Using an AC Power Supply
394
Mounting the Lens
395
Adjusting the Lens Flange
396
Adjusting the White Shading
397
Adjusting the Viewfinder
399
Adjusting the Position
399
Adjusting the Diopter and Screen
400
Adjusting the Eyecup Position
400
Detaching the Eyecup
401
Viewfinder
401
Audio Input Preparations
403
Main Unit
403
Using the Microphone Kit
403
Mounting the AJ-MH700P Microphone Holder (Option)
404
Connecting an Audio Component
406
Mounting the Unit to a Tripod
407
Adjusting the Shoulder Pad Position
408
Attaching the Rain Cover
409
Connecting the AJ-EC2/AQ-EC1
410
Setting Menu Configuration
411
Warning/Status Displays in the Viewfinder and Display Window ¡Displaying the Setting Menu Inside the Viewfinder
411
Basic Setting Menu Operations
413
Lamp Displays Inside the Viewfinder
415
Setting the ! Lamp Display
416
Status Displays Inside the Viewfinder Screen
417
Selecting Display Items
420
Display Mode and Setting Change
421
Message
421
Changing the Display Mode
422
Setting the Marker Displays
422
Setting the Camera ID
423
VTR Section Operation/Status-Related Displays
424
Time Code-Related Displays
425
Adjusting the Time and Date
426
Adjustments and Setup During Recording ¡Adjustments and Setup Using the Setting Menu
427
Setting the Gain Selector Value
428
Selecting Functions
429
Adjusting the White Balance
430
Adjusting the White Balance/Black Balance
430
Adjusting the Black Balance
433
Setting the Electronic Shutter
435
Shutter Modes
435
Setting the Synchro Scan Mode
437
Setting the Time Code
441
Setting the Time Data
441
Setting the User Bit
442
Source
444
External Lock Operation Procedure
444
Cassettes
445
Inserting and Ejecting Cassettes
445
Preventing Accidental Erasure
446
Basic Procedures
447
Recording
447
Successive Shooting
450
Colour Playback
452
Playback-Checking Recorded Contents
452
Rec Review
452
Connection with an External VTR
453
Recording Simultaneously with the Internal VTR and an External
454
Vtr
454
Using the 26-Pin Output Adaptor
456
RET Button
458
Replacing the Backup Battery
459
Setting Menu Screens
460
Warning System
482
Emergency Eject
484
Error Codes
484
Cleaning the Video Heads
485
Cleaning the Viewfinder
485
Cameras
485
Condensation
485
Maintenance
485
Inspecting the Camera Section
486
Inspection Preparations
486
Inspections before Shooting
486
Inspecting the Viewfinder
487
Inspecting the Iris and Zoom Functions
488
Inspecting the VTR Section
488
Camera Section
490
Specifications ¡General
490
Viewfinder
490
Accessories
491
VTR Section
491
Related Components
492
Table of Contents
496
Changing the Iris Automatic Adjustment Reference Value
497
Changing the Shutter Speed/Mode
497
Selection Range
497
Features of the Camera Section
498
General and Features
498
Features of the VTR Section
501
System Configuration
502
Controls and Their Functions
503
Power Supply Section
503
Accessory Mounting Section
504
Audio Function Section
505
Shooting (Recording)/Playback Function Section (1
507
Menu Operation Section
513
Time Code-Related Section
513
Warning/Status Display Section
515
Power Supply
516
Using an Anton Bauer Battery
516
Pack
516
Using the Panasonic AU-BP402
517
Using a Sony Battery Pack
519
Using the Sony BP-90 Battery Pack
520
Using an AC Power Supply
521
Mounting the Lens
522
Adjusting the Lens Flange
523
Adjusting the White Shading
524
Adjusting the Position
526
Adjusting the Viewfinder
526
Adjusting the Diopter and Screen
527
Adjusting the Eyecup Position
527
Detaching the Eyecup
528
Viewfinder
528
Audio Input Preparations
530
Main Unit
530
Using the Microphone Kit
530
Mounting the AJ-MH700P Microphone Holder (Option)
531
Connecting an Audio Component
533
Mounting a Wireless Microphone
533
Mounting the Unit to a Tripod
534
Adjusting the Shoulder Pad Position
535
Attaching the Rain Cover
536
Connecting the AQ-EC1 Extension Control Unit (Option)
537
Viewfinder
538
Setting Menu Configuration
538
Basic Setting Menu Operations
540
Lamp Displays Inside the Viewfinder
542
Setting the ! Lamp Display
543
Status Displays Inside the Viewfinder Screen
544
Selecting Display Items
547
Display Mode and Setting Change Message
548
Changing the Display Mode
549
Setting the Marker Displays
549
Setting the Camera ID
550
Displays
551
VTR Section Operation/Status-Related Displays
551
Time Code-Related Displays
552
Adjusting the Time and Date
553
Adjustments and Setup During Recording Adjustments and Setup Using the Setting
554
Setting the Gain Selector Value
555
Selecting Functions
556
Adjusting the White Balance/Black Balance Adjusting the White Balance
557
Adjusting the Black Balance
560
Setting the Electronic Shutter
562
Shutter Modes
562
Setting the Synchro Scan Mode
564
Changing the Shutter Speed/Mode Selection Range
565
Adjusting the Audio Level
566
Setting the Time Code
568
Setting the Time Data
568
Setting the User Bit
569
Locking the Time Code to an External Source
570
External Lock Operation Procedure
571
Cassettes
572
Inserting and Ejecting Cassettes
572
Preventing Accidental Erasure
573
Basic Procedures
574
Recording
574
Successive Shooting
577
Color Playback
579
Playback-Checking Recorded Contents
579
Rec Review
579
Connection with an External VTR
580
Recording Simultaneously with the Internal VTR and an External VTR
581
Recording with an External VTR Instead
583
Using the 26-Pin Output Adaptor
583
RET Button
585
Replacing the Backup Battery
586
Setting Menu Screens
587
Warning System
609
Emergency Eject
611
Error Codes
611
Cleaning the Video Heads
612
Cleaning the Viewfinder
612
Cameras
612
Condensation
612
Maintenance
612
Inspecting the Camera Section
613
Inspection Preparations
613
Inspections before Shooting
613
Inspecting the Viewfinder
614
Inspecting the Iris and Zoom Functions
615
Inspecting the VTR Section
615
Camera Section
617
General
617
Specifications
617
Viewfinder
617
Accessories
618
VTR Section
618
Related Components
619
Evf Block Diagram
639
Cassette Compartment Assembly
671
Evf Assembly
673
Packing Parts Assembly
677
Safety Precautions
757
Advertisement
Panasonic AJ-D400P Operating Instructions Manual (129 pages)
DVCPRO Camera Recorder
Brand:
Panasonic
| Category:
Camcorder
| Size: 2.95 MB
Table of Contents
Specifications
3
Related Components
8
Safety Precautions
9
General Guidelines
9
Leakage Current Cold Check
9
Leakage Current Hot Check
9
For Your Safety
10
Lithium Battery
11
To Remove the Battery
12
Main Power Battery
12
Back up Battery
12
System Configuration
13
Controls and Their Functions
14
Power Supply Section
14
Accessory Mounting Setting
15
Audio Function Section
16
Auto Knee Function
20
Menu Operation Section
24
Time Code Related Section
24
Warning/Status Display Section
26
Power Supply
27
Using an Anton Bauer Battery Pack
27
Using the Panasonic AU-BP402 Battery Pack
28
Using a Sony Battery Pack
30
Using an AC Power Supply
32
Mounting the Lens
33
Adjusting the Lens Flange
34
Adjustment Method
34
Adjusting the Flange Back
34
Adjusting the White Shading
35
White Shading Adjustment Procedure
35
Adjusting the Viewfinder
37
Adjusting the Position
37
Adjusting the Eyecup Position
38
Adjusting the Diopter
38
Adjusting the Screen
38
Detaching the Eyecup
39
Remounting the Eyecup
39
Detaching the Viewfinder
40
Mounting the Viewfinder
40
Audio Input Preparations
41
Using the Microphone Mounted to the Main Unit
41
Using the Microphone Kit
41
Mounting the Microphone Holder
42
Using the Microphone Not Mounted to the Main Unit
43
Mounting a Wireless Microphone
44
Connecting an Audio Component
44
Mounting the Unit to a Tripod
45
Adjusting the Shoulder Pad Position
46
Attaching the Rain Cover
47
Connecting the Extension Control Unit
48
Displaying the Setting Menu Inside the Viewfinder
49
Setting Menu Configuration
49
Changing the Setting Menu Configuration
50
User Mode
50
Engineer Mode
50
Selecting the Desired Item
52
Changing the Settings
52
Returning to the Default Settings
52
Quitting the Menu
52
Lamp Displays Inside the Viewfinder
54
Setting the Lamp Display
54
Status Displays Inside the Viewfinder Screen
55
Selecting Display Items
58
Display Mode and Setting Change Message
59
Changing the Display Mode
60
Setting the Marker Displays
60
Setting the Camera ID
61
Remaining Battery Level and Audio Level Displays
62
VTR Section Operation/Status Related Displays
62
Time Code-Related Displays
63
Adjusting Time and Date
64
Adjusting and Setup Using the Setting Menu
64
Setting the Gain Selector Value
66
Selecting Functions
67
Selecting the Required Functions
67
Adjusting the White Balance
68
When the White Balance Cannot be Automatically Adjusted
70
Error Message Related to White Balance Adjustment
70
When There Is no Time to Adjust the White Balance
70
White Balance Memories
70
Adjusting the Black Balance
71
Setting the Electronic Shutter
73
Shutter Modes
73
Setting the Shutter Mode/Speed
74
Setting the Synchro Scan Mode
75
Changing the Shutter Speed/Mode Selection Range
76
Changing the Iris Automatic Adjustment Reference Value
76
Adjusting the Audio Level
77
Manually Adjusting the Audio Level
77
Limiter
77
Adjusting the Audio CH1 Level from the Viewfinder
77
When the Optimal Level Cannot be Set
78
Setting the Time Data
79
Setting the Time Code
79
Setting the User Bit
80
Locking the Time Code to an External Source
81
Example of Connections for External Locking
81
External Lock Operation Procedure
82
Setting Time Data
82
User Bit Setting During External Locking
82
Releasing the External Lock
82
Cassettes
83
Inserting Cassettes
83
Checking that There Is no Slack in the Tape
83
Preventing Accidental Erasure
84
Ejecting Cassettes
84
Ejecting Cassettes When the Battery Has Run out
84
Recording
85
Procedures from Power Supply Preparations to Inserting a Cassette
85
Shooting Images
87
Successive Shooting
88
While Recording Is Paused
88
Successive Shooting in Order Cases
89
Playback - Checking Recorded Contents
90
Rec Review
90
Color Playback
90
Connection with an External VTR
91
Precautions When Connecting an External VTR
91
TALLY Lamp and REC Lamp Operation
91
Warning Tone
91
Connections
92
Checking the Function Settings
92
Starting Recording
92
If One VTR Comes to the End of Its Tape During Recording
92
Functions of the Unit's VTR SAVE/STBY Switch
93
Tape Running Mode
93
Viewing Playback Images on the Viewfinder
93
Using the 26-Pin Output Adaptor
94
Mounting the 26-Pin Output Adaptor
94
Recording with an External VTR Instead of the Internal VTR
95
Controlling the External VTR with the Unit's Switches
95
Output Level of the 26 Pin Output Adaptor
95
RET Button
96
Lens RET Button Functions
96
Replacing the Backup Battery
97
Setting Menu Screens
98
Marker Screen
98
Menu Screen Display Methods
98
VF Display Screen
99
Camera ID Screen
100
Shutter Speed Screen
100
SYNCRO SCAN Screen
101
LED Screen
101
Main Function Screen
102
Batt/Tape Alarm Screen
102
LOW Setting Screen
107
MID Setting Screen
108
HIGH Setting Screen
109
Level Screen
110
VF Operation Screen
115
Lens ADJ Screen
116
Menu Select Screen
116
Auto Shading Screen
119
Data Reset Screen
119
Diagnostic Screen
119
Warning System
120
Emergency Eject
122
Error Codes
122
Maintenance
123
Condensation
123
Cleaning the Video Heads
123
Cleaning the Viewfinder
123
Inspections before Shooting
124
Inspection Preparations
124
Inspecting the Camera Section
124
Inspecting the Viewfinder
125
Inspecting the Iris and Zoom Functions
126
Inspecting the VTR Section
126
Tape Running Inspections
126
Inspection of Audio Level Automatic Adjustment Functions
127
Inspection of Audio Level Manual Adjustment Functions
127
Earphone and Speaker Inspections
127
Time Code and User Bit-Related Inspections
127
Panasonic AJ-D400P Operating Instructions Manual (128 pages)
DVCPRO Digital Camera/VTR
Brand:
Panasonic
| Category:
Camcorder
| Size: 2.78 MB
Table of Contents
Operating Instructions
1
For Your Safety
2
Safety Precautions
2
Table of Contents
3
General and Features
5
Features of the Camera Section
5
Features of the VTR Section
8
System Configuration
9
Controls and Their Functions
10
Power Supply Section
10
Accessory Mounting Section
11
Audio Function Section
12
Shooting (Recording)/Playback Function Section (1
14
Menu Operation Section
20
Time Code-Related Section
20
Warning/Status Display Section
22
Power Supply
23
Pack
23
Battery Pack
24
Using a Sony Battery Pack
26
Using the Sony BP-90 Battery Pack
27
Using an AC Power Supply (When Using the AJ-B75 AC Adaptor)
28
Mounting the Lens
29
Adjusting the Lens Flange
30
Adjusting the White Shading
31
Adjusting the Viewfinder
33
Adjusting the Position
33
Adjusting the Diopter and Screen
34
Adjusting the Eyecup Position
34
Detaching the Eyecup
35
Detaching and Mounting the Viewfinder
36
Audio Input Preparations
37
Using the Microphone Mounted to the Main Unit
37
Using the Microphone Kit
37
To the Main Unit
37
Mounting the AJ-MH700P Microphone Holder (Option)
38
Using the Microphone Not Mounted to
39
The Main Unit
39
Mounting a Wireless Microphone
40
Connecting an Audio Component
40
Mounting the Unit to a Tripod
41
Adjusting the Shoulder Pad Position
42
Attaching the Rain Cover
43
Connecting the AQ-EC1 Extension Control Unit (Option)
44
Warning/Status Displays in the Viewfinder and Display Window Displaying the Setting Menu Inside the Viewfinder
45
Setting Menu Configuration
45
Basic Setting Menu Operations
47
Returning to the Default Settings
48
Lamp Displays Inside the Viewfinder
49
Setting the ! Lamp Display
50
Status Displays Inside the Viewfinder Screen
51
Selecting Display Items
54
Display Mode and Setting Change Message
55
Changing the Display Mode
56
Setting the Marker Displays
56
Setting the Camera ID
57
Displays
58
Level Displays
58
VTR Section Operation/Status-Related Displays
58
Time Code-Related Displays
59
Adjusting the Time and Date
60
Adjustments and Setup During Recording Adjustments and Setup Using the Setting Menu
61
Setting the Gain Selector Value
62
Selecting Functions
63
Adjusting the White Balance/Black Balance
64
Adjusting the Black Balance
67
Setting the Electronic Shutter Shutter Modes
69
Selecting the Shutter Mode/Speed
70
Setting the Synchro Scan Mode
71
Changing the Shutter Speed/Mode Selection Range
72
Changing the Iris Automatic Adjustment Reference Value
72
Adjusting the Audio Level
73
Setting the Time Data
75
Setting the Time Code
75
Setting the User Bit
76
Locking the Time Code to an External Source
77
External Lock Operation Procedure
78
Cassettes
79
Inserting and Ejecting Cassettes
79
Cassettes Inserting and Ejecting Cassettes
79
Preventing Accidental Erasure
80
Recording Basic Procedures
81
Shooting Images
83
Successive Shooting
84
Playback-Checking Recorded Contents
86
Rec Review
86
Color Playback
86
Connection with an External VTR
87
Recording Simultaneously with the Internal VTR and an External VTR
88
Recording with an External VTR Instead
90
Using the 26-Pin Output Adaptor
90
RET Button
92
Replacing the Backup Battery
93
Setting Menu Screens
94
Vf Display Screen
95
Camera ID Screen
96
Shutter Speed Screen
96
Led Screen
97
Time Date Screen
102
Low Setting Screen
103
MID Setting Screen
104
High Setting Screen
105
Lens Adj Screen
112
Diagnostic Screen
115
Warning System
116
Emergency Eject
118
Error Codes
118
Maintenance
119
Condensation
119
Cleaning the Video Heads
119
Cleaning the Viewfinder
119
Cameras
119
Inspections before Shooting
120
Inspection Preparations
120
Inspecting the Camera Section
120
Inspecting the Viewfinder
121
Inspecting the Iris and Zoom Functions
122
Inspecting the VTR Section
122
Specifications
124
General
124
Camera Section
124
Viewfinder
124
VTR Section
125
Accessories
125
Related Components
126
Advertisement
Panasonic AJ-D400P Operating Instructions Manual (128 pages)
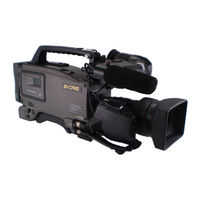
DVCPRO Camera Recorder
Brand:
Panasonic
| Category:
Camcorder
| Size: 2.96 MB
Advertisement
Related Products
Panasonic AJ-D400
Panasonic DVCPRO AJ-D410AP
Panasonic AJ-D400E
Panasonic AJ-D400PE
Panasonic AJD200P - DVC PRO
Panasonic AJD215 - DVCPRO CAMCORDER
Panasonic AJD900W - DVC PRO 50 CAMCORDER
Panasonic AJ-D610WBp
Panasonic AJ-D908MC
Panasonic AJ-D910WAE
Panasonic Categories
Camcorder
Air Conditioner
TV
Digital Camera
Cordless Telephone
More Panasonic Manuals
Login
Sign In
OR
Sign in with Facebook
Sign in with Google
Upload manual
Upload from disk
Upload from URL