Sign In
Upload
Manuals
Brands
Panasonic Manuals
Switch
AV-HS450NJ
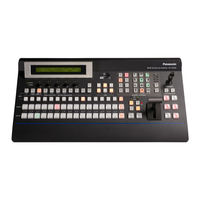
User Manuals: Panasonic AV-HS450NJ Video Switcher
Manuals and User Guides for Panasonic AV-HS450NJ Video Switcher. We have
1
Panasonic AV-HS450NJ Video Switcher manual available for free PDF download: Operating Instructions Manual
Panasonic AV-HS450NJ Operating Instructions Manual (190 pages)
Multi-format Live Switcher
Brand:
Panasonic
| Category:
Switch
| Size: 1.64 MB
Table of Contents
Operating Instructions
1
Safety Precautions
2
Important Safety Instructions
3
Table of Contents
4
Description
7
Features
7
Configuration
9
Accessories
9
Precautions for Use
10
Trademarks and Registered Trademarks
11
Disclaimer of Warranty
11
1 Installation
12
Installing the Control Panel
12
Installing the Mainframe
13
How to Install the Option Boards
14
Connections
16
Block Diagram
16
Connections When Implementing Gen-Lock
17
(Frame Synchronizer OFF)
17
Co Nnections When Not Implementing Gen- Lock (Frame Synchronizer ON)
18
2 Functions in each Area
19
Control Panel
19
Crosspoint Area
20
Wipe Pattern/Memory Area
21
User Button Area
22
Transition Area
22
LCD Menu Area
25
Positioner Area
27
SD Memory Card Area
28
Rear Panel Connections Area
29
Mainframe
30
Front Panel
30
Rear Panel Connections Area
31
3 Basic Operations
33
Background Transition
33
Selecting the Bus
33
Selecting the Bus Using the SHIFT Function
33
Selecting the Bus Mode
36
Selecting the Transition Mode
37
Manual Transition (Using the Fader Lever)
37
Auto Transition
37
Cut Transition
37
Image
38
Setting the IMAGE Effects
38
Executing the IMAGE Effect
39
Wipe
40
Selecting the Wipe Pattern
40
Selecting the Background for the 3D2 Pattern Page
42
Selecting the Wipe Direction
42
Wipe Decorations (Border, Soft Effect)
43
Setting the Wipe Start Position
44
Modifying Wipe
45
Key
47
Selecting the Key Type
48
Selecting the Key Material
49
Key Transitions
50
Key Preview
51
Adjusting the Luminance Key and Linear Key
52
Adjusting the Chroma Key
53
Key Decorations
61
Masking the Key Signals
62
Flying Key
63
Pinp (Picture in Picture)
64
Selecting the Pinp Channel and Material
64
Selecting Shape
65
Pinp Preview
65
Pinp Transitions
66
Pinp Adjustments
66
Linking Pinp1 and Pinp2
68
Pinp Decorations
69
Trimming Settings
70
DSK (Downstream Key)
71
Selecting the DSK Type
71
Selecting the DSK Channel and DSK Fill Material
73
DSK Transitions
74
DSK Preview
74
DSK Adjustments
75
DSK Decorations
76
Masking the DSK Signals
77
FTB (Fade to Black)
78
Internal Color Signals
79
Setting the Color Background
79
Switching the AUX Output
80
Selecting the AUX Output Materials
80
AUX1 Transitions
81
Setting Enable/Disable for the AUX1 Transition
82
Memory
83
Memory Registration and Recall Items
84
Storing the Settings in the Memory (Store)
85
Recalling the Operations Stored in the Memory (Recall)
86
Deleting the Operations Stored in the Memory (Delete)
87
Effect Dissolve
88
Frame Memories
89
Transferring Images from the AUX Bus
89
Saving Images in Flash Memory
90
SD Memory Cards
91
Initializing the SD Memory Cards
92
Saving Data on SD Memory Cards
93
Loading Data from SD Memory Cards
94
Deleting Files on SD Memory Cards
95
Displaying the SD Memory Card Information
95
4 Input/Output Signal Settings
96
Input Signal Settings
96
Setting the Frame Synchronizer
97
Setting the Input Mode
98
Freezing the Input Signals
99
Color Corrector
100
Setting the Up-Converter
104
Setting the Analog Input Gain (Option)
105
Setting the Analog Composite Input Signals (Option)
106
Setting the DVI Input Signals (Option)
107
Setting the DVI Input Signals
107
Adjusting the DVI Input Signals
111
Setting the Output Signals
112
Assigning the Output Signals
113
Setting the DVI Output Signals (OUT5 and OUT6 Standard Outputs and Options)
115
Setting the Down-Converter (Option)
117
Setting the Sync Signals
118
Adjusting the Output Signal Phase
119
Setting the Multi View Display
123
Setting the Screen Layout
123
Setting the Split Frame and Characters
125
Setting the Tally Displays
126
Changing the Material Names
127
High-Resolution Multi View Mode
128
Setting the On-Screen Display (OSD)
129
Setting the Ancillary Data
130
5 System Settings
131
Selecting the Video Format
131
Setting the Crosspoints
132
Assigning Signals to the Crosspoints
132
Setting the Crosspoint Switching
134
Button Assignments
135
Setting the User Buttons
135
Setting the Date and Time
137
Network Settings
138
Other Settings
139
External Device Control
140
Enable/Disable Setting for Control of External Devices
140
Editor Control
141
Setting the GPI
142
Camera Control
144
Status Displays
151
Alarm Status Displays
151
Alarm Message
151
Displaying the Version Information and Option Information
152
Initialization
153
Initializing Setting Data
153
Initializing Fader
153
6 External Interfaces
154
Connecting the Control Panel and Mainframe
154
Mainframe
154
Lan
154
Editor
155
Com
155
Tally/Gpi
156
Control Panel
157
Tally/Gpi
157
7 Image Transmission Functions
158
How to Install the Software
159
8 Setting Menu Table
163
9 Appearance
181
10 Specifications
182
Appendix (Glossary)
187
Advertisement
Advertisement
Related Products
Panasonic AVHS400AN - MULTI-FORMAT LIVE SWITCHER
Panasonic AV-HS400AE
Panasonic AV-HS450N
Panasonic AV-HS410
Panasonic AV-HS410N
Panasonic AV-HS450E
Panasonic AV-HS450
Panasonic AV-HS410E
Panasonic AVHSB300G - HD ANALOG BOARD
Panasonic AV-HS50N
Panasonic Categories
Camcorder
Air Conditioner
TV
Digital Camera
Cordless Telephone
More Panasonic Manuals
Login
Sign In
OR
Sign in with Facebook
Sign in with Google
Upload manual
Upload from disk
Upload from URL