Sign In
Upload
Manuals
Brands
Panasonic Manuals
Air Conditioner
CZ-KPY3A series
Panasonic CZ-KPY3A series Manuals
Manuals and User Guides for Panasonic CZ-KPY3A series. We have
1
Panasonic CZ-KPY3A series manual available for free PDF download: Installation Instructions Manual
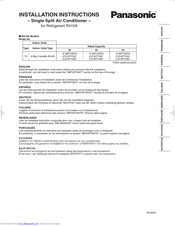
Panasonic CZ-KPY3A series Installation Instructions Manual (148 pages)
Single Split Air Conditioner for Refrigerant R410A
Brand:
Panasonic
| Category:
Air Conditioner
| Size: 45.6 MB
Table of Contents
English
4
Installation Instructions
1
Important
2
Please Read before Starting
2
Table of Contents
4
1 General
5
Tools Required for Installation (Not Supplied)
5
Accessories Supplied with Unit
5
9. Appendix . . . . . . . . . . . . . . . . . . . . . . . . . . . . . . . . . . . . 16
5
Type of Copper Tube and Insulation Material
5
Additional Materials Required for Installation
5
2 Selecting the Installation Site
6
Indoor Unit
6
3 How to Install the Indoor Unit
6
Preparation for Ceiling Suspension
6
Ceiling Opening Dimensions and Hanging Bolt Location
6
Positions of Air Conditioner Body and Ceiling Surface
6
Installing the Drain Pipe
7
Indoor Unit Drain Piping
7
4 Electrical Wiring
8
General Precautions on Wiring
8
Recommended Wire Length and Wire Diameter for Power Supply System
8
Wiring System Diagrams
9
For Stranded Wiring
11
Examples of Shielded Wires
11
Wiring Samples
11
5 How to Process Tubing
12
Connecting the Refrigerant Tubing
12
Connecting Tubing between Indoor and Outdoor Units
12
Insulating the Refrigerant Tubing
13
Taping the Tubes
14
Finishing the Installation
14
6 How to Install the Timer Remote Controller or High-Spec Wired Remote Controller (Optional Part)
14
Note
14
Refer to the Operating Instructions Attached to the Optional
14
Timer Remote Control Unit or Optional High-Spec Wired
14
Remote Controller
14
7 Installation of Decorative Panel
14
Before Installing the Decorative Panel
14
Installing the Decorative Panel
14
When Using Wireless Remote Controller Instead of Wired Remote Controller
15
8 How to Install Wireless Remote Controller Receiver
16
Important Information Regarding the Refrigerant Used
17
Français
20
Important
18
1 Généralités
21
Outils Nécessaires À L'installation (Non Fournis)
21
Accessoires Fournis Avec L'unité
21
Type de Tube en Cuivre Et Matériau D'isolation
21
Matériaux Supplémentaires Nécessaires À L'installation
21
2 Sélection du SITE D'INSTALLATION
22
Unité Intérieure
22
3 COMMENT INSTALLER L'unité Intérieure
22
9. Annexe . . . . . . . . . . . . . . . . . . . . . . . . . . . . . . . . . . . . . . 32
22
Préparatifs Pour la Suspension Au Plafond
22
Dimensions D'ouverture du Plafond Et Emplacement des Boulons de Suspension
22
Positions du Corps du Climatiseur Et Surface du Plafond
22
Installation du Tube de Vidange
23
Canalisation de Purge de L'unité Intérieure
23
4 CÂBLAGE Électrique
24
Précautions Générales À Propos du Câblage
24
Longueur Et Diamètre de Fil Recommandés Pour Le Système D'alimentation
24
Schémas du Système de Câblage
25
Pour Fils Torsadés
27
Exemples de Fils Blindés
27
Exemples de Câblage
27
5 Comment Installer la Tuyauterie
28
Connexion de la Tuyauterie de Réfrigérant
28
Connexion de Canalisation entre Unités Intérieure Et Extérieure
28
Isolation du Tube de Réfrigérant
29
Guipage des Tubes
30
Fin de L'installation
30
Remarque
30
Se Reporter Au Mode D'emploi Fourni Avec la Télécommande
30
De Minuterie en Option Ou Avec la Télécommande Câblée
30
6 COMMENT INSTALLER la Télécommande de MINUTERIE OU la Télécommande Câblée HAUT de GAMME (Pièce en OPTION)
30
7 INSTALLATION du PANNEAU Décoratif
30
Avant D'installer Le Panneau Décoratif
30
Lors de L'utilisation de la Télécommande Câblée À la Place de la Télécommande Sans Fil
31
8 COMMENT INSTALLER LE Récepteur de Télécommande SANS FIL
32
Deutsch
52
Wichtig
50
1 Allgemeines
53
Für die Installation Erforderliche Werkzeuge (nicht Mitgeliefert)
53
Mit dem Gerät Geliefertes Zubehör
53
Art der Kupferleitung und des Isoliermaterials
53
Zusätzliche Materialien, die für die Installation Notwendig sind
53
2 Wahl des Installationsorts
54
9. ANHANG . . . . . . . . . . . . . . . . . . . . . . . . . . . . . . . . . . . . . . 64 Innengerät
54
3 INSTALLIEREN des Innengeräts
54
Vorbereitung zur Deckenaufhängung
54
Maße der Deckenöffnung und Positionen der Hängeanker
54
Lage des Klimagerätgehäuses und der Deckenfläche
54
Installieren der Ablaufleitung
55
Innengerät-Ablaufleitung
55
4 Elektrische Verkabelung
56
Allgemeine Hinweise zur Verkabelung
56
Empfohlene Kabellänge und Kabelquerschnitt für das Stromversorgungssystem
56
Schaltpläne
57
Für Drahtlitzenleiter
59
Beispiele für Abgeschirmte Kabel
59
5 Vorbereitung der Leitungen
60
Anschluss der Kühlmittelleitungen
60
Anschließen der Leitungen zwischen Innen- und Außengeräten
60
Isolieren der Kühlmittelleitungen
61
Umwickeln der Leitungen
62
Abschließende Installationsschritte
62
6 Installieren der Timer-Fernbedienung oder der Hochwertigen Kabelfernbedienung (Sonderausstattung)
62
Hinweis
62
Siehe Bedienungsanleitung der als Sonderausstattung
62
Erhältlichen Timer-Fernbedienung oder Hochwertigen
62
Kabelfernbedienung
62
7 Montage der Dekorverkleidung
62
Vor der Montage der Dekorverkleidung
62
Bei Verwendung der Kabellosen Fernbedienung Anstelle der Kabelfernbedienung
63
8 INSTALLIEREN des KABELLOSEN Fernbedienungsempfängers
64
Collegamenti Elettrici
72
Elektrische Bedrading
88
Advertisement
Advertisement
Related Products
Panasonic CZ-KPY2
Panasonic CZ-KPY3B series
Panasonic CZ-KPU21
Panasonic CZ-KPU3 Series
Panasonic CZ-36KPU1U
Panasonic CZ-18BT1U
Panasonic CS-S18MKQ
Panasonic CU-C7JKD
Panasonic CU-YT19KBP5
panasonic CU-S12NKV-7
Panasonic Categories
Camcorder
Air Conditioner
TV
Digital Camera
Cordless Telephone
More Panasonic Manuals
Login
Sign In
OR
Sign in with Facebook
Sign in with Google
Upload manual
Upload from disk
Upload from URL