Sign In
Upload
Manuals
Brands
Panasonic Manuals
Blu-ray Player
DMR-BW500
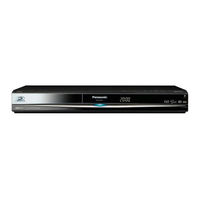
Panasonic DMR-BW500 Blu-ray Recorder Manuals
Manuals and User Guides for Panasonic DMR-BW500 Blu-ray Recorder. We have
2
Panasonic DMR-BW500 Blu-ray Recorder manuals available for free PDF download: Operating Instructions Manual
PANASONIC DMR-BW500 Operating Instructions Manual (120 pages)
Blu-ray Disc Recorder
Brand:
PANASONIC
| Category:
Blu-ray Player
| Size: 15.09 MB
Table of Contents
Dear Customer
1
Operating Instructions
1
Included Accessories
2
Characteristics of this Unit
3
Table of Contents
4
HDD and Disc Information
6
Regarding Blu-Ray Disc
6
Recording High Definition Programmes and Copying
7
HDD and Discs You Can Use for Recording and Play
8
Play-Only Discs
10
Discs that Cannot be Played
10
USB Memory and Card Information
11
USB Memories You Can Use on this Unit
11
Cards You Can Use on this Unit
11
Control Reference Guide
12
Remote Control
12
Main Unit
13
The Unit's Display
13
HDD (Hard Disk Drive) Handling Care
14
Unit Care
14
Media Handling (Disc/Usb Memory/Sd Card)
15
Inserting Discs
15
Inserting, Removing the USB Memory
15
Inserting, Removing the SD Card
15
Disc and Card Care
15
STEP 1 Connection
16
Connecting a Television
16
Connecting a Television and Digital Satellite Receiver
16
Connection to Enjoy High Definition Images
17
STEP 2 Channel Reception Settings and TV Aspect
18
Settings
18
Watching Digital Broadcasts
20
Select the Channel
20
To Show Subtitle
20
To Select Content in the Digital Broadcast
20
To Show Teletext
21
Digital Channel Information
21
Audio Format of the Programme
21
Playing BD-Video or DVD-Video/Playing Recorded
22
Video Contents
22
Playing BD-Video or DVD-Video
22
Playing Recorded Video Contents
22
Recording Television Programmes [HDD]
23
To Specify a Time to Stop Recording
23
One Touch Recording
23
Timer Recording (Using the TV Guide System)
24
[Hdd] [Bd-Re] [Bd-R]
24
Recording to HDD
24
Recording to BD-RE or BD-R
25
Deleting Titles
26
Using the DELETE Navigator to Delete
26
Deleting During Play
26
Copying Titles
27
Important Notes for Recording
28
Advanced Recording
30
Recording Modes
30
Programmes Simultaneous Recording
31
Playing While You Are Recording
32
Operation During Recording
33
Advanced Timer Recording
34
Manually Programming Timer Recordings
34
To Release the Unit from Recording Standby
35
Relief Recording
35
Auto Renewal Recording
35
To Cancel Recording When Recording Has Already Begun
35
Check, Change or Delete a Programme
36
Notes on Timer Recording
36
Operations in the TV Guide System
37
TV Guide Data Download
37
Advanced Playback
38
Operation During Play
38
Changing Audio During Play
39
Display the Subtitle During Play
39
Selecting Recorded Programmes (Titles) to Play-Direct Navigator
40
Switching of the Navigator
40
Playback the Title that was Viewed Once [HDD]
40
To Sort the Titles for Easy Searching
40
To Play Grouped Titles [HDD]
40
To Edit the Group of Titles [HDD]
40
Playback of the High Definition Video (AVCHD)
41
Playback of the Playlist Created on Other Equipment
41
Playing DIVX
42
Playing DIVX Video Contents
42
To Enjoy the BD Video Which Supports BONUS VIEW or BD-Live [BD-V]
44
To Enjoy High Bit Rate Audio and Video
45
Enjoying High Bit Rate Audio with 7.1Ch Speaker
45
Regarding 24P Output
45
Editing Titles
46
Title Operations
47
High Speed Copy Preparation
48
Create/Playback/Edit of the Chapter
49
Create Chapter Mark
49
Editing and Playing Chapters
49
Chapter Operations
49
Copying Titles
50
Copy Speed
51
Frequently Asked Questions
52
Copy Title Playing
53
Copying Using the Copying List-Advanced Copy
54
To Edit the Copying List
55
Copying a Finalised DVD-R, DVD-R DL, DVD-RW (DVD-Video Format), +R and +R DL
56
Recording Broadcasts from External Equipment
57
Recording from Digital Satellite Receiver
57
Flexible Recording
57
Linked Timer Recordings with External Equipment (Digital Satellite Receiver) - EXT LINK
57
Copying from a Video Cassette Recorder
58
Manual Recording
58
DV Automatic Recording (DV Auto Recording)
59
Recording Via AV3 Input
59
Copy the HD Video (AVCHD Format) or the SD Video (MPEG2 Format)
60
Copying HD Video (AVCHD Format)
60
Copying SD Video (MPEG2 Format)
61
Playing Still Pictures
62
Useful Functions During Still Picture Play
63
Editing Still Pictures
64
Editing Still Pictures (JPEG)
64
Still Pictures Operation
65
Copying Still Pictures
66
Copying All the Still Pictures on the USB Memory-Copy All Pictures
66
Copying New Still Pictures on the SD Card-Copy New Pictures
66
Copying Using the Copying List
66
Music
66
Playing Music
68
Playing MP3 Files
68
Playing Music CD
68
Playing Music Recorded on HDD
69
Useful Functions During Music Play
70
Editing Music/Playlist
71
Editing Music
71
Album and Track Operation
71
Register Track to Playlist
72
Editing Playlist
72
Playlist Operation
72
Copying Music to HDD
73
About the Gracenote ® Database
73
Copying Music from a Disc or a USB Memory
73
Deleting Still Pictures and Music Using DELETE Navigator
74
Deleting Still Pictures
74
Deleting Music
74
Entering Text
75
Linked Operations with the TV (VIERA Link "HDAVI Control TM "/Q Link)
76
Easy Control Only with VIERA Remote Control
77
Convenient Functions to Playback and Viewing or Listening
78
Using On-Screen Menus
78
Status Messages
80
Switch the Aspect Ratio of the Screen
80
FUNCTION MENU Window/Pause Live TV
81
FUNCTION MENU Window
81
To Pause the TV Programme You Are Watching-Pause Live TV
81
Disc and Card Management
82
Common Procedures
82
Setting the Protection
82
Providing a Name for a Disc
82
Deleting All Titles-Delete All Titles
83
Enabling the Unit's Recording Function-Format
83
Selecting the Background Style-Top Menu
84
Selecting Whether to Show the Top Menu First-Auto-Play Select
84
Enabling Discs to be Played on Other Equipment-Finalise
84
Creating Top Menu-Create Top Menu
84
Changing the Unit's Settings
85
Common Procedures
85
Tuning
85
Hdd/Disc
87
Picture
88
Sound
88
Display
89
Connection
90
Network Settings
91
Others
92
Network Settings
93
Software Update
94
Other Settings
95
Television Operation
95
Child Lock
95
Additional Connections
96
Connecting a Television with AUDIO/VIDEO or S VIDEO Terminals
96
Connecting VCR with AUDIO/VIDEO or S VIDEO Terminals
96
Connecting a Television with COMPONENT VIDEO Terminals
96
Connecting a Stereo Amplifier
96
Connecting an Amplifier with a Digital Input Terminal
97
Connecting with an HDMI Compatible Television and Receiver
97
Connecting an Analogue Television and VCR
98
Connecting a Television and VCR, Digital Satellite Receiver
98
Network Connection
99
Operations that Can be Performed Simultaneously
100
Operations that Can be Performed While Recording or Copying a Title
100
Starting of the Timer Recording While Executing Other Operation
100
Frequently Asked Questions
101
Messages
102
When Removing a Recorded Disc
102
Troubleshooting Guide
104
Specifications
112
Glossary
114
Safety Precautions
116
Index
118
Advertisement
Panasonic DMR-BW500 Operating Instructions Manual (120 pages)
Panasonic Blu-ray Disc Recorder Operating Instructions
Brand:
Panasonic
| Category:
Blu-ray Player
| Size: 14.6 MB
Table of Contents
Operating Instructions
1
Included Accessories
2
Characteristics of this Unit
3
Table of Contents
4
HDD and Disc Information
6
Regarding Blu-Ray Disc
6
Regarding DR (Direct Recording) Mode
7
HDD and Discs You Can Use for Recording and Play
8
Play-Only Discs
10
Discs that Cannot be Played
10
USB Memory and Card Information
11
USB Memories You Can Use on this Unit
11
Cards You Can Use on this Unit
11
Control Reference Guide
12
Remote Control
12
Main Unit
13
The Unit's Display
13
HDD (Hard Disk Drive) Handling Care
14
Unit Care
14
Media Handling (Disc/Usb Memory/Sd Card)
15
Inserting Discs
15
Inserting, Removing the USB Memory
15
Inserting, Removing the SD Card
15
Disc and Card Care
15
STEP 1 Connection
16
Connecting a Television
16
Connecting to a TV with an HDMI (High Definition Multimedia Interface) Cable
17
STEP 2 Channel Reception Settings and TV Aspect to Edit the Group of Titles [HDD]
18
Settings
18
Watching Digital Broadcasts
20
Select the Channel
20
Switching Audio of the TV Broadcast
20
To Show Subtitle
20
To Show Teletext
21
Digital Channel Information
21
Playing BD-Video or DVD-Video/Playing Recorded Video Contents
22
Playing BD-Video or DVD-Video
22
Playing Recorded Video Contents
22
Recording Television Programmes [HDD]
23
When Recording Digital Broadcast with Subtitle or Multiple Audio
23
To Specify a Time to Stop Recording-One Touch Recording
23
Timer Recording (Using the TV Guide System)
24
Programme to HDD
24
Programme to a Disc
25
Deleting Titles
26
Using the DELETE Navigator to Delete
26
Deleting During Play
26
Copying Titles
27
Recording
28
Important Notes for Recording
28
Advanced Recording
30
Recording Modes
30
Programmes Simultaneous Recording
31
Flexible Recording
32
Playing While You Are Recording
32
Operation During Recording
33
Advanced Timer Recording
34
Manually Programming Timer Recordings
34
To Release the Unit from Recording Standby
35
Relief Recording
35
Auto Renewal Recording
35
To Cancel Recording When Recording Has Already Begun
35
Check, Change or Delete a Programme
36
Notes on Timer Recording
36
Operations in the TV Guide System
37
TV Guide Data Download
37
Playing Back
38
Advanced Playback
38
Operation During Play
38
Changing Audio During Play
39
Display the Subtitle During Play
39
Selecting Recorded Programmes (Titles) to Play-Direct Navigator
40
Switching of the Navigator
40
Playback the Title that was Viewed Once [HDD]
40
To Sort the Titles for Easy Searching
40
To Play Grouped Titles [HDD]
40
To Edit the Group of Titles [HDD]
40
Playback of the High Definition Camera Video (AVCHD)
41
Playback of the Playlist Created on Other Equipment
41
Different Kinds of Playback for BD-Video
42
Showing Pop-Up Menu
42
To Enjoy the BONUSVIEW™ Compatible BD-Video
42
Enjoying High Bit Rate Audio and Video of BD-Video
43
Regarding High Bit Rate Audio
43
Regarding 24P Output
43
Editing Titles
44
Title Operations
45
Create/Playback/Edit of the Chapter
46
Create Chapter Mark
46
Editing and Playing Chapters
47
Chapter Operations
47
Copying Titles
48
Frequently Asked Questions
50
Copy Title Playing
51
Copying Using the Copying List-Advanced Copy
52
Copying a Finalised DVD-R, DVD-R DL, DVD-RW (DVD-Video Format), +R and +R DL
54
Recording Broadcasts from External Equipment
55
With Other Equipment
56
Copying from a Video Cassette Recorder
56
Manual Recording
56
DV Automatic Recording (DV Auto Rec)
57
Recording Via AV3 Input
57
Copy the HD Video (AVCHD Format) or the SD Video (MPEG 2 Format)
58
Copying HD Video (AVCHD Format)
58
Copying SD Video (MPEG 2 Format)
59
Playing Still Pictures
60
Useful Functions During Still Picture Play
61
Editing Still Pictures
62
Editing Still Pictures (JPEG)
62
Still Pictures Operation
63
Copying Still Pictures
64
Copying All the Still Pictures on the USB Memory-Copy All Pictures
64
Copying New Still Pictures on the SD Card-Copy New Pictures
64
Copying Using the Copying List
64
Music
64
Playing Music
66
Playing MP3 Files
66
Playing Music CD
66
Playing Music Recorded on HDD
67
Useful Functions During Music Play
68
Editing Music/Playlist
69
Editing Music
69
Album and Track Operation
69
Register Track to Playlist
70
Editing Playlist
70
Playlist Operation
70
Copying Music to HDD
71
About the Gracenote Database
71
Copying Music from a CD or a USB Memory
71
Deleting Still Pictures and Music Using DELETE Navigator
72
Deleting Still Pictures
72
Deleting Music
72
Entering Text
73
Linked Operations with the TV (VIERA Link "HDAVI Control TM ")
74
Easy Control Only with VIERA Remote Control
75
Convenient Functions to Playback and Viewing or Listening
76
Using On-Screen Menus
76
Status Messages
77
Switch the Aspect Ratio of the Screen
77
FUNCTION MENU Window/Pause Live TV
78
FUNCTION MENU Window
78
To Pause the TV Programme You Are Watching-Pause Live TV
78
Disc and Card Management
79
Common Procedures
79
Setting the Protection
79
Providing a Name for a Disc
79
Deleting All Titles-Delete All Titles
80
Enabling the Unit's Recording Function-Format
80
Selecting the Background Style-Top Menu
81
Selecting Whether to Show the Top Menu First-Auto-Play Select
81
Enabling Discs to be Played on Other Equipment-Finalise
81
Creating Top Menu-Create Top Menu
81
Changing the Unit's Settings
82
Common Procedures
82
Tuning
82
Hdd/Disc
84
Picture
85
Sound
85
Display
86
Connection
87
Network Settings
88
Others
89
Timer/Clock/Remote Control
89
Power Save/System Update
89
Network Settings
90
Other Settings
92
Television Operation
92
Child Lock
92
Software Update
93
Additional Connections
94
Connecting a Television with S VIDEO Terminals
94
Connecting a Television with COMPONENT VIDEO Terminals
94
Connecting a Stereo Amplifier
94
Connecting an Amplifier with a Digital Input Terminal
94
Connecting with an HDMI Compatible Television and Receiver
95
Connecting an Analogue Television and VCR
96
Connecting a Digital Television and VCR
97
Network Connection
98
Operations that Can be Performed Simultaneously
99
Operations that Can be Performed While Recording or Copying a Title
99
Starting of the Timer Recording While Executing Other Operation
99
Frequently Asked Questions
100
Messages
102
When Removing a Recorded Disc
102
Troubleshooting Guide
104
Specifications
112
Glossary
114
Structure of Folders Displayed by this Unit
115
Safety Precautions
116
Index
118
Advertisement
Related Products
Panasonic DMR-BW500EF
Panasonic DMR-BW500G
Panasonic Diga DMR-BW880
Panasonic DMR-BWT740
Panasonic DMR-BWT955
Panasonic DMR-BWT840
Panasonic DMR-BWT460
Panasonic DMR-BW780EB
Panasonic DMR-BWT835GZ
Panasonic DMR-BWT760
Panasonic Categories
Camcorder
Air Conditioner
TV
Digital Camera
Cordless Telephone
More Panasonic Manuals
Login
Sign In
OR
Sign in with Facebook
Sign in with Google
Upload manual
Upload from disk
Upload from URL