Sign In
Upload
Manuals
Brands
Panasonic Manuals
Digital Camera
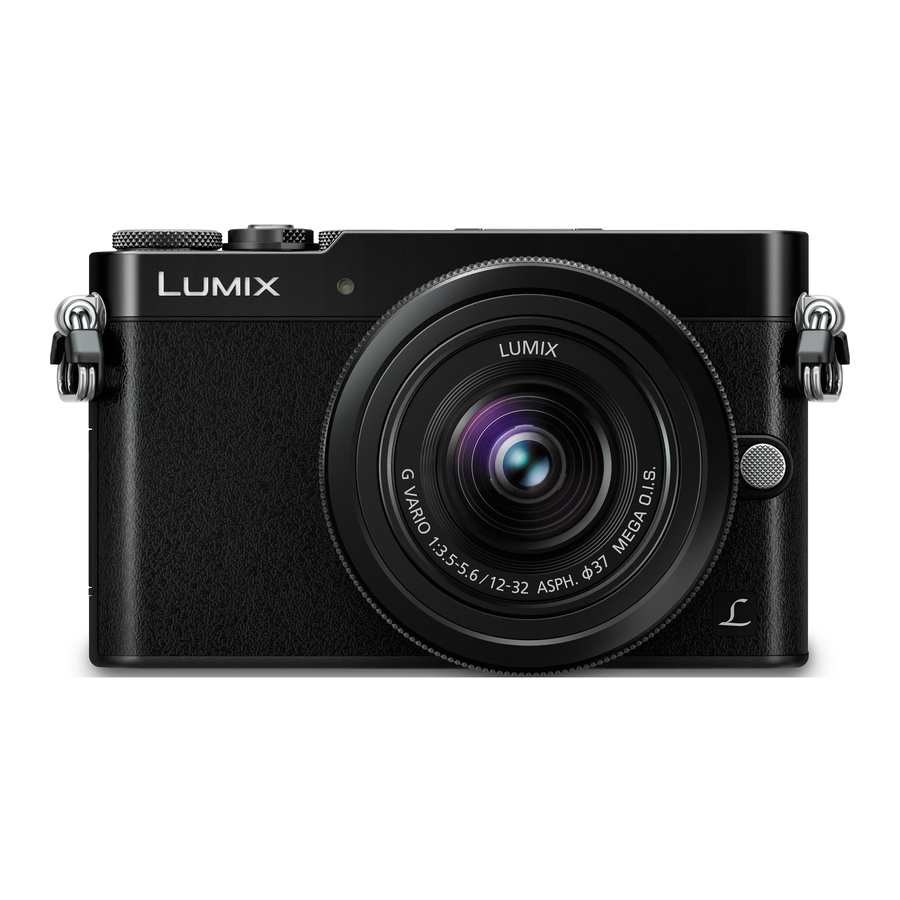
Lumix DMC-GM5
Panasonic Lumix DMC-GM5 Manuals
Manuals and User Guides for Panasonic Lumix DMC-GM5. We have
2
Panasonic Lumix DMC-GM5 manuals available for free PDF download: Owner's Manual, Owner's Manual For Advanced Features
Panasonic Lumix DMC-GM5 Owner's Manual (368 pages)
Brand:
Panasonic
| Category:
Digital Camera
| Size: 6.28 MB
Table of Contents
Contents
2
Quick Start Guide
4
Before Use
12
Care of the Camera
12
Standard Accessories
13
Names and Functions of Components
14
Camera Body
14
Lens
16
About the Lens
17
About the Lens and Functions
17
Card Compatible with this Unit
19
About the Motion Picture Recording and SD Speed Class
19
Getting Started/Basic Operations
20
Attaching the Shoulder Strap
20
Charging the Battery
21
About the Charge Indicator
22
Charging Time
22
Battery Indication
22
Approximate Operating Time and Number of Recordable Pictures
23
Recording Still Pictures (When Using the Monitor)
23
Recording Conditions by CIPA Standard
24
Recording Motion Pictures (When Using the Monitor)
25
Playback
26
Inserting and Removing the Card/The Battery
27
About the Card
29
Access to the Card
29
Formatting the Card
29
Approximate Number of Recordable Pictures and Available Recording Time
30
Number of Recordable Pictures
30
Available Recording Time
30
Changing the Lens
32
Detaching the Lens
32
Attaching the Lens
33
Zoom Operations
33
Attaching the Lens Hood
34
Interchangeable Lens
34
Attaching the Decoration Ring
35
Setting Date/Time (Clock Set)
36
Diopter Adjustment
37
Changing the Clock Setting
37
Basic Operations
38
Tips for Taking Good Pictures
38
Extending/Retracting the Lens
39
Shutter Button (Taking Pictures)
40
Motion Picture Button (Recording Motion Pictures)
41
Mode Dial (Selecting a Recording Mode)
42
Rear Dial
43
Cursor Buttons/[Menu/Set] Button
44
[DISP.] Button (Switching the Displayed Information)
45
In Recording Mode
45
About the Tilt Sensor Display
48
In Playback Mode
49
[LVF] Button (Switching the Monitor/Viewfinder)
51
Touch Screen (Touch Operations)
53
Touch
53
Drag
53
Pinch
53
Taking Pictures Using the Touch Function
55
Easily Optimizing the Brightness for a Specified Area
56
Setting Menu Items
57
Switching to Other Menus
58
Calling Frequently-Used Menus Instantly
60
Change the Quick Menu to Your Preferred Item
62
Assigning Frequently Used Functions to the Buttons
64
Configuring the Function Button Settings from the On-Monitor Recording Information Screen
65
Using Function Buttons with Touch Operations
65
Configuring Basic Setting of this Unit
66
Entering Text
74
Recording Modes
75
Taking Pictures Using the Automatic Function
75
Functions that Work Automatically
77
Auto Focus, Face/Eye Detection, and Face Recognition
77
About the Flash
77
Scene Detection
78
Recording Night Scenes
79
Combining Pictures into a Single Picture with Rich Gradation
80
Taking a Picture with a Blurred Background (Defocus Control)
81
Recording Images by Changing the Brightness or Color Tone
82
About Intelligent Auto Plus Mode and Intelligent Auto Mode
83
Menus that Can be Set
84
Taking Pictures with Your Favorite Settings
85
Program Shift
86
Example of Program Shift
87
Taking Pictures by Specifying the Aperture/Shutter Speed
88
Aperture-Priority AE Mode
88
Shutter-Priority AE Mode
89
Manual Exposure Mode
90
Confirm the Effects of Aperture and Shutter Speed (Preview Mode)
93
Easily Set Aperture/Shutter Speed for Suitable Exposure (One Push AE)
94
Taking Panorama Pictures
95
Technique for Panorama Shot Mode
96
About Playback
97
Taking Pictures that Match the Scene Being Recorded
98
Switching the Scene Selection Screen Display
99
Taking Pictures with Different Image Effects
107
Switching the Image Effect (Filter) Selection Screen Display
108
Setting Brightness
109
Minimizing Operational Sounds During Motion Picture Recording
119
Registering Your Preferred Settings
120
Registering Personal Menu Settings
120
Recording Using Registered Custom Set
121
Picture Quality and Color Tone Settings
122
Adjusting the Picture Quality by Adding an Effect
122
Adjusting the Picture Quality
123
Recording Images with Image Effects
124
Adjusting Bright/Dark Portions
126
Adjusting the White Balance
127
Finely Adjusting the White Balance
129
Auto White Balance
129
White Balance Bracket
130
Setting the Picture Quality and Size
131
Setting the Aspect Ratio of Pictures
131
Setting the Number of Pixels
131
Setting the Compression Rate of Pictures
132
Using Image Correction Functions
133
Compensating the Contrast and Exposure
133
Raiding the Resolution
133
Combining Pictures with Different Exposures
134
Reducing the Long Shutter Noise
135
Correcting the Brightness on the Screen Periphery
135
Setting the Color Space
136
Focus and Brightness (Exposure) Settings
137
Taking Pictures with Auto Focus
137
Selecting the Focus Mode
139
Selecting the Auto Focus Mode
141
Restriction on Auto Focus Mode
142
Changing the Eye to be in Focus
143
Locking the Subject to be Tracked
144
Setting up Position of the AF Area/Changing Size of the AF Area
145
Setting the AF Area Position with the Touch Pad
148
Optimizing the Focus and Brightness for a Touched Position
149
Setting the Desired Focus Method
150
Taking Pictures with Manual Focus
153
About the Focus Distance Reference Mark
156
Fixing the Focus and the Exposure
159
Compensating the Exposure
161
Setting the Light Sensitivity
162
Setting the Step Increment of ISO Sensitivity
164
Extending ISO Sensitivity
164
Selecting the Method for Measuring Brightness
165
Shutter and Drive Settings
166
Setting the Shutter Type
166
Select a Drive Mode
168
Taking Pictures Using Burst Mode
169
Taking Pictures Using Auto Bracket
172
Canceling the Auto Bracket
173
Changing the Settings
173
Taking Pictures with the Self-Timer
175
Canceling the Self-Timer
176
Functions Customized for Various Subjects and Purposes
177
Taking Pictures Automatically at Set Intervals
177
Creating Stop Motion Pictures
180
Making Multiple Exposures on One Picture
184
About Automatic Gain Control Setting
185
Superimposing Pictures on a Picture Already Taken
185
Disabling Operational Sounds and the Output of Light at Once
186
Taking Clear Pictures by Registering Faces
187
Change or Delete the Information for a Registered Person
191
Recording Profiles of Babies and Pets on Images
192
Using Screens and Displays Suitable for Recording
193
Displaying the Recording Screen in Black and White
194
Stabilizer, Zoom and Flash
195
Optical Image Stabilizer
195
Taking Pictures with the Zoom
197
Raising the Telescopic Effect
198
Increasing the Zoom Magnification in Steps
199
Digital Zoom
200
Changing the Settings for a Power Zoom Lens
201
Zooming Using Touch Operations
202
Taking Pictures with the Flash (Supplied)
203
Attaching the Flash
203
The Available Flash Range (Approximation)
205
Setting the Flash Functions
206
Changing the Firing Mode
206
Setting the Output Ratio Manually
206
Changing Flash Mode
207
Correcting Red Eyes
207
Available Flash Settings by Recording Mode
208
Setting to the 2Nd Curtain Synchro
209
Shutter Speed for each Flash Setting
209
Adjust the Flash Output
210
Synchronizing the Output of the Flash to the Exposure Compensation
210
Taking Pictures with Wireless Flashes
211
Recording Motion Picture
214
Setting the Format, Size and Recording Frame Rate
217
About the Compatibility of the Recorded Motion Pictures
218
How to Set Focus When Recording a Motion Picture
219
Recording Still Pictures While Recording Motion Pictures
220
Setting Motion Picture and Still Picture Priorities
220
Recording Snap Movies
221
To Deactivate Snap Movie
222
Setting up [Pull Focus]
223
Using the [Motion Picture] Menu
224
Playing Back Pictures
226
Playing Back Motion Pictures
227
Creating Still Pictures from a Motion Picture
228
Operations During Automatic Snap Movie Playback
228
Switching the Playback Method
229
Using the Playback Zoom
229
Displaying Multiple Screens (Multi Playback)
230
Displaying Pictures by Recording Date (Calendar Playback)
230
Playing Back Group Pictures
231
Deleting Pictures
233
To Delete a Single Picture
233
To Delete Multiple Picture or All the Pictures
234
Using the Playback Menu
235
Operations During a Slideshow
236
Changing the Slide Show Settings
236
Location Logging
238
Clear Retouch
239
Title Edit
241
Text Stamp
242
Video Divide
245
Time Lapse Video
246
Stop Motion Video
246
Resize
247
Cropping
249
Rotate/Rotate Disp
250
Favorite
251
Print Set
252
Canceling All the Print Set Settings
253
To Print the Date
253
Protect
254
Face Rec Edit
255
Picture Sort
255
Delete Confirmation
256
Using the Wi-Fi Function
257
Wi-Fi Function
257
About the Wi-Fi Connection Lamp
258
About the Wi-Fi Button
258
Describing Method
259
What You Can Do with the Wi-Fi Function
260
Controlling with a Smartphone/Tablet
261
Installing the Smartphone/Tablet App "Image App"
261
Connecting to a Smartphone/Tablet
262
Changing the Connection Method
265
Taking Images Via a Smartphone/Tablet (Remote Recording)
266
Playing Back Images in the Camera
267
Saving Images Stored in the Camera
267
Sending Images in the Camera to an SNS
268
Adding Location Information to Images Stored in the Camera from a Smartphone/Tablet
268
Combining Motion Pictures Recorded with Snap Movie According to Your Preference on a Smartphone/Tablet
270
Sending Images to a Smartphone/Tablet by Controlling the Camera
271
Methods for Sending and Images that Can be Sent
271
Sending an Image each Time a Recording Is Made
272
Select and Send the Images
273
Displaying Pictures on a TV
274
Printing Wirelessly
275
When Sending Images to AV Device
276
When Sending Images to PC
278
Using Web Services
282
When Sending Images to Web Service
283
Registering Web Services
284
When Sending Images
287
Registering to the "LUMIX CLUB"
289
Connecting from Your House
295
Connecting Quickly with the same Settings as the Previous Ones
298
Editing the Items Registered to Favourites
299
About Settings for Sending Images
300
Wi-Fi Setup Menu
303
Connecting to Other Equipment
305
Enjoying 3D Pictures
305
Playing Back Pictures on a TV Screen
308
Saving Still Pictures and Motion Pictures on Your PC
312
About the Supplied Software
313
Installing Supplied Software
314
Transferring Images to a PC
315
Copying to a PC Without Using
316
Saving Still Pictures and Motion Pictures on a Recorder
317
Dubbing with Non-Compatible Equipment
317
Printing the Pictures
318
Others
324
Optional Accessories
324
Hand Grip
325
AC Adaptor/DC Coupler
325
Filters
325
Monitor Display/Viewfinder Display
326
In Recording
326
Message Display
331
Menu List
335
Troubleshooting
344
Battery and Power Source
344
Recording
344
Cautions for Use
358
Optimal Use of the Camera
358
Cleaning
359
About the Monitor/Viewfinder
360
Battery
361
Charger
361
About 3D
362
Card
363
About the Personal Information
363
About the Picture Data
365
About Tripods or Unipods
365
About the Shoulder Strap
365
Advertisement
Panasonic Lumix DMC-GM5 Owner's Manual For Advanced Features (367 pages)
Brand:
Panasonic
| Category:
Digital Camera
| Size: 15.06 MB
Table of Contents
Finding the Information You Need
2
How to Use this Manual
3
Quick Start Guide
4
Table of Contents
6
1 Before Use
12
Care of the Camera
12
Standard Accessories
13
Names and Functions of Components
14
Camera Body
14
About the Lens
17
Cards Compatible with this Unit
19
2 Getting Started/Basic Operations
20
Attaching the Shoulder Strap
20
Charging the Battery
21
Charging
21
Approximate Operating Time and Number of Recordable Pictures
23
Inserting and Removing the Card (Optional)/The Battery
27
About the Card
29
Formatting the Card (Initialization)
29
Approximate Number of Recordable Pictures and Available Recording Time
30
Changing the Lens
32
Setting Date/Time (Clock Set)
36
Changing the Clock Setting
37
Diopter Adjustment
37
Basic Operations
38
Tips for Taking Good Pictures
38
Extending/Retracting the Lens [When the Interchangeable Lens (H-FS12032/H-FS35100) Is Attached]
39
Shutter Button (Taking Pictures)
40
Motion Picture Button (Recording Motion Pictures)
41
Mode Dial (Selecting a Recording Mode)
42
Rear Dial
43
Cursor Buttons/[Menu/Set] Button
44
[DISP.] Button (Switching the Displayed Information)
45
[LVF] Button (Switching the Monitor/Viewfinder)
51
Touch Screen (Touch Operations)
53
Taking Pictures Using the Touch Function
55
Setting Menu Items
57
Calling Frequently-Used Menus Instantly (Quick Menu)
60
Change the Quick Menu to Your Preferred Item
62
Assigning Frequently Used Functions to the Buttons (Function Buttons)
64
Configuring Basic Settings of this Unit (Setup Menu)
66
Entering Text
74
3 Recording Modes
75
Taking Pictures Using the Automatic Function (Intelligent Auto Mode)
75
Scene Detection
78
The Backlight Compensation
78
Recording Night Scenes ([Ihandheld Night Shot])
79
Combining Pictures into a Single Picture with Rich Gradation ([Ihdr])
80
Taking a Picture with a Blurred Background (Defocus Control)
81
Recording Images by Changing the Brightness or Color Tone
82
About Intelligent Auto Plus Mode and Intelligent Auto Mode
83
Taking Pictures with Your Favorite Settings (Program AE Mode)
85
Taking Pictures by Specifying the Aperture/Shutter Speed
88
Aperture-Priority AE Mode
88
Shutter-Priority AE Mode
89
Manual Exposure Mode
90
Confirm the Effects of Aperture and Shutter Speed (Preview Mode)
93
Easily Set Aperture/Shutter Speed for Suitable Exposure (One Push AE)
94
Taking Panorama Pictures (Panorama Shot Mode)
95
Taking Pictures that Match the Scene Being Recorded (Scene Guide Mode)
98
Backlit Softness
100
Distinct Scenery
101
Cool Night Sky
103
Warm Glowing Nightscape
103
Artistic Nightscape
103
Glittering Illuminations
104
Handheld Night Shot
104
Clear Night Portrait
104
Appetizing Food
105
Taking Pictures with Different Image Effects (Creative Control Mode)
107
Setting Brightness
109
Impressive Art
112
Recording Motion Pictures with Manually Set Aperture Value/Shutter Speed (Creative Video Mode)
118
Start Recording
118
Stop Recording
118
Minimizing Operational Sounds During Motion Picture Recording
119
Registering Your Preferred Settings (Custom Mode)
120
Registering Personal Menu Settings (Registering Custom Settings)
120
Recording Using Registered Custom Set
121
4 Picture Quality and Color Tone Settings
122
Adjusting the Picture Quality by Adding an Effect ([Photo Style])
122
Recording Images with Image Effects ([Filter Settings])
124
Adjusting Bright/Dark Portions ([Highlight Shadow])
126
Adjusting the White Balance
127
Setting the Picture Quality and Size
131
Setting the Aspect Ratio of Pictures
131
Setting the Number of Pixels
131
Setting the Compression Rate of Pictures ([Quality])
132
Using Image Correction Functions
133
Compensating the Contrast and Exposure ([I.dynamic])
133
Raising the Resolution ([I.resolution])
133
Combining Pictures with Different Exposures ([HDR])
134
Reducing the Long Shutter Noise ([Long Shtr NR])
135
Correcting the Brightness on the Screen Periphery ([Shading Comp.])
135
Setting the Color Space ([Color Space])
136
5 Focus and Brightness (Exposure) Settings
137
Taking Pictures with Auto Focus
137
Selecting the Focus Mode (AFS/AFF/AFC)
139
Selecting the Auto Focus Mode
141
Setting up Position of the AF Area/Changing Size of the AF Area
145
Setting the AF Area Position with the Touch Pad
148
Optimizing the Focus and Brightness for a Touched Position
149
Setting the Desired Focus Method
150
Taking Pictures with Manual Focus
153
Fixing the Focus and the Exposure (AF/AE Lock)
159
Compensating the Exposure
161
Setting the Light Sensitivity
162
Setting the Upper Limit on ISO Sensitivity
163
Setting the Step Increment of ISO Sensitivity
164
Extending ISO Sensitivity
164
Selecting the Method for Measuring Brightness ([Metering Mode])
165
6 Shutter and Drive Settings
166
Setting the Shutter Type
166
Select a Drive Mode
168
Taking Pictures Using Burst Mode
169
Taking Pictures Using Auto Bracket
172
Taking Pictures with the Self-Timer
175
7 Functions Customized for Various Subjects and Purposes
177
Taking Pictures Automatically at Set Intervals ([Time Lapse Shot])
177
Creating Stop Motion Pictures ([Stop Motion Animation])
180
Making Multiple Exposures on One Picture ([Multi Exp.])
184
Disabling Operational Sounds and the Output of Light at Once ([Silent Mode])
186
Taking Clear Pictures by Registering Faces ([Face Recog.])
187
Recording Profiles of Babies and Pets on Images
192
Using Screens and Displays Suitable for Recording
193
8 Stabilizer, Zoom and Flash
195
Optical Image Stabilizer
195
Taking Pictures with the Zoom
197
Raising the Telescopic Effect
198
Zooming Using Touch Operations
202
Taking Pictures with the Flash (Supplied)
203
Setting the Flash Functions
206
Changing the Firing Mode
206
Changing Flash Mode
207
Setting to the 2Nd Curtain Synchro
209
Adjust the Flash Output
210
Synchronizing the Output of the Flash to the Exposure Compensation
210
Taking Pictures with Wireless Flashes
211
9 Recording Motion Pictures
214
Recording Motion Picture
214
Setting the Format, Size and Recording Frame Rate
217
How to Set Focus When Recording a Motion Picture ([Continuous AF])
219
Recording Still Pictures While Recording Motion Pictures
220
Recording Snap Movies
221
Using the [Motion Picture] Menu
224
[Snap Movie]
224
[Rec Format]
224
[Rec Quality]
224
[Exposure Mode]
224
[Picture Mode]
224
[Continuous AF]
224
[Ex. Tele Conv.]
224
[Flkr Decrease]
224
[Silent Operation]
225
[MIC Level Disp.]
225
[MIC Level Adj.]
225
[Wind Cut]
225
10 Playing Back and Editing Images
226
Playing Back Pictures
226
Playing Back Motion Pictures
227
Creating Still Pictures from a Motion Picture
228
Switching the Playback Method
229
Using the Playback Zoom
229
Displaying Multiple Screens (Multi Playback)
230
Displaying Pictures by Recording Date (Calendar Playback)
230
Playing Back Group Pictures
231
Deleting Pictures
233
Using the [Playback] Menu
235
[2D/3D Settings]
235
[Slide Show]
235
[Playback Mode]
237
[Location Logging]
238
[Clear Retouch]
239
[Title Edit]
241
[Text Stamp]
242
[Video Divide]
245
[Time Lapse Video]
246
[Stop Motion Video]
246
[Resize]
247
[Cropping]
249
[Rotate]/[Rotate Disp.]
250
[Favorite]
251
[Print Set]
252
[Protect]
254
[Face Rec Edit]
255
[Picture Sort]
255
[Delete Confirmation]
256
11 Using the Wi-Fi Function
257
Wi-Fi R Function
257
What You Can Do with the Wi-Fi Function
260
Controlling with a Smartphone/Tablet
261
Installing the Smartphone/Tablet App "Image App
261
Connecting to a Smartphone/Tablet
262
Taking Images Via a Smartphone/Tablet (Remote Recording)
266
Playing Back Images in the Camera
267
Saving Images Stored in the Camera
267
Sending Images in the Camera to an SNS
268
Adding Location Information to Images Stored in the Camera from a Smartphone/Tablet
268
Combining Motion Pictures Recorded with Snap Movie According to Your Preference on a Smartphone/Tablet
270
Sending Images to a Smartphone/Tablet by Controlling the Camera
271
Displaying Pictures on a TV
274
Printing Wirelessly
275
When Sending Images to AV Device
276
When Sending Images to PC
278
Using Web Services
282
When Sending Images to Web Service
283
When Sending Images to [Cloud Sync. Service]
287
Registering to the "LUMIX CLUB
289
About the [LUMIX CLUB]
289
About Connections
294
Connecting from Your House (Via the Network)
295
Connecting from a Location Away from Your House (Direct Connection)
297
Connecting Quickly with the same Settings as the Previous Ones ([Select a Destination from History]/[Select a Destination from Favorite])
298
About Settings for Sending Images
300
[Wi-Fi Setup] Menu
303
12 Connecting to Other Equipment
305
Enjoying 3D Pictures
305
Recording Functions
307
Playing Back Pictures on a TV Screen
308
Using VIERA Link (HDMI)
310
Automatic Input Switching
311
Saving Still Pictures and Motion Pictures on Your PC
312
About the Supplied Software
313
Saving Still Pictures and Motion Pictures on a Recorder
317
Printing the Pictures
318
13 Others
324
Optional Accessories
324
Monitor Display/Viewfinder Display
326
Histogram Display
330
Message Display
331
Menu List
335
[Rec]
335
[Motion Picture]
338
[Custom]
339
[Setup]
341
[Playback]
343
Troubleshooting
344
Battery and Power Source
344
Motion Pictures
347
Cautions for Use
358
Advertisement
Related Products
Panasonic LUMIX DMC-GM5K
Panasonic Lumix DMC-GM5L
Panasonic Lumix DMC-GM5W
Panasonic Lumix DMC-GM5KP
Panasonic Lumix DMC-GM5KPC
Panasonic Lumix DMC-GM5KEB
Panasonic Lumix DMC-GM5KEC
Panasonic Lumix DMC-GM5KEE
Panasonic Lumix DMC-GM5KEF
Panasonic Lumix DMC-GM5KEG
Panasonic Categories
Camcorder
Air Conditioner
TV
Digital Camera
Cordless Telephone
More Panasonic Manuals
Login
Sign In
OR
Sign in with Facebook
Sign in with Google
Upload manual
Upload from disk
Upload from URL