Sign In
Upload
Manuals
Brands
Panasonic Manuals
Digital Camera
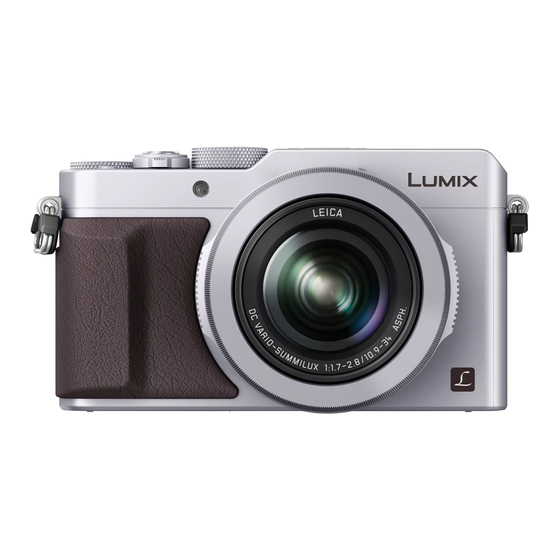
Lumix DMC-LX100EBS
Panasonic Lumix DMC-LX100EBS Manuals
Manuals and User Guides for Panasonic Lumix DMC-LX100EBS. We have
1
Panasonic Lumix DMC-LX100EBS manual available for free PDF download: Owner's Manual For Advanced Features
Panasonic Lumix DMC-LX100EBS Owner's Manual For Advanced Features (332 pages)
Brand:
Panasonic
| Category:
Digital Camera
| Size: 7.38 MB
Table of Contents
Finding the Information You Need
2
How to Use this Manual
3
Table of Contents
4
Contents by Function
10
Before Use
12
Standard Accessories
13
Names and Functions of Main Parts
14
[MENU/SET] Button / Cursor Button / Control Dial
18
Preparations
19
Attaching the Lens Cap and Shoulder Strap
19
Charging Battery
20
Remaining Battery
21
Guidelines for Number of Recordable Pictures and Operating Time
22
Inserting and Removing the Battery/The Card (Optional)
24
About the Card
25
Formatting the Card (Initialization)
26
Recording Capacity Guidelines (Pictures/Recording Time)
27
Setting the Clock
29
Changing Time Settings
30
Setting the Menu
31
Setting the Menu Screen Background
33
Calling Frequently-Used Menus Instantly (Quick Menu)
34
Change the Quick Menu to Your Preferred Item
35
Assigning Frequently Used Functions to the Buttons (Function Buttons)
37
Changing Settings Using the Control Ring
39
Changing the Settings Assigned to the Control Ring
40
Using the [Setup] Menu
41
[Clock Set]
41
[World Time]
41
[Travel Date]
42
[Wi-Fi]
42
[Beep]
43
[Live View Mode]
43
[Monitor Display] / [Viewfinder]
44
[Monitor Luminance]
45
[Sleep Mode]
46
[USB Mode]
47
[TV Connection]
47
[Menu Resume]
49
[Menu Background]
49
[Menu Information]
49
[Language]
49
[Version Disp.]
50
[Self Timer Auto Off]
50
[No.reset]
50
[Reset]
50
[Reset Wi-Fi Settings]
51
[Format]
51
Entering Text
52
Holding the Camera
53
Recording Pictures Using the Viewfinder
54
Switching between the Monitor and Viewfinder
54
About Eye Sensor AF
55
Taking Pictures
56
Recording Motion Pictures
58
Select the Recording Mode
59
Recording Mode
59
Switching the Display Information on the Recording Screen
62
Viewing Your Pictures
67
Viewing Motion Pictures
70
Switching the Display Information on the Playback Screen
71
Deleting Pictures
73
[Delete Single]
73
To Delete Multiple (up to 100)/ to Delete All Pictures
74
[Intelligent Auto] Mode
75
Taking Pictures Using a Handheld Camera ([Ihandheld Night Shot])
78
Combining Pictures into a Single Still Picture with Rich Gradation ([Ihdr])
79
Taking Pictures after Setting the Aperture Value and Shutter Speed
80
Taking Pictures after Automatically Setting the Aperture Value and Shutter Speed ([Program AE] Mode)
81
Taking Pictures by Setting the Aperture Value ([Aperture-Priority] Mode)
83
Taking Pictures by Setting the Shutter Speed ([Shutter-Priority] Mode)
84
Taking Pictures by Setting the Aperture Value and Shutter Speed ([Manual Exposure] Mode)
86
Checking the Effects of the Aperture Value and Shutter Speed ([Preview] Mode)
88
Picture Quality and Coloring Settings
100
Adjusting the Picture Quality with Effects [Photo Style]
100
Adjusting Highlights and Shadows [Highlight Shadow]
102
Adjusting the White Balance
103
Setting the Picture Quality and Size
107
Changing the Aspect Ratio of the Still Pictures
107
Setting the Picture Size
108
Setting the Compression Rate of Pictures ([Quality])
109
Using the Picture Correction Functions Effectively
111
Correcting Contrast and Exposure ([I.dynamic])
111
Enhancing the Impression of High-Resolution ([I.resolution])
111
Combining Still Pictures with Different Exposures ([HDR])
112
Suppressing the Noise of a Long Exposure ([Long Shtr NR])
113
Setting the Color Space
113
Adjusting the Focus and Brightness (Exposure)
114
Taking Pictures with Auto Focus
114
Select the Focus Mode (AFS, AFF, AFC)
114
Switching [AF Mode]
115
Changing the Position and Size of the AF Area
121
Setting Your Preferred Focusing Method
124
(Macro Recording)
126
Focus Range
126
Taking Pictures with Manual Focus
128
MF Assist
131
Taking Pictures by Locking the Focus And/Or Exposure [AF/AE Lock]
133
Taking Pictures with Exposure Compensation
135
Setting the ISO Sensitivity
136
Setting the Upper Limit of ISO Sensitivity
137
Setting the Incremental Value of ISO Sensitivity
138
Extending the ISO Sensitivity Setting
138
Setting the Metering Mode
139
Shutter and Drive Settings
140
Setting the Shutter Type
140
Selecting a Drive Mode
141
Burst Function
142
Recording While Exposure Is Changed Automatically [Auto Bracket]
145
Automatically Changing the Aspect Ratio While Taking Pictures [Aspect Bracket]
147
Taking Pictures with Self-Timer
148
Recording Panorama Pictures
150
Playback [Auto Review]
152
Functions for Specific Subjects and Purposes
153
Taking Pictures Automatically at Set Intervals [Time Lapse Shot]
153
Creating Stop Motion Animation [Stop Motion Animation]
156
Performing Multiple Exposures for a Single Picture [Multi Exp.]
159
Disabling the Beeps and Flash at the same Time [Silent Mode]
161
Recording with the Face Recognition Function [Face Recog.]
162
Setting the Profile for a Baby or Pet to Record in a Picture
165
Displaying the Appropriate Screen for Specific Recording Conditions
166
Stabilizer, Zoom and Flash
168
Correcting Jitter
168
Using Zoom
170
Zoom Types and Use
171
Taking Pictures Using the Flash (Supplied)
176
Attaching the Flash
176
Changing the Firing Mode (Manual Flash)
179
Changing Flash Mode
180
Setting the 2Nd Curtain Sync
182
Adjusting the Flash Output
183
Synchronizing the Flash Output with the Camera During Exposure Compensation
183
Performing Wireless Flash Settings
184
Recording Motion Pictures
187
Setting the Format, Picture Size and Recording Frame Rate
187
Adjusting the Focus While Recording Motion Pictures ([Continuous AF])
189
Recording Motion Pictures
190
Recording 4K Motion Pictures
194
Creating a High-Resolution Still Picture from a 4K Motion Picture [4K PHOTO]
195
Picture Playback
197
Taking Still Pictures While a Motion Picture Is Being Recorded
198
Using the [Motion Picture] Menu
199
[4K Photo]
199
[Rec Format]
199
[Rec Quality]
199
[Picture Mode]
199
[Continuous AF]
199
[MIC Level Disp.]
200
[MIC Level Adj.]
200
[Wind Cut]
200
Playing Back and Editing Pictures
201
Viewing the Group Picture
201
Capturing Still Pictures from Motion Pictures
203
Using the [Playback] Menu
204
[Slide Show]
204
[Playback Mode]
206
[Location Logging]
207
[RAW Processing]
208
[Title Edit]
211
[Text Stamp]
212
[Video Divide]
214
[Time Lapse Video]
215
[Stop Motion Video]
215
[Resize]
216
[Cropping]
217
[Rotate] / [Rotate Disp.]
218
[Rotate]/[Rotate Disp.]
218
[Favorite]
219
[Print Set]
220
[Protect]
221
[Face Rec Edit]
222
[Picture Sort]
223
[Delete Confirmation]
223
Wi-Fi
224
Wi-Fi Function and NFC Function
224
What You Can Do with the Wi-Fi Function
227
Operating the Camera by Connecting It to a Smartphone
228
Installing the Smartphone/Tablet App "Panasonic Image App
228
Image App
228
Connecting to a Smartphone
229
Connecting to a Smartphone Using NFC Function
233
Taking Pictures Via a Smartphone
234
(Remote Recording)
234
Playing Back Pictures in the Camera on a Smartphone
235
Saving Pictures in the Camera to the Smartphone
235
Easily Transferring Pictures in the Camera
236
Sending Pictures in the Camera to Social Networking Services
237
Adding Location Information to Pictures in the Camera from a Smartphone
237
Operating the Camera to Send Pictures to a Smartphone
239
Displaying Still Pictures on a TV
242
Wireless Printing
243
Sending Pictures to AV Device
244
Sending Pictures to a PC
247
Using WEB Services
251
When Sending Images to WEB Service
251
When Sending Images to [Cloud Sync. Service]
255
Using "LUMIX CLUB
258
About the [LUMIX CLUB]
258
About Connections
263
[Via Network]
264
Connecting Via a Wireless Access Point
264
[WPS (Push-Button)]
264
Connecting Directly
267
Connecting Quickly with the same Settings as Used Previously ([Select a Destination from History] / [Select a Destination from Favorite])
268
Settings for Sending Pictures
270
Sending Images
271
[Wi-Fi Setup]
272
[Touch Sharing]
272
Connecting with Other Devices
274
Enjoying 4K Motion Pictures
274
Viewing 4K Motion Pictures
274
Photofunstudio
274
Storing 4K Motion Pictures
275
Viewing on TV Screen
276
VIERA Link (HDMI) (HDAVI Control™)
278
Storing Recorded Still Pictures and Motion Pictures on Your PC
280
About Supplied Software
281
Installing Supplied Software
283
Silkypix
283
Copying Still Pictures and Motion Pictures
284
Storing Recorded Still Pictures and Motion Pictures in the Recorder
286
Copying by Inserting the Card into the Recorder
286
Dubbing Playback Pictures Via AV Cables
286
(Optional)
286
Printing
287
Printing Multiple Pictures
288
Printing with Date and Text
289
Making Print Settings on the Camera
290
Optional Accessories
291
External Flash (Optional)
291
Using the AC Adaptor (Optional) and DC Coupler (Optional) Instead of the Battery
292
List of Monitor/Viewfinder Displays
293
Message Displays
299
Menu List
303
[RAW Processing]
309
[Resize]
309
[Cropping]
309
[Location Logging]
309
[Title Edit]
309
[Text Stamp]
309
[Print Set]
309
[Protect]
309
Q&A Troubleshooting
311
Pictbridge
324
Usage Cautions and Notes
326
Advertisement
Advertisement
Related Products
Panasonic Lumix DMC-LX100
Panasonic lumix DMC-LX10
Panasonic LUMIX DMC-LX100GN
Panasonic LUMIX DMC-LX100SG
Panasonic Lumix DMCLX100S
Panasonic Lumix DMCLX100K
Panasonic DMCLX1PP - DIGITAL STILL CAMERA
Panasonic Lumix DMC-LX15
Panasonic DMC-LX1EGM
Panasonic DMC-LX1GD
Panasonic Categories
Camcorder
Air Conditioner
TV
Digital Camera
Cordless Telephone
More Panasonic Manuals
Login
Sign In
OR
Sign in with Facebook
Sign in with Google
Upload manual
Upload from disk
Upload from URL