Sign In
Upload
Manuals
Brands
Panasonic Manuals
Receiver
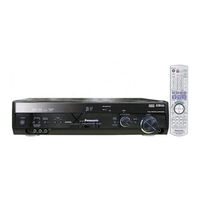
SA-XR57S - AV Receiver
Panasonic SA-XR57S - AV Receiver Manuals
Manuals and User Guides for Panasonic SA-XR57S - AV Receiver. We have
1
Panasonic SA-XR57S - AV Receiver manual available for free PDF download: Operating Instructions Manual
Panasonic SA-XR57S - AV Receiver Operating Instructions Manual (40 pages)
AV Control Receiver
Brand:
Panasonic
| Category:
Receiver
| Size: 2.28 MB
Table of Contents
Operating Instructions
1
Before Use IMPORTANT SAFETY INSTRUCTIONS
2
Table of Contents
3
Listening Caution
3
Control Guide
4
Home Theater Connections
5
Connecting the Unit to a TV, DVD Recorder and DVD Player
5
Connections
5
HDMI Connections for Enjoying High-Quality Sounds and Pictures Easily
5
To Enjoy High-Quality Pictures
6
To Enjoy Standard-Quality Pictures
7
To Enjoy Analog Sounds/To Enjoy High-Quality Analog Sounds Using DVD-Audio Discs (DVD Analog 6-Channel Connections)
8
To Enjoy TV Sounds on Multi Channels/Connection to a DVD Recorder with Built-In VCR
9
Placing and Connecting Speakers According to Their Numbers
10
Connecting Speakers Designed for Bi-Wiring
11
Connecting a Second Pair of Front Speakers
12
Connecting Antennas
12
Making Surround Speakers Wireless with SH-FX50/SH-FX60
12
Connecting Other Equipment
13
Connecting Speakers
10
Connecting the Unit to a Vcr/Connecting the Unit to a CD Player/
13
Connecting the Unit to a Cable Box or Satellite Receiver Etc./
13
Connecting the Unit to a Video Camera or Game Player Etc
13
Before Playback Detecting Speakers Automatically
14
Confirming Audio Output from Speakers and Adjusting Volumes
15
Enjoying Home Theater Features
16
Basic Playback
16
Adjust the Volume
16
Digital Signals that Can be Played on this Unit
17
How the Unit Displays Audio Signals
17
Playback Options
18
Using HDAVI Control
19
Enjoying Home Theater Features through One-Touch Operations
19
Setting the Unit against HDAVI Control Operations
19
Using SPEAKERS B/ADVANCED DUAL AMP Function/Enjoying BI-AMP Sounds/Playing DVD-Audio (Enjoying DVD-Audio Sources through Digital Connections/Playing DVD ANALOG 6Ch/Enjoying High Quality 2-Channel Analog Sounds)
18
Remote Controlling a DVD Recorder
20
Remote Controlling a TV
20
Remote Controlling a DVD Player
21
Remote Controlling a CD Player
22
Remote Controlling a VCR
22
Changing Remote Control Codes
23
Enter a Code to Operate some Equipment
23
Listening to Sounds with Surround Effects
24
Dolby Pro Logic
24
SFC (Sound Field Control)
25
Adjusting Neo:6'S "MUSIC " Mode Further
26
Adjusting SFC (Sound Field Control) Further
26
Sound Effect under Remote Control
26
Convenient Functions under Remote Control
27
Dimming the Display Light (Dimmer)
27
Using Headphones
27
Basic Operation
28
Sound Effect/Convenient Functions
28
Adjusting the Bass/Adjusting the Treble/Adjusting the Volume Balance/Changing the Audio Output (Dual Program)/Adjusting the Brightness of the Display/Sleep Timer
29
Basic Operation
30
Setting the Receiver
30
Setting Speakers and Their Sizes/Setting Distances/Setting Bi-Wiring Connections/Setting the Lowpass Filter
31
HF and LF Difference)
32
Making Bi-Amp Settings
32
Reducing Standby Power Consumption
33
Selecting the Equipment Connected to the HDMI Input Terminal
33
Settings to Conditions Upon Factory Settings (Reset Function)
33
Manual Tuning
34
The Radio
34
Preset Tuning
35
Presetting Stations/Listening to Preset Stations
35
Reducing Excessive Noise
35
Reference Troubleshooting Guide
36
Help Message
37
Specifications
37
Warranty (U.S.A.)
38
Maintenance
39
Warranty (Canada)
39
Product Service
40
Supplied Accessories
40
Advertisement
Advertisement
Related Products
Panasonic SA-XR57K - AV Receiver
Panasonic SAXR57 - RECEIVER
Panasonic SA-XR57E
Panasonic SA-XR57EG
Panasonic SA-XR57EB
Panasonic SAXR50 - DIGITAL A/V RECEIVER
Panasonic SAXR55 - A/V RECEIVER
Panasonic SAXR55P - A/V RECEIVER
Panasonic SA-XR55K
Panasonic SAXR58 - DIGITAL A/V RECEIVER
Panasonic Categories
Camcorder
Air Conditioner
TV
Digital Camera
Cordless Telephone
More Panasonic Manuals
Login
Sign In
OR
Sign in with Facebook
Sign in with Google
Upload manual
Upload from disk
Upload from URL