Sign In
Upload
Manuals
Brands
Toshiba Manuals
Copier
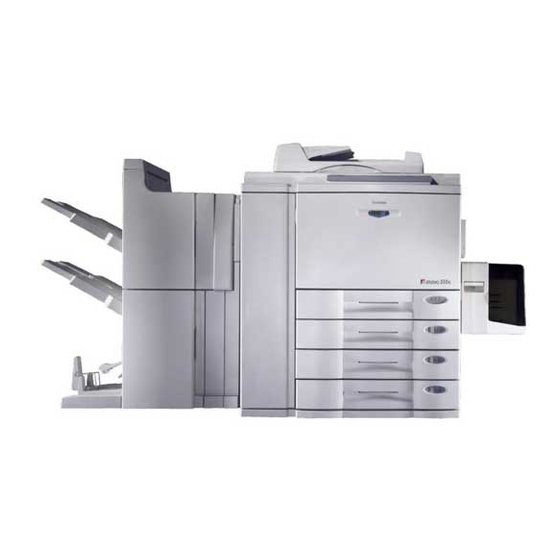
e-studio 211c
Toshiba e-studio 211c Manuals
Manuals and User Guides for Toshiba e-studio 211c. We have
3
Toshiba e-studio 211c manuals available for free PDF download: Operator's Manual, Imaging Manual
Toshiba e-studio 211c Operator's Manual (225 pages)
Digital Color Plain Paper Copier
Brand:
Toshiba
| Category:
Copier
| Size: 6.35 MB
Table of Contents
Toshiba Quality Is Second to None
3
Preface
5
Features of the E-Studio211C/311C
6
Table of Contents
7
Table of Contents
8
Precautions
10
Installation
10
General Precautions
11
Disclaimer Notice
14
Forgery Prevention Function / Storage of Color Copies
15
Before Making Copies
16
Description of the Digital Color Copier and the Optional Equipment
17
Main Components
17
Optional Equipment
18
Control Panel
19
Touch Panel
21
Turning on the Power Switch
23
Controlling the Use of the Copier with Access Codes
24
Energy-Saving Functions
25
How to Make Copies
26
General Copying Procedures
27
Setting Copy Paper
29
Acceptable Copy Paper Types and Sizes
29
Recommended Paper / Handling and Storing Paper
30
Changing the Paper Size of the Drawer / Setting the Drawer for Special Uses
31
Setting Originals
34
Acceptable Original Types and Sizes
34
When Placing an Original on the Glass
35
When Using the Reversing Automatic Document Feeder (Optional)
36
Auto Job Start (Job Preset)
39
During Warming up
39
During Copying
40
During Printing (Optional)
41
Interrupt Copying
42
Canceling/Resuming a Copy Operation
43
Setting of Basic Copy Modes
44
Paper Selection
45
Automatic Paper Selection (APS)
45
Manual Paper Selection
46
Reduction and Enlargement Copying
47
Using Automatic Magnification Selection (AMS)
47
Specifying both Original Size and Copy Size
48
Using the Reduction/Enlargement Zoom Keys or One-Touch Zoom Keys
49
Reducing/Enlarging Photos to Standard Size (Photo Zoom Key)
50
Duplex Copying (1-Sided, 2-Sided, Book-Type)
52
Copy Density Adjustment
58
Color Mode
59
Original Mode
60
Color Editing and Adjustment
62
Monocolor Copying
63
Hue Adjustment
64
Saturation
65
Color Balance (YMCK Adjustment)
66
RGB Adjustment
67
One-Touch Adjustment
68
Background Adjustment
69
Sharpness Adjustment
70
Using the Editing Functions
73
Image Shift
73
Edge Erase
75
Book Center Erase
76
Dual-Page
77
Full Image
79
In 1 / 4 in
80
In 1 / 4 in 1
81
Magazine Sort (from the Editing Menu)
82
X-Y Zoom
84
Image Editing
85
Trimming/Masking
85
Mirror Image
87
Negative/Positive Reversal
88
Centering
89
Image Repeat
91
Using the Special Functions
95
Continuous Original Feeding / Single Original Feeding
95
Mixed-Sized Originals
97
Bypass Copying
98
Bypass Copying on Standard Size or Full Bleed Paper
100
Bypass Copying on Non-Standard Size Paper
102
Thin Paper/Thick Paper/Ohp Film/Special Paper/Sticker Label
104
Job Memory
106
Setting the "OTHER" Size Key
109
User Selection (Initial Settings)
110
Weekly Timer
112
Setting the Date and Time
114
Total Counter
115
Department Management
116
Printing an Access Code List
117
Setting Access Codes (Registration/Change/Deletion)
118
Resetting Counters
122
Automatic Calibration
123
Switching between Languages
125
Setting the Energy Saving Mode
126
Setting the Off-Mode (Auto Shutoff)
127
Clearing of Toner Counter
128
Selecting Finishing Modes (Using the Optional Finishers)
131
Finishing Modes and Finishers (Optional)
131
Sort/Group Copying
132
Staple Sorting
133
Magazine Sort & Saddle Stitching Mode (Booklet Mode)
135
Hole Punching Mode
137
Network Scanning Function (Using the Optional Printer Controller)
139
About the Scanning Function
139
Procedure of Scan Setting
140
About the Setting before Scanning
155
Setting by the User
156
Setting by the Administrator
160
Setting the Administrator Password
167
Shutting down the Power Supply to the Printer Controller
169
When the Graphic Symbols Flash on the Touch Panel
171
Description of the Flashing Graphic Symbols
171
Add Paper Symbol
172
Adding Paper to the Drawers
172
Adding Paper to the Large-Capacity Feeder (Optional)
173
Replace Toner Cartridge Symbol
174
Replace Toner Bag Symbol
176
Clear Paper Symbol
178
Paper Misfeed in the Reversing Automatic Document Feeder (Optional)
178
Paper Misfeed in the Drawer Feeding Area
179
Paper Misfeed in the Large-Capacity Feeder (Optional)
180
Paper Misfeed on the Bypass Guide
181
Paper Misfeed Inside of the Copier
181
Paper Misfeed in the Automatic Duplexer (Optional)
184
Paper Misfeed in the Hole Punch Unit (Optional)
186
Paper Misfeed in the Finisher (Optional)
187
Paper Misfeed in the Saddle Stitch Unit (Optional)
188
Adding Staples (Optional)
190
Removing Jammed Staples (Optional)
194
Clearing Accumulated Punched Paper Bits (Optional)
196
Call Service Symbol
197
Periodic Maintenance Message
198
Daily Inspection
200
Daily Inspection
201
Simple Troubleshooting
203
Maintenance
200
Specifications & Options
207
E-Studio211C/311C Specifications
207
Specifications of Options
210
Specifications of Options
211
Packing List
215
Copying Function Combination Matrix
216
Image Quality Adjustment Combination Matrix
217
Index
218
Call Service Symbol
218
Advertisement
Toshiba e-studio 211c Operator's Manual (225 pages)
Digital colour plain paper copier
Brand:
Toshiba
| Category:
Copier
| Size: 6.31 MB
Table of Contents
Toshiba Quality Is Second to None
3
Preface
5
Features of the E-Studio211C/311C
6
Table of Contents
7
Table of Contents
8
Precautions
10
Installation
10
General Precautions
11
Disclaimer Notice
14
Forgery Prevention Function/ Storage of Colour Copies
15
Before Making Copies
16
Description of the Digital Colour Copier and the Optional Equipment
17
Main Components
17
Optional Equipment
18
Control Panel
19
Touch Panel
21
Turning on the Power Switch
23
Controlling the Use of the Copier with Access Codes
24
Energy-Saving Functions
25
How to Make Copies
26
General Copying Procedures
27
Setting Copy Paper
29
Acceptable Copy Paper Types and Sizes
29
Recommended Paper/Handling and Storing Paper
30
Changing the Paper Size of the Drawer / Setting the Drawer for Special Uses
31
Setting Originals
34
Acceptable Original Types and Sizes
34
When Placing an Original on the Glass
35
When Using the Reversing Automatic Document Feeder (Optional)
36
Auto Job Start (Job Preset)
39
During Warming-Up
39
During Warming up
39
During Copying
40
During Printing (Optional)
41
Interrupt Copying
42
Cancelling/Resuming a Copy Operation
43
Setting of Basic Copy Modes
44
Paper Selection
45
Automatic Paper Selection (APS)
45
Manual Paper Selection
46
Reduction and Enlargement Copying
47
Using Automatic Magnification Selection (AMS)
47
Specifying both Original Size and Copy Size
48
Using the Reduction/Enlargement Zoom Keys or One-Touch Zoom Keys
49
Reducing/Enlarging Photos to Standard Size (Photo Zoom Key)
50
Duplex Copying (1-Sided, 2-Sided, Book-Type)
52
Copy Density Adjustment
58
Colour Mode
59
Original Mode
60
Colour Editing and Adjustment
63
Monocolour Copying
63
Hue Adjustment
64
Saturation
65
Colour Balance (YMCK Adjustment)
66
RGB Adjustment
67
One-Touch Adjustment
68
Background Adjustment
69
Sharpness Adjustment
70
Using the Editing Functions
73
Image Shift
73
Edge Erase
75
Book Centre Erase
76
Dual-Page
77
Full Image
79
In 1 / 4 in
80
In 1 / 4 in 1
81
Magazine Sort (from the Editing Menu)
82
X-Y Zoom
84
Image Editing
85
Trimming/Masking
85
Mirror Image
87
Negative/Positive Reversal
88
Centring
89
Image Repeat
91
Using the Special Functions
95
Continuous Original Feeding / Single Original Feeding
95
Mixed-Sized Originals
97
Bypass Copying
98
Bypass Copying on Standard Size or A3-Wide Paper
100
Bypass Copying on Non-Standard Size Paper
102
Thin Paper/Thick Paper/Ohp Film/Special Paper/Sticker Label
104
Mode Memory
106
Setting the "OTHER" Size Key
109
User Selection (Initial Settings)
110
Weekly Timer
112
Setting the Date and Time
114
Total Counter
115
Department Management
116
Printing an Access Code List
117
Setting Access Codes (Registration/Change/Deletion)
118
Resetting Counters
122
Automatic Calibration
123
Switching between Languages
125
Setting the Energy Saving Mode
126
Setting the Off-Mode (Auto Shutoff)
127
Clearing of Toner Counter
128
Selecting Finishing Modes (Using the Optional Finishers)
130
Finishing Modes and Finishers (Optional)
131
Sort/Group Copying
132
Staple Sorting
133
Magazine Sort & Saddle Stitching Mode (Booklet Mode)
135
Hole Punching Mode
137
Network Scanning Function (Using the Optional Printer Controller)
139
About the Scanning Function
139
Procedure of Scan Setting
140
About the Setting before Scanning
155
Setting by the User
156
Setting by the Administrator
160
Setting the Administrator Password
167
Shutting down the Power Supply to the Printer Controller
169
When the Graphic Symbols Flash on the Touch Panel
171
Description of the Flashing Graphic Symbols
171
Add Paper Symbol
172
Adding Paper to the Drawers
172
Adding Paper to the Large-Capacity Feeder (Optional)
173
Replace Toner Cartridge Symbol
174
Replace Toner Bag Symbol
176
Clear Paper Symbol
178
Paper Misfeed in the Reversing Automatic Document Feeder (Optional)
178
Paper Misfeed in the Drawer Feeding Area
179
Paper Misfeed in the Large-Capacity Feeder (Optional)
180
Paper Misfeed on the Bypass Guide
181
Paper Misfeed Inside of the Copier
181
Paper Misfeed in the Automatic Duplexer (Optional)
184
Paper Misfeed in the Hole Punch Unit (Optional)
186
Paper Misfeed in the Finisher (Optional)
187
Paper Misfeed in the Saddle Stitch Unit (Optional)
188
Adding Staples (Optional)
190
Removing Jammed Staples (Optional)
194
Clearing Accumulated Punched Paper Bits (Optional)
196
Call Service Symbol
197
Periodic Maintenance Message
198
Daily Inspection
200
Daily Inspection
201
Simple Troubleshooting
203
Maintenance
200
Specifications & Options
207
E-Studio211C/311C Specifications
207
Specifications of Options
210
Specifications of Options
211
Packing List
215
Copying Function Combination Matrix
216
Image Quality Adjustment Combination Matrix
217
Index
218
Toshiba e-studio 211c Imaging Manual (132 pages)
Brand:
Toshiba
| Category:
All in One Printer
| Size: 6.58 MB
Table of Contents
Table of Contents
6
1 General Adjustments - Copying and Printing
8
To Obtain High-Density Image in General
8
To Have Optimum Image Quality for Paper Used
13
To Eliminate Color Unevenness and Density Unevenness
18
To Have Uniform Image Quality in Continuous Printing
20
(To Optimally Set the Image Quality Control Function)
20
To Maintain Uniform Image Quality in Continuous Printing
22
(To Optimally Set the Image Quality Control Function)
22
To Eliminate Color Shifts for Text and Thin Lines
25
2 Copier-Specific Adjustments
26
To Obtain the same Color Balance as that of the Original
26
To Eliminate Inclusion of any Color Other than Black in Gray Hue
30
To Obtain a Denser and Brighter Image than the Original
32
To Provide High Density and Solidity for a Pale Area
34
(To Improve the Highlight Reproducibility)
34
To Eliminate Background Color
38
To Avoid Copying the Back Side of Originals on Thin Paper
40
To Eliminate Moiré
42
To Obtain a Sharper Image in General (to Enhance Sharpness)
44
To Make Photo Borders and Edges Look Softer
46
To Make an Image Fully Solid and Dense
47
To Correctly Reproduce the Hues of Highlighter Pens
48
To Obtain Good Color Balance on Thick Paper
50
To Obtain Good Color Balance on Special Paper (Waterproof Gloss Paper for POP)
52
(E-Studio211C/311C Only)
52
3 Printer-Specific Adjustments
54
To Obtain Uniform Color Balance (to Perform Calibration)
54
To Obtain Your Favorite Color Balance
62
To Obtain Color Balance Similar to that of Monitor
69
To Print a Gray Area in Black Toner Only (to Eliminate Moiré in the Gray Area)
76
To Improve Color Reproducibility of Gray Area in RGB Data
77
To Improve Color Reproducibility of Gray Area of CMYK Data
79
To Print Attaching Importance to Reproducibility of All Gray Areas
81
To Eliminate Redness from a Printed Gray Area (to Adjust Gray Balance)
84
To Prevent Blending of Primary Colors (C/M/Y/K)
90
To Reproduce Hue Obtainable with Another Printer
94
(To Use the Ink Simulation Feature)
94
To Adjust Overall Brightness Easily
98
To Obtain a Sharper Image
101
To Make Low-Resolution Data Look Finer (to Soften an Image)
104
To Make Sharpness Settings
105
To Make Image Smoothing Settings
107
To Smoothen Text Edges or Image
109
To Disable Sharpness Settings
110
To Make Image Smoothing Settings
112
To Make Light-Colored Fine Lines Look Sharper
114
To Adjust Halftone
115
To Make CMYK Simulation Profile Settings
117
To Make Large, Light-Colored Text Clearer
119
To Make a Gray Area Look Smooth
122
To Print Light-Colored Thin Lines Darkly
128
Advertisement
Advertisement
Related Products
Toshiba e-studio 210c
Toshiba 2860
Toshiba 2060
Toshiba 2870
Toshiba 2550
Toshiba e-studio 28
Toshiba e-Studio 223CS
Toshiba e-STUDIO 2510AC
Toshiba e-STUDIO 2018A
Toshiba e-STUDIO 2518A
Toshiba Categories
Laptop
Air Conditioner
TV
LCD TV
All in One Printer
More Toshiba Manuals
Login
Sign In
OR
Sign in with Facebook
Sign in with Google
Upload manual
Upload from disk
Upload from URL