Table of Contents

Summary of Contents for Whirlpool HB10813
- Page 1 BATHROOM VENTILATOR OPERATION MANUAL HB10813 Please read this Operation Manual carefully before using this machine. Warning: In order to prevent damage or accident, this machine must be installed by those qualified technicians recognized by the government.
- Page 2 Must use the appropriate power (220V-240V ~/50Hz). This product is not suitable for the disabled, mental retarded or mental disorder, or those who are lack of experience and common sense (including children) unless they are under guidance. Take care of your children and do not allow them to play with this machine.
- Page 3 When the machine was installed and placed at the correct working location, there should be a person responsible for safety guidance and assistance, and to ensure the safety of the users to understand the potential risk of this machine. Children who aged from 3 to 8 only can turn on/off this machine.
- Page 4 Turn off the product and remove plug until the product stops working and cool down completely before clean the unit. Please do not pull out the power plug by pulling the power cord. It may cause the power cord damage or electric shock.
- Page 5 supervision is necessary when this is used near children. Do not touch hot surface when in use. Do not share the same circuit receptacle with others appliances, otherwise may have burn hazard. Do not use extension cord or exchangeable plug. Unplug heater if it fails to operate properly and inform customer service center.
-
Page 6: Installation Precautions
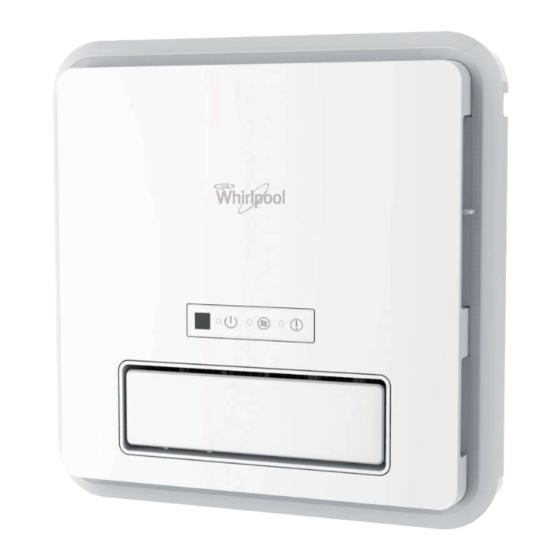
2. Installation Precautions This product should be installed in the place where can bear the weight of this goods. Incorrect installation may cause noise, empathy. Please assembly properly. In order not to cause the dew flowing back from exhaust pipe to the bathroom, the exhaust pipe should always be set in downward sloping to the outdoor. - Page 7 Names of the device and functions 1. Machine Unit: mm Front Side Bottom Remote Control 1. Pre-Filter, Carbon Filter 2. Front Panel 3. Display Panel 4. Air Outlet 5. Stainless Steel Housing - 6 -...
- Page 8 2. Remote LCD Display Battery Replacement Sense Ionizer Air Volume Time Display Hi / Lo ( / ) Swing LCD Function Display Dry ( Heat ( Vent ( Fan ( Quick Heat ( 24H Vent (24 - 7 -...
-
Page 9: Installation Method
Installation Method Window Type Size Front Panel (HxW): 254x254 mm Machine Body* (HxW): 209x207 mm * Exclude the front panel Window Cut Out (HxW): 214x212 mm 1. Install at the place of the aluminum framed window or replace the exhaust fan in the bathroom. - Page 10 Installation of the Remote Control 1. Take out the remote control from the holder. 2. Install the remote control to suitable place. Check the main body can receive signal from the remote control installation location or take out the remote control to check the receiver sensitivity.
- Page 11 Instructions Operation Mode Time FUNCTION APPLICATION Default Setting (Max.) 1. Quick Heat High Speed 2 hrs 12 hrs Heat (Hi) Warm Air High Speed 2 hrs 12 hrs Heat (Lo) Low Speed 2 hrs 12 hrs 2. Vent (Hi) High Speed 2 hrs 24 hrs Air Exhaust...
-
Page 12: Function Descriptions
Function Descriptions Display Power Indicator – Blue indicator light on when connected to power supply Air Quality Indicator – Red indicator light means “Poor”, Orange indicator light means “Fair”, Green indicator light means “Good” Malfunction Indicator – Red indicator light on when the machine is failure HEAT Function –... - Page 13 VENT Function - Hi / Lo Press the “Vent” button, the LCD displays “Vent” icon, air volume will run at “Hi” mode. Press the button again to select “Hi” or “Lo” mode. Timer: the default time is 2 hrs. By pressing “Timer” up or down button to select time duration.
- Page 14 Sense De-odor Function Press “6 Sense” button, the LCD displays “ ” icon. In 6 Sense mode, the machine will automatically detect the odor of the bathroom and run the de-odor function. The air quality light will indicate the odor level, Red indicator light means “Poor”, the machine will run at “Hi”...
- Page 15 Swing Function – Manual (Left / Right) Left and right louver function to provide selection of wide airflow distribution of up to 120 degree, or concentrated airflow. Diffused Airflow Concentrated Airflow Ionizer Function When the fan motor is running, press the “Ionizer” button, the LCD will display “ ”...
-
Page 16: Maintenance And Cleaning
Maintenance and Safety Items Maintenance and cleaning: Please do turn off the power before maintenance work. 1. Front panel cleaning: Front Panel Filter Please use the soft rag to clean the dirty place of the front panel. Put a clean rag in the warm water dissolved with neutral detergent, and then use the rag to wipe the front panel. - Page 17 If it is difficult to pull out the filter, please open the front cover to take out the filter: 1. Open the front cover by 3. Close the front cover and also 2. Pull out the Pre-filter. holding the two sides of front press the upper left &...
-
Page 18: Product Specification
Be aware that any change of the specification and design will not be informed. If any item in the English Version is different from the Chinese Version, please refer to the Chinese Version. The latest operation manual will be based on the url: www.whirlpool.com.hk. - 17 -...


