Table of Contents
Advertisement
Quick Links
Download this manual
See also:
User Manual
Advertisement
Table of Contents

Summary of Contents for Samsung Galaxy Gear
- Page 1 QUICK REFERENCE MANUAL...
- Page 2 Support This guide provides you with the information you need to get started. For more information and additional support, please visit the Samsung.com support page: • Get support for your device online. • Review your device’s User Manual and troubleshooting FAQs.
-
Page 3: Device Functions
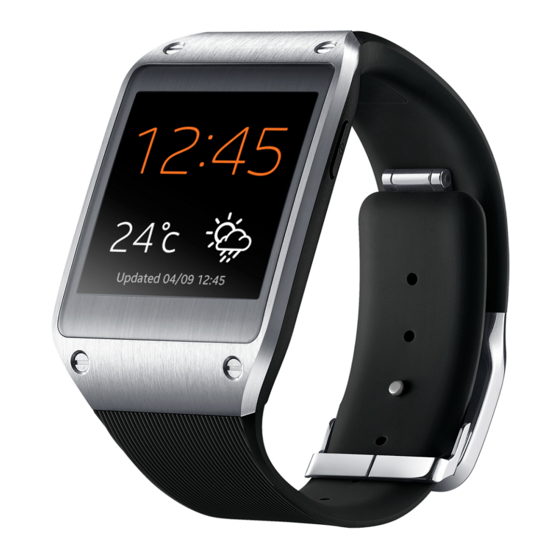
Device Functions Wristband Display/ Touch Screen Speaker Buckle NOTE: Swipe down on the display screen to go back from your current on-screen application or menu. - Page 4 Digital camera Joint Microphone 1 Power/ Home Microphone 2 Frame Metal Pin...
-
Page 5: Setting Up Your Device
Setting Up Your Device Charging the Device 1. Before turning on your Galaxy Gear™ for the first time, charge it fully. 2. In a single motion, slide and hold the switch to open the cover of the Charging cradle. 3. Carefully place the device onto the cradle, make sure to align the connector plates to the charging pins. -
Page 6: Turning Your Device On And Off
Turning Your Device On and Off 1. To turn ON, press and hold the Power/Home key. 2. To turn OFF, press and hold Power/Home key. -
Page 7: Launching Gear Manager
Gear Manager Installing the Gear Manager 1. Turn on your smartphone and enable NFC communication. 2. Tap the back of your Charging cradle to the back of your compatible smartphone (as indicated below). NFC Antenna NFC tag 3. Read the on-screen installation information on the smartphone, then tap OK g Install. -
Page 8: Pairing The Devices Automatically
2. Turn your Charging cradle around and tap it to the back of the smartphone (as previously shown). 3. Tap (Accept) on the Galaxy Gear screen, confirm the PIN codes match, and tap OK on your smartphone to confirm the pairing request. -
Page 9: Pairing The Devices Manually
Tap the paired device from within the Paired Gear area of the screen and select Connect new Gear g OK g Connect manually. 3. Tap the listed on-screen GALAXY Gear device. 4. Tap (Accept) on the Galaxy Gear screen, confirm the PIN codes match, and tap OK on your smartphone to confirm the pairing request. -
Page 10: Navigation & Gestures
Navigation & Gestures Waking the Device ¬ Shake the Galaxy Gear on your wrist or press the Power/Home key. Screen Navigation Swipe Double-tap Swipe left or right across the Home screen to view • the favorite functions . Tap on the screen to select an on-screen item. - Page 11 Security Securing Your Galaxy Gear NOTE: Although Galaxy Gear can be paired and synchronized with your smartphone, it is not secured. It is recommended that you use the Gear Manager to change the default name of your Galay Gear. 1. From the Home (Clock) screen, swipe across the...
-
Page 12: Calling Features
Calling Features Making a Call 1. From the Home (Clock) screen, swipe across the ) Apps g Dialer. display and select ( 2. Enter the number you wish to call and tap place the call. • If you make a mistake while dialing, tap clear the last digit. -
Page 13: Sending A Call To The Galaxy Gear
Sending a Call to the Galaxy Gear ¬ From within an active call screen on the smartphone, (Bluetooth Headset Off) to turn the Headset connection back on and send the call to the Galaxy Gear. Ending a Call ¬ (End Call). - Page 14 NOTE: To check notifications manually, swipe across the screen and tap Notifications. Replying to a New Message IMPORTANT: To reply via Galaxy Gear, you must first launch the S Voice application on the smartphone and accept the terms of service prior to its initial use.
-
Page 15: Apps & More
Apps & More Accessing Applications ¬ Turn on Galaxy Gear and swipe across the screen to view the currently loaded top applications. NOTE: These favorite applications can be customized from within Gear Manager’s My apps menu. Adding Your Favorite Applications Galaxy Gear comes with a set of default favorite applications that appear as you scroll across the screen. -
Page 16: Customizing The Clock Screen
Customizing the Clock Screen The clock shown on the Galaxy Gear’s Home screen can be customized by selecting an available setting from within the Gear Manager application. 1. From within your smartphone’s Applications page, (Gear Manager) g launch (Clocks). 2. Select an available clock face from the on-screen list. - Page 17 From the Home screen, swiping up over the screen launches the Dialer application. NOTE: By default, the Galaxy Gear is set to manually sync multimedia files. To change it to automatically sync these files, you will need to edit the settings within the Camera apps’...
-
Page 18: Shooting A Video
Shooting a Video 1. From the Home (Clock) screen, swipe down over the display the Camera screen. 2. Tap the (Camera mode) icon at the top-left of the screen to switch the device into (Camcorder mode). 3. Use the screen to frame your shot and tap the screen to shoot your 15 second (maximum) video. - Page 19 Notes ________________________________________ ________________________________________ ________________________________________ ________________________________________ ________________________________________ ________________________________________ ________________________________________ ________________________________________ ________________________________________ ________________________________________ ________________________________________ ________________________________________ ________________________________________ ________________________________________ ________________________________________...
- Page 20 ©2013 Samsung Telecommunications America, LLC. Samsung, Galaxy, Galaxy Gear, and TecTile are all trademarks of Samsung Electronics Co., Ltd. Bluetooth is a registered trademark of Bluetooth SIG. Other company and product names mentioned herein may be trademarks of their respective owners. Screen images simulated.


