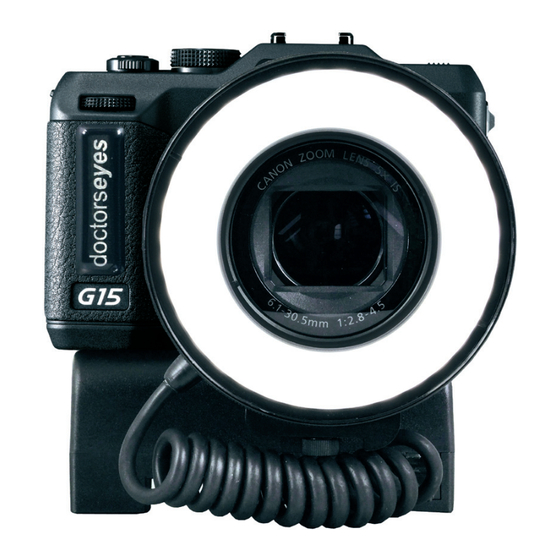
Canon Powershot G15 User Manual
In conjunction with the doctorseyes ring light system
Hide thumbs
Also See for Powershot G15:
- User manual (316 pages) ,
- Manual (12 pages) ,
- Getting started manual (2 pages)
Table of Contents
Advertisement
Quick Links
www.doctorseyes.nl
Version 1.1 / Benelux
doctorseyes GmbH
Abteistr: 28
88416 Ochsenhausen
Germany
www.doctorseyes.nl
exclusive Distributor
René Smit International
Parkweg 17a
2585 JH Den Haag
The Netherlands
Tel. +31 70 355 10 20
Fax +31 70 386 77 07
Manual for the
Canon Powershot G15
in conjunction with the
doctorseyes
Ring Light System
Note: The original Canon camera guide in Dutch
language is stored as pdf fi le on the memory card
placed inside your camera.
doctorseyes
made in Germany
TM
TM
Advertisement
Table of Contents

Summary of Contents for Canon Powershot G15
- Page 1 Version 1.1 / Benelux doctorseyes GmbH Abteistr: 28 88416 Ochsenhausen Germany www.doctorseyes.nl Note: The original Canon camera guide in Dutch language is stored as pdf fi le on the memory card exclusive Distributor René Smit International placed inside your camera. Parkweg 17a...
-
Page 2: Make Settings
doctorseyes.com the world of digital dental imaging doctorseyes.com the world of digital dental imaging 4) Reset all to factory settings In case you encounter any problems you can easily reset all adjustments to the factory setting. Resetting Settings to Their Default Values Select [Reset All]. - Page 3 1. Connect the camera to a direct print compatible Overview operating elements ..............9 printer. How to mount the Ringlight on the Canon G15 ........10 • Open the camera’s terminal cover and insert the How to mount accessories on the ring light ..........10 interface cableall the way into the terminal.
- Page 4 System. This manual will give you instructions and tips on we recommend using „L“ how to set up your Canon G15 to be used in con- junction with the doctorseyes Ringlight and obtain optimal imaging results. Our lighting system is very easy to use and it’s usage is very intuitive.
- Page 5 doctorseyes.com the world of digital dental imaging doctorseyes.com the world of digital dental imaging A) the doctorseyes System 12) Activating grid lines on Display The Power & Light Conroller PLC-4 Especially when taking front teeth shots the grid lines will help to prevent tilting of the camera . You will not see the grid lines on the taken images.
- Page 6 doctorseyes.com the world of digital dental imaging doctorseyes.com the world of digital dental imaging 10) Examples for dental photography setups Working with the PLC 4 Professional lose-up lens: +4 dpt Dig. Zoom: activated On / Off: Zoom: 9,1 x The PLC-4 can be activated with the button on the Macro mode: activated 16 cm top right side and the blue display will be illuminated.
-
Page 7: Technical Specifications
All values have now been saved. The data will re- charging time approx. 3 hours main active even after change of battery. According to Canon the camera will keep its values for a period of 2 weeks without batterys. The PLC-4 was contructed according to EN... -
Page 8: Charging The Controller
6) A-Mode: Improving depth of focus power input jack Adjust depth of focus In the P-mode the Canon G15 automatically sets the shutter speed and aperture Charging the Controller with acceptable depth of focus. If desired, you can... -
Page 9: Led Control
doctorseyes.com the world of digital dental imaging doctorseyes.com the world of digital dental imaging LED control 4) How to activate the macro mode With the left button you can activate or deactivate Press the Tulip-Symbol . The macro mode has LEDS in 4 configurations (half ring right - half ring left been activated when you see the tulip symbol in the - simulation twin flash unit - full ring) -
Page 10: Disabling Flash
The doctorseyes dental Set 1 „compact“ recalled this way. consists of: 2) Disabling flash ● Canon G15 digital camera wit accessories Press on the flash button (see picture) until the „flash ● doctorseyes Ring Light disabled“ symbol appears on the display. This sym- ●... - Page 11 Coupling The PowerShot G15 adjustments: Wing Light Connector The Canon PowerShot G15 offers a multitude of adjustment possibilities and options. We have made a selection of necessary adjustments for you to re- Power & Light produce to enable you to optimize your results.
-
Page 12: Components Guide
The How to mount the Ringlight on the Canon G15 screw will hold the mirror in the desired position. 1. The camera should be turned off.


