Sign In
Upload
Manuals
Brands
NEC Manuals
Desktop
POWERMATE
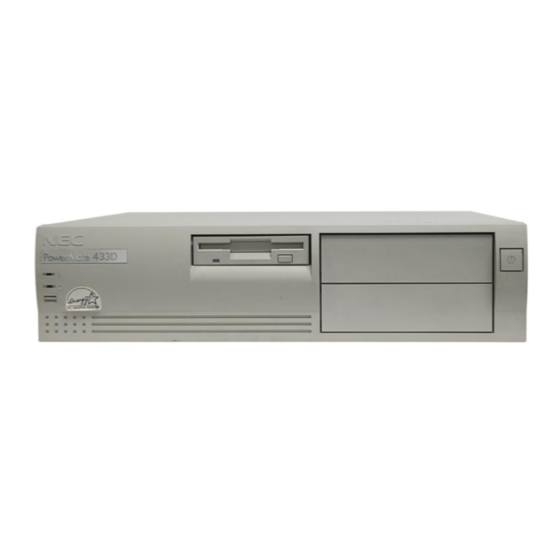
NEC POWERMATE Manuals
Manuals and User Guides for NEC POWERMATE. We have
6
NEC POWERMATE manuals available for free PDF download: Service Manual, Manual
NEC POWERMATE Service Manual (184 pages)
Brand:
NEC
| Category:
Desktop
| Size: 1.55 MB
Table of Contents
Table of Contents
2
Preface
11
Abbreviations
12
Section 1 Technical Information
14
Desktop System Unit
14
Minitower System Unit
15
System Board
16
Processor
18
Secondary Cache
18
Flash ROM
19
List of Tables
19
System Memory Map
19
Power Management
20
I/O Addressing
21
I/O Address Map
21
System Memory
22
Interrupt Controller
22
Video Controller
23
Interrupt Level Assignments
23
Video Memory
25
Text Modes
25
Graphic Modes
26
ISA/VL-Bus Backboard
27
ISA Bus
27
VL-Bus
27
Parallel Interface
28
Parallel Port Addressing and Interrupts
28
Serial Interface
29
Indicator Panel
29
Serial Port Addressing and Interrupts
29
Power Supply
30
Diskette Drive
30
Hard Disk Drive
30
Keyboard
30
Section 2 Setup and Operation
31
Unpacking and Repacking
31
Setup
31
Appendix B Specifications
32
Desktop Voltage Selector Switch
32
Desktop Peripheral Connections
33
Desktop Lamps, Reset Button, and Power Button
33
Minitower Setup
35
Minitower Voltage Selector Switch
35
Minitower Peripheral Connections
36
Minitower Indicators, Reset Button, and Power Button
36
System Configuration
38
Setup Utility
38
How to Start Setup
39
How to Use Setup
39
Menu Bar
40
Legend Bar
41
Field Help Window
41
Setup Key Functions
41
General Help Window
42
Main Menu Options
42
Legend Bar Main Menu Parameters
42
IDE Adapters
43
Memory Shadow
44
IDE Hard Disk Parameters
44
Memory Shadow Parameters
44
Boot Sequence
45
Numlock
45
Boot Parameters
45
Advanced Menu
46
Integrated Peripherals Menu
46
Numlock Parameters
46
Parity
47
Integrated Peripherals Parameters
47
Large Disk Access Mode
48
Security Menu
48
Large Disk Parameters
48
System Security Options
49
Power Menu
50
Power Management Parameters
50
Exit Menu
51
Save Values & Exit
51
Discard Values & Exit
51
Get Default Values
51
Load Previous Values
51
Save Current Values
52
BIOS Update Utility
53
System Board Jumpers
54
System Configuration Jumpers
55
Section 3 Options
57
Internal Options
57
Desktop Cover Removal
58
Desktop Cover Screws
58
Removing the Desktop Cover
58
Minitower Cover Removal
59
Minitower Cover Screws
59
Expansion Board(S)
60
Removing the Minitower Cover
60
Desktop Expansion Board Installation
61
Desktop Expansion Slots
61
Removing the Inside Expansion Slot Bracket
62
Minitower Expansion Board Installation
63
Minitower Expansion Slots
63
Expansion Board Troubleshooting
64
System Board Options
65
System Board Option Sockets
65
Overdrive Processor Installation
66
Pga/Overdrive Socket Lever
66
Overdrive Processor Alignment
67
Overdrive Processor Troubleshooting
68
Overdrive Problems and Solutions
68
SIMM Memory Installation
69
SIMM Upgrade Path
69
SIMM Configurations
70
SIMM Installation
71
SIMM Upgrade Kit Troubleshooting
72
SIMM Upgrade Problems and Solutions
72
Secondary Cache Installation
73
Secondary Cache Kit Troubleshooting
74
Secondary Cache Problems and Solutions
74
Video DRAM Module Installation
75
Video DRAM Module Troubleshooting
76
Video DRAM Module Problems and Solutions
76
Video Cache RAM Chip Installation
77
Video Cache RAM Chip Troubleshooting
78
Video Cache RAM Chip Problems and Solutions
78
Optional 5 1/4-Inch Slot Devices
79
1/4-Inch Diskette Drive
79
1/4-Inch Diskette Drive Settings
79
Hard Disk Drives
80
Hard Disk Drive Settings
80
FD1158C, 1.2-MB Diskette Drive
80
Desktop 5 1/4-Inch Device Installation
82
Desktop 3 1/2-Inch Drive Bracket Removal
82
Inch Drive Bracket Screws
82
Desktop Blank Panel Removal
83
Indicator Panel Connectors
83
Desktop 5 1/4-Inch Device Placement
84
Desktop Blank Panel Removal
84
Desktop 5 1/4-Inch Diskette Drive Cabling
85
Desktop 5 1/4-Inch Device Screws
85
Desktop 5 1/4-Inch Hard Disk Drive Cabling
86
Desktop 5 1/4-Inch Diskette Drive Cables
86
Finishing Desktop 5 1/4-Inch Device Installation
87
Minitower 5 1/4-Inch Device Installation
87
Desktop 5 1/4-Inch Hard Disk Drive Cables
87
Minitower Blank Panel Removal
88
Device Cage Slot Cover
89
Minitower 5 1/4-Inch Device Placement
90
Minitower 5 1/4-Inch Device Screws
90
Minitower 5 1/4-Inch Diskette Drive Cables
91
Minitower 5 1/4-Inch Diskette Drive Cabling
91
Minitower 5 1/4-Inch Hard Disk Drive Cables
92
Minitower 5 1/4-Inch Hard Disk Drive Cabling
92
Finishing Minitower 5 1/4-Inch Device Installation
93
Hard Disk Drive Troubleshooting
93
Optional 5 1/4-Inch Device Problems and Solutions
94
NEC SVGA Monitor
95
Connecting the Monitor
96
Monitor Connections
97
Front Control Panel
98
NEC SVGA Monitor Front Control Panel
98
Rear Control Panel
99
NEC SVGA Monitor Troubleshooting
100
NEC SVGA Monitor Problems and Solutions
100
Section 4 Maintenance and Troubleshooting
101
NEC Service and Information Telephone Numbers
101
Maintenance
102
System Unit
102
Keyboard
103
Removing the Keyboard Enclosure
103
Mouse
104
Routine Checks
104
Troubleshooting
105
Error Messages
105
BIOS Update Utility Error Messages
105
Diagnosing and Solving Problems
106
Problems and Solutions
106
Diagnostic Output and Beep Codes
110
Diagnostic Output and Beep Codes Looped on Post
112
Section 5 Desktop Repair
113
Disassembly and Reassembly
113
Powermate Desktop Disassembly Sequence
113
Top Cover Removal
115
Top Cover Screws
115
Expansion Board Removal
116
Removing the Top Cover
116
Expansion Slot Screw
117
Inside Expansion Slot Screw
117
Removing the Expansion Slot L-Bracket
118
ISA/VL-BUS Backboard Removal
119
Front Panel Assembly Removal
119
ISA/VL-Bus Backboard Screws
119
Indicator Panel Connectors
120
Power Button Cover Removal
121
Speaker Assembly Removal
122
Speaker Screw
122
SIMM Removal
123
SIMM Socket
123
1/2-Inch Diskette and Hard Disk Drive Removal
124
Inch Drive Bracket Screws
124
Inch Diskette and Hard Disk Drive Screws
125
Optional 5 1/4-Inch Device Removal
126
Inch Device Screws
126
1/4-Inch Device Cage Removal
127
Power Supply Removal
128
Power Button Screws
128
System Board Removal
129
Power Supply Screws
129
System Board Connectors and Screws
130
Connector Identifiers
130
Battery Removal
131
Battery Replacement
131
Illustrated Parts Breakdown
132
Powermate Desktop Field-Replaceable Parts List
132
Powermate Desktop Illustrated Parts Breakdown
134
Powermate Desktop Options
135
Powermate Desktop Documentation and Packaging
136
Section 6 Minetower Repair
137
Powermate Minitower Disassembly Sequence
137
Disassembly and Reassembly
137
Top Cover Removal
139
Top Cover Screws
139
Removing the Top Cover
140
Expansion Board Removal
141
Expansion Slot Screw
141
ISA/VL-Bus Backboard Bracket Screws
142
ISA/VL-BUS Backboard Removal
142
ISA/VL-Bus Backboard Screws
142
Front Panel Assembly Removal
143
Front Panel Screws
143
Power Button Tabs
144
Power Button Cover Removal
144
Speaker Assembly Removal
145
Speaker Tabs
145
SIMM Socket
146
SIMM Removal
146
1/2-Inch Diskette Drive Removal
147
Inch Diskette Drive Cables
147
Diskette Drive Bracket Screws
148
1/2-Inch Hard Disk Drive Removal
149
Inch Hard Disk Drive Cables
149
Right Side Device Screws
150
1/4-Inch Device Removal
151
Left Side Device Screw Access Holes
151
1/4-Inch Device Cage Removal
152
Inch Device Cage Screws
152
Power Button Screws
153
Power Supply Removal
153
Power Supply Screws
154
System Board Removal
154
Connector Identifiers
155
System Board Connectors and Screws
155
Battery Removal
156
Battery Replacement
156
Powermate Minitower Field-Replaceable Parts List
157
Illustrated Parts Breakdown
157
Powermate Minitower Illustrated Parts Breakdown
159
Powermate Minitower Options
160
Powermate Minitower Documentation and Packaging
161
Appendix A Connector Pin Assignments
164
Serial Interface Connectors
164
Parallel Interface Connector
165
VGA Interface Connector Pin Assignments
166
Speaker Connector Pin Assignments
166
Power Supply Connectors
167
Keyboard and Mouse Connectors
167
Power Lamp Connector
168
Hard Disk Drive Lamp Connector
168
Reset Button Connector
168
Diskette Drive Interface Pin Assignments
169
Advertisement
NEC POWERMATE Service Manual (195 pages)
Brand:
NEC
| Category:
Desktop
| Size: 2.18 MB
Table of Contents
Table of Contents
2
Table of Contents
11
Appendix DCD-Rom Reader Specifications and Jumper Settings
13
Preface
13
Abbreviations
15
List of Tables
17
Technical Information
17
First Release of System Configurations
17
Second Release of System Configurations
18
Desktop System Chassis
19
Desktop System Controls and Storage Device Slots
19
Minitower System Chassis
20
Minitower System Controls and Storage Device Slots
20
System Board
21
Processor
23
System Board Chips
23
Secondary Cache
24
System and Video BIOS
24
System Memory
25
System Memory Map
25
SIMM Memory Upgrade Path
26
Graphics Accelerator
27
Integrated Graphics
27
Motion Video Controller
27
Video Memory
27
Interrupt Controller
28
Interrupt Assignments
29
I/O Address Map
30
I/O Addressing
30
ISA Bus
31
PCI Auto Configuration
31
PCI Local Bus
31
PCI/IDE Ports
31
Parallel Interface
32
Parallel Port Addressing and Interrupts
32
Serial Interface
32
Infrared Interface
33
Serial Port Addressing and Interrupts
33
Diskette Drive
34
Hard Disk Drive
34
Power Supply
34
Keyboard
35
Mouse
35
Multimedia Components
35
Integrated Audio
35
CD-ROM Reader
36
Microphone
36
Speakers
36
Network Board
36
Plug and Play
36
Desktop Management Interface
37
DMI Components
37
CI Module
38
DMI Browser
38
Manageable Components
38
Usage
39
DMI Troubleshooting
40
Power Management
37
Specifications
41
Setup
44
Desktop Setup
44
Setup and Operation
44
Unpacking and Repacking
44
Desktop Peripheral Connections
45
Desktop Voltage Selector Switch
45
Desktop Network Board Connections
46
Assembling the Microphone Holder
47
Connecting the Microphone
47
Desktop Power Button, Lamps, and Suspend Button
48
Minitower Setup
49
Minitower Voltage Selector Switch
49
Minitower Network Board Connections
50
Minitower Peripheral Connections
50
Assembling the Microphone Holder
51
CD-ROM Reader
54
System Configuration
55
Setup Utility
55
How to Start Setup
56
How to Use Setup
57
Menu Bar
57
Legend Bar
58
Setup Key Functions
58
Field Help Window
59
General Help Window
59
Main Menu Options
59
IDE Adapters
60
Main Menu Parameters
60
IDE Hard Disk Parameters
61
Memory Cache
62
Memory Cache Parameters
62
Memory Shadow
62
Boot Options
63
Boot Parameters
63
Numlock
63
Numlock Parameters
63
Advanced Menu
64
Advanced Menu Parameters
64
Integrated Peripherals Menu
64
Integrated Peripherals Parameters
65
Security Menu
66
System Security Options
66
Power Menu
67
Boot Menu
68
Power Management Parameters
68
Discard Changes & Exit
69
Exit Menu
69
Get Default Values
69
Load Previous Values
69
Save Changes & Exit
69
Save Changes
70
BIOS Update Utility
70
NEC Bulletin Board Service
71
Using the BIOS Update Utility
72
General Rules for Installing Options
73
Option Installation
73
Precautions
74
Removing the System Unit Cover
75
Removing the Desktop Cover
75
Removing the Minitower Cover
77
Expansion Boards
78
Expansion Slot Locations
79
Expansion Board Installation
80
Inside Slot Expansion Board Installation
83
System Board Options
84
Checking System Memory
85
SIMM Upgrade
85
Recommended Memory Upgrade Path
86
SIMM Removal
87
SIMM Installation
88
Video Upgrade
89
Processor Removal
90
Processor Upgrade
90
Processor Installation
91
MIDI/Joystick Upgrade
91
Data Storage Devices
93
Device Slots
93
Device Cables
95
Device Preparation
95
Diskette Drive Signal Cable
95
IDE Signal Cables
95
System Power Cables
97
Cabling an IDE Device
98
Device Cabling
98
Cabling a Diskette Drive
99
Desktop Storage Device Installation
99
Installing the Desktop 3 1/2-Inch Drive
100
Removing the Desktop 3 1/2-Inch Drive Bracket
100
Removing the Desktop Front Panel
101
Installing the Desktop 5 1/4-Inch Device
103
Replacing the Desktop 3 1/2-Inch Drive Bracket
104
Replacing the Desktop Front Panel
104
Minitower Storage Device Installation
105
Installing a 3 1/2-Inch Drive into a Minitower Rear Slot
106
Installing the 3 1/2-Inch Drive into the Minitower Internal Front Slot
106
Removing the Minitower Front Panel
108
Installing the Minitower 5 1/4-Inch Device
110
Replacing the Minitower Front Panel
112
Adding External Options
113
Parallel Printer
113
RS-232C Device Connection
114
Maintenance
116
NEC Service and Information Telephone Numbers
116
Keyboard Cleaning
117
System Cleaning
117
Mouse Cleaning
118
Maintenance and Troubleshooting
116
Troubleshooting
119
Diagnosing and Solving Problems
119
Problems and Solutions
119
CMOS Battery Replacement
123
Desktop Repair
125
Disassembly and Reassembly
125
Powermate V Desktop Disassembly Sequence
125
System Unit Cover Removal
126
Expansion Board Removal
127
1/2-Inch Diskette and Hard Disk Drive Removal
129
PCI/ISA Backboard Removal
129
Front Panel Assembly Removal
131
Blank Panel Removal
132
Speaker Assembly Removal
132
SIMM Removal
133
1/4-Inch Device Removal
134
Power Supply Removal
135
System Board Removal
137
Illustrated Parts Breakdown
138
Powermate V Desktop Field-Replaceable Parts List
138
Powermate V Desktop Documentation and Packaging
141
Powermate V Desktop Options
141
Disassembly and Reassembly
142
Powermate V Minitower Disassembly Sequence
142
System Unit Cover Removal
143
Expansion Board Removal
145
SIMM Removal
145
Front 3 1/2-Inch Drive Removal
147
1/2-Inch Diskette Drive Removal
148
Front Panel Assembly Removal
148
Blank Panel and Metal Cover Plate Removal
149
1/4-Inch Device Removal
150
Rear 3 1/2-Inch Drive Removal
152
Card Guide/Fan Bracket Removal
153
Speaker Assembly Removal
154
Power Supply Removal
155
PCI/ISA Backboard Removal
156
System Board Removal
156
Illustrated Parts Breakdown
158
Powermate V Minitower Field-Replaceable Parts List
158
Minitower Repair
142
Powermate V Minitower Documentation and Packaging
161
Powermate V Minitower Options
161
Appendix A Connector Pin Assignments
162
CD Audio Connector Pin Assignments
164
Serial Interface Connectors
164
Parallel Interface Connector
165
Speaker Connector Pin Assignments
166
VGA Interface Connector Pin Assignments
166
Keyboard and Mouse Connectors
167
Power Supply Connector
167
Fan Connector
168
IRDA Connector
168
Suspend Button Connector
168
Diskette Drive Interface Pin Assignments
169
IDE Interface Connectors
170
SIMM Sockets
171
ISA/PCI-Bus Backboard Connector Pin Assignments
172
ISA Expansion Bus Connector Pin Assignments
174
Appendix B System Board Jumpers
176
Jumper Locations
176
Changing Processor Jumper Settings
177
Changing the Password
179
Clearing CMOS
180
Appendix C Hard Disk Drive Specifications and Jumper Settings
182
Hard Disk Drive Specifications
182
Specifications
182
540-MB Hard Disk Drive Jumper Settings
184
850-MB Hard Disk Drive Jumper Settings
185
GB Hard Disk Drive Jumper Settings
186
CD-ROM Reader Specifications
187
CD-ROM Reader Connectors and Jumper Settings
188
NEC POWERMATE Manual (112 pages)
Brand:
NEC
| Category:
Desktop
| Size: 11.9 MB
Table of Contents
Table of Contents
2
Text Setup
3
Electronic User’s Guide
3
Basic Care and Handling Tips
4
Storage Requirements
5
Starting up Your Computer for the First Time
6
Packing List
6
System Unit
6
Power Cable
6
Setting up and Booting Your Computer
7
For System Units with a Graphic Card
7
For System Units Without a Graphic Card
8
Using a Wireless Keyboard and Wireless Mouse
10
Setting up Your Operating System
14
Dual Boot (2 Languages)
15
Language Selection
15
Shutting down Windows Vista
17
The System Unit
18
Getting to Know Your Computer
18
The Keyboard
20
The Wired Keyboard
20
LED Indicators
21
Browsing Keys
21
Multimedia Keys
22
The Wireless Keyboard
23
The Mouse
25
The Wired/Wireless Mouse
25
Using the Optical Drive
26
To Insert a Disc in the Optical Drive
26
Optical Drive
26
To Remove a Disc from the Optical Drive
26
General Information about Optical Discs
27
Disc Care
27
Optical Disc Drive Care
27
Using the PC Dock Drive
28
Using the Memory Card Reader
28
To Remove the External Hard Drive (Via NEC PC-Drive) Safely
28
The Hard Disk Drive
29
To Remove a Memory Card from the Memory Card Reader Slot Safely
29
To Insert a Memory Card in the Memory Card Reader Slot
29
Optional/Peripheral Accessories
30
Setting up the Remote Control
30
Remote Control Functions
32
Center Command Key
33
Navigation Buttons
33
Playback Buttons
33
AV and Power Buttons
34
Shortcut Buttons
35
Numeric Keypad
35
Triple Tab Function (Character Input)
35
Teletext Buttons
35
Setting up the TV Tuner
36
TV Tuner
36
Precautions When Using TV Tuner with External Antenna
37
HD Hardware Setting and Configuration
38
HDMI Connection Checklist
38
HDMI Connector
39
Modem
40
Connecting Using a Modem
40
Lan
40
Communicating with Your Computer
40
Wireless Lan
41
Reader
44
Applications
44
Blu-Ray
45
Share Your Media over the Internet with Cyberlink Live
47
Share Media and Access TV Anytime, Anywhere
47
Cyberlink Live
47
Sharing Your Multimedia with Others
48
Cyberlink Magicdirector
49
Stylised Video Themes Turn up the Excitement
49
Video Scenes Editing Made Simple
49
One-Click Video and Audio Cleaning
49
Key Features of "Cyberlink Magicdirector"
50
Cyberlink Magicsports 3.0
51
Cyberlink Media Server
52
Access to Cyberlink Media Server
52
Cyberlink Powercinema 4
53
News and Weather, more Options
54
Cyberlink Powercinema 5
54
Dvds, Videos, Music, and Pictures: Watch, Listen, and Enjoy
54
Access to Cyberlink Powerdvd
55
Cyberlink Powerdvd 7.3
55
High-Definition Video
56
Home Theatre Audio
56
Smart DVD Utilities & Advanced Controls
56
Cyberlink Softdma
57
Internet Security Suite with Site Advisor
58
Safe Search and Surf
59
Home License Subscription Service
59
Stops Viruses
59
Halts Hackers
59
Protects Children Online
60
Improves Computer Health
60
Prevents Spam and Email Scam
60
Secures Your Identity
60
MDVD Creator Application
61
Nmouse Utility Software
62
Easy Zoom
62
Application Independence
62
More Applications
62
Easy Configuration
63
Web Navigation Control
63
Multimedia Playback Control
64
Office Application Quick Launch
65
Office Quick Control
66
Roxio Creator LJ
67
Back up
67
Music
67
Data
67
More Features
68
Advanced Options
68
SRS Premium Sound
69
Aero Theme
70
Entering BIOS Setup
71
BIOS Setup Menus
71
Introducing BIOS Setup for Windows Vista
71
Updating the BIOS
72
The NEC Recovery Program Allows Two Types of Recovery
73
Partial Recovery
73
Full Recovery
73
Recovery Information for Windows Vista Only
73
Starting the NEC Recovery Program
74
Backup Your Personal Files
74
Return Your Computer to Its Original Configuration
74
To Launch the NEC Recovery Program
74
If You Wish to Perform a Full Recovery
76
If You Wish to Perform a Partial Recovery
77
Keyboard and Mouse
78
Monitor and Display
78
Recovery and Diagnosis
78
Frequently Asked Questions (FAQ)
78
FAQ: Start-Up
79
My Computer Does Not Start
79
Upon Startup, My Computer Displays Unusual Commands
79
Upon Startup, My Computer Emits a Continuous Beeping Sound
79
FAQ: Recovery and Diagnosis
80
What Are the Tools on My Computer?
80
How to Use Windows Vista System Restore?
80
Utilities
80
My Mouse Does Not Work
81
The Numeric Pad Is Disabled
81
My Keyboard Does Not Work
81
FAQ: Keyboard and Mouse
81
FAQ: Monitor and Display
82
Nothing Appears on the Screen
82
My Screen Suddenly Turns Blank
82
The Display Is Not Centred or Gets Wavy
83
FAQ: Sound
84
My Computer Has no Sound
84
Your Computer will Not Play Audio Cds
84
FAQ: Internet
85
I Cannot Connect to the Internet
85
You Are Using a Dial-Up Modem.
86
You Are Using ADSL or Cable Connection.
86
I Cannot Send or Receive E-Mails
86
Use a Personal Firewall
87
I Seem to Have a Virus on My Computer
87
Run an Antivirus Program
87
FAQ: Printer
88
My Printer Does Not Work
88
Media Center Command Key
89
Troubleshooting
89
FAQ: Wireless LAN
89
Arrange Your Equipment
90
Reducing the Risk of Injuries
90
Potential Medical Conditions
90
Setting up a Healthy Work Environment
90
Your Chair
91
Your Screen or Monitor
92
Your Desk
92
Your Input Devices
92
Practise some Stretching Exercises
93
Repetitive Strain Injury
94
Pre-Existing Conditions and Psychosocial Factors
94
Epilepsy Warning
95
Safety Notices
96
Cleaning Your Computer
97
Modifications to the Product
97
Radio Frequency Interference
97
Radio Frequency Interference Statement
97
Remote Earth
98
Safety Extra Low Voltage (SELV)
98
Protected Extra Low Voltage (PELV)
98
Connections and Remote Earth
98
Power Supply and Cables
99
Power Supply
99
Power Cables
100
Cables
100
Laser Compliance Statement
100
Thunderstorm Warning
100
Radio-Communication Regulation
101
Additional Notices
101
Electrostatic Discharge (ESD) and ESD Protection
101
Computer Environment
101
When the Product Is in Use (or Started Up)
102
Product Storage Environment Guidelines
102
Safety Guidelines for Battery Usage
103
General Guidelines
103
Battery Use
103
Alkaline Manganese Batteries
103
General Precautions
104
Additional Precautions for Alkaline Manganese Batteries
104
Additional Precautions for Button Batteries (if Applicable)
105
Disposal
105
Glossary
106
License Agreement
107
Copyright
109
Trademarks
110
Official Name of the Software Used
111
Advertisement
NEC POWERMATE Manual (116 pages)
Brand:
NEC
| Category:
Desktop
| Size: 0.49 MB
Table of Contents
Table of Contents
2
Using this Guide
6
Text Conventions
7
Related Documents
8
1 Introducing Your Computer
12
Front Features
12
System Controls and Lamps
15
IR Window
16
Diskette Drive a
17
CD-ROM Reader
18
Back Features
19
External Connectors
22
Power Supply Features
23
Network Interface Board
24
Speakers
25
Microphone
26
2 Getting Started
27
Using a Mouse
27
Using Online Documentation
28
Where to Go from here
30
Quick Reference to Information about Your
31
Computer
32
3 Using Voyetra Sound Software
33
Audiostation
33
Power Bar
34
Mixer Module
36
CD Module
36
Digital Audio Transport (DAT) Module
37
MIDI Module
37
MIDI Orchestrator
38
Playing a MIDI Song File
39
Editing a MIDI Song File
39
Windat
41
Recording .WAV Files
41
Loading and Playing .WAV Files
42
Editing .WAV Files
43
4 Setting System Parameters
44
The Setup Utility
45
How to Start Setup
46
How to Use Setup
47
Main Menu Parameters
47
The Menu Bar
48
The Legend Bar
49
Setup Key Functions
49
Selecting a Menu Item
50
Displaying a Submenu
50
Getting Help
50
Main Menu Options
50
IDE Adapters
52
Memory Cache
54
IDE Hard Disk Parameters
54
Memory Shadow
55
Boot Options
55
Memory Cache Parameters
55
Boot Parameters
55
Numlock
56
Keyboard Parameters
56
The Advanced Menu
57
Integrated Peripherals Menu
58
Advanced Menu Parameters
58
Integrated Peripherals Parameters
59
The Security Menu
60
System Security Options
62
The Power Menu
63
Power Management Parameters
64
The Exit Menu
65
Save Changes & Exit
65
Discard Changes & Exit
66
Get Default Values
66
Load Previous Values
66
Save Changes
67
5 Setting System Board Jumpers
68
Changing Processor Jumper Settings
69
Clearing CMOS
72
Clearing Your Password
74
24-Hour Information Services
76
Nec's Fastfacts Service
77
NEC Bulletin Board Service
79
America Online Service
82
Compuserve Online Service
83
AT & T Interchange
84
E-Mail/Fax Technical Support Service
85
Internet
86
NEC Technical Support Services
87
Problem Checklist
89
Solutions to Common Problems
90
System Problems
90
Diskette Drive Problems
92
Monitor Problems
93
Keyboard/Mouse Problems
94
CD-ROM Problems
94
Speaker Problems
95
Microphone Problems
95
Diagnostic Diskette
95
Getting Help
96
Getting Help from Your Company
96
Getting Help from Your NEC Dealer
97
Getting Help from Nec's Technical Support Center
97
NEC Warranty/Non-Warranty Repair Service
97
Setting up a Healthy Work Environment
98
Making Your Computer Work for You
98
Arrange Your Equipment
100
Adjust Your Chair
101
Adjust Your Input Devices
103
Adjust Your Monitor
105
Vary Your Workday
107
Pre-Existing Conditions and Psychosocial Factors
108
Checking Your Comfort: How Do You Measure up
109
Checking Your Chair
109
Checking Your Keyboard
109
Checking Your Mouse
109
Checking Your Monitor
109
Checking You
109
Index
111
NEC POWERMATE Manual (33 pages)
Brand:
NEC
| Category:
Desktop
| Size: 21.76 MB
Table of Contents
Virus Warning
3
Epilepsy Warning
3
Safety and Comfort
4
Safety Precautions
4
Health Precautions
4
Packing List
5
Getting to Know Your Computer
8
Web Camera
11
Installation
11
Troubleshooting
12
Regulatory Information
14
Laser Compliance Statement
16
Hazardous Voltage
16
Communication Regulation
16
Useful Accessories
18
System Components
19
Recommended Environment
19
NEC POWERMATE Manual (31 pages)
Brand:
NEC
| Category:
Desktop
| Size: 9.73 MB
Table of Contents
Safety Precautions
4
Health Precautions
4
Installation
11
Modifications to the Product
14
Radio Frequency Interference Statement
14
Useful Accessories
18
Advertisement
Related Products
NEC PowerMate 2000 Series
NEC PowerMate eco
NEC POWERMATE - VERSION 2007
NEC POWERMATE - VERSION 2008
NEC POWERMATE 8100 Series
NEC POWERMATE ES Series
NEC POWERMATE ENTERPRISE NETPC - SERVICE
NEC POWERMATE P - SERVICE 1996
NEC POWERMATE P ETC
NEC POWERMATE PRO2180 - SERVICE 1996
NEC Categories
Monitor
Projector
Server
Telephone
Computer Hardware
More NEC Manuals
Login
Sign In
OR
Sign in with Facebook
Sign in with Google
Upload manual
Upload from disk
Upload from URL