Sign In
Upload
Manuals
Brands
Samsung Manuals
Camera Accessories
136S
Samsung 136S Manuals
Manuals and User Guides for Samsung 136S. We have
2
Samsung 136S manuals available for free PDF download: Installation Manual
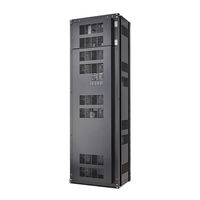
Samsung 136S Installation Manual (156 pages)
LIB System for UPS
Brand:
Samsung
| Category:
Controller
| Size: 7.81 MB
Table of Contents
Important Safety Instructions
5
General Instructions
6
Safety Precautions
6
Personnel and Equipment Warnings
7
Dangerous Voltages
7
Lock Out/Tag out Guidelines
8
General Warnings
8
Table of Contents
11
Tables
13
Figures
14
1 About this Manual
19
Purpose
19
Target Audience
19
Organization
19
Revision History
20
Acronyms and Abbreviations
21
2 Product Description
22
Major Components
22
Battery Module (Type a / Type B)
23
Figure 2-1: Battery Module Type a
23
Figure 2-2: Battery Module Type B
24
SMU (String Management Unit)
25
Table 2-1: Extra Auxiliary Breaker Switch Connector Description
26
Figure 2-4: Auxiliary Breaker Switch
26
Figure 2-5: Terminal Block Isometric View
26
Table 2-2: Terminal Block Description
27
Figure 2-6: Terminal Block Front / Top View (Cover Opened/Closed)
27
SMPS Assembly (Type a / Type B)
28
Figure 2-7: SMPS Assembly Type a
28
Figure 2-8: SMPS Assembly Type B
29
Figure 2-9: Front View of SMPS Assembly Type A, 3-Phase Input
29
Figure 2-10: Front View of SMPS Assembly Type A, 1-Phase Input
29
Figure 2-11: SMPS Assembly Type a - System BMS Connections
29
Figure 2-12: Front View of SMPS Assembly Type B, 1-Phase Input
30
Table 2-3: RS485 Connector Description
31
Table 2-4: TCP/IP Connector Description
31
Table 2-5: Dry Contact Connector Description
32
Table 2-6: AC Terminal Description (3 Phase)
32
Table 2-7: AC Terminal Description (1 Phase)
32
Table 2-8: Dry Contact Operation (Customer ID = 0)
33
Table 2-9: Dry Contact Operation (Customer ID = 1)
33
Table 2-10: Dry Contact Operation (Customer ID = 2)
33
Rack Frame
35
Figure 2-13: Rack Frame
35
3 Installing the Product
36
Grounding the Battery System
36
Arc Flash Calculations
37
Installation Procedure
38
Figure 3-1: Installation Procedure
38
Table 3-1: Estimated Time for Installation (Based on 136S 3P Installation)
39
Preparation Stage-Procedure
40
Preparation Stage-Unpacking
41
Table 3-2: Parts for 136S 3P Rack
41
Figure 2-3: SMU
41
Preparation Stage-Ground Wire and Tools
42
Ground Wires
42
Ground Wire Fasteners
42
Rack Fasteners (Anchors)
42
Multiple Rack Fasteners
42
Table 3-3: Ground Wire Specifications
42
Table 3-4: Ground Wire Fastener Specification
42
Table 3-5: Rack Fastener Specifications
42
Table 3-6: Rack Fastener Specifications (Side by Side)
42
Preparation Stage-Recommended Tools/Instruments
43
Table 3-7: Recommended Tools and Instruments
43
Preparation Stage-Visual Inspection
45
Inspection of the Rack Frame
45
Inspection of the Modules
45
Inspecting the SMU
45
Table 3-8: Module Voltage and Internal Impedance
45
Inspecting the SMPS Assembly
46
Rack Anchoring Stage
47
Table 3-9: Rack Clearance Distances
47
Figure 3-2: Clearance Distance for Single Rack Frame
48
Figure 3-3: Clearance Distance for Multiple Rack Frames Installed Side-By-Side
48
Figure 3-4: Clearance Distance for Multiple Rack Frames Installed Side-By-Side and Rear-To-Rear
49
Figure 3-5: Front Panel Screws (Eight)
49
Figure 3-6: Front Panel Hooks (Four)
50
Figure 3-7: Side Panel Screws (Six)
50
Figure 3-8: Side Panel Hooks (Four)
51
Figure 3-9: Rear Panel Screws (Eight)
51
Figure 3-10: Rear Panel Hooks (Four)
52
Figure 3-11: Rack Anchoring Points (4 EA)
52
Figure 3-12: Holes on the Sides of the Rack (Six)
53
Figure 3-13: Reattaching the Side Panels (Four Hooks and Six Screws for each Panel)
54
Figure 3-14: Reattaching the Rear Panels
55
Rack Installation Stage
56
Front Door Removal
57
Figure 3-15: Front Door Ajar
57
Figure 3-16: Removing the Earth Cable
57
Figure 3-17: Removing the Front Door
58
Figure 3-18: All Doors and Front Panels Removed
58
SMU and SMPS Assembly Installation
59
Figure 3-19: Inserting SMU
59
Figure 3-20: Attaching a SMU to a Rack Frame
59
Figure 3-21: Ground Cable Connection to the SMU
60
Figure 3-22: Inserting SMPS Assembly
61
Figure 3-23: Attaching the SMPS Assembly
61
Figure 3-24: Ground Cable Connection to the SMPS Assembly
62
Battery Module Installation
63
Figure 3-25: Insertion of Modules on the Ninth Shelf from the Bottom
63
Figure 3-26: Battery Module Arrangement on the Eighth Shelf
64
Figure 3-27: Battery Module Arrangement
64
Figure 3-28 : Module Number
65
Figure 3-29: Insertion of Modules on 1St Shelf
65
Fuse-Busbar Assembly
66
Figure 3-30: Rack Fuse Busbar Assembly
66
Figure 3-31: Rack Fuse Busbar Assembly (Fuse Cover)
66
Figure 3-32: Fuse Busbar Left Assembly
67
Figure 3-33: Fuse Busbar Left Assembly (Fuse Cover)
67
Figure 3-34: Fuse Busbar Right Assembly
68
Figure 3-35: Fuse Busbar Right Assembly (Fuse Cover)
68
Busbar Installation
69
Figure 3-36: Removing the Module #1'S Cover and SMU B- Terminal Cover
70
Figure 3-37: Connect SMU B- and Module #1 B
70
Figure 3-38: Restore Smu's B- Terminal
71
Figure 3-40: Connect Battery Module #1 B+ and Battery Module #2 B
72
Figure 3-42: Remove Battery Module #2'S Front Cover
73
Figure 3-44: Reattach Battery Module #2'S Front Cover
74
Figure 3-46: Connect Battery Module #3 B+ and Module #4 B
75
Figure 3-47: Reattach Battery Module #3'S Front Cover
76
Figure 3-49: Connect Battery Module #4 B+ and Battery Module #5 B
77
Figure 3-50: Reattach Battery Module #4'S Front Cover
78
Figure 3-52: Connect Battery Module #5 B+ and Battery Module #6 B
79
Figure 3-53: Reattach Battery Module #5'S Front Cover
80
Figure 3-55: Connect Battery Module #6 B+ and Battery Module #7 B
81
Figure 3-56: Reattach Battery Module #6'S Front Cover
82
Figure 3-58: Connect Battery Module #7 B+ and Battery Module #8 B
83
Figure 3-60: Remove Battery Modules #9'S Front Cover
84
Figure 3-61: Connect Battery Module #8 B+ and Battery Module #9 B
85
Figure 3-63: Remove Battery Modules #10'S Front Cover
86
Figure 3-65: Reattach Battery Module #9'S Front Cover
87
Figure 3-67: Connect Battery Module #10 B+ and Battery Module #11 B
88
Figure 3-68: Reattach Battery Module #10'S Front Cover
89
Figure 3-70: Connect Battery Module #11 B+ and Battery Module #12 B
90
Figure 3-71: Reattach Module #11'S Front Cover
91
Figure 3-73: Connect Battery Module #12B+ and Battery Module #13 B
92
Figure 3-74: Reattach Module #12'S Front Cover
93
Figure 3-76: Connect Battery Module #13 B+ and Battery Module #14 B
94
Figure 3-77: Reattach Battery Module #13'S Front Cover
95
Figure 3-79: Connect Battery Module #14 B+ and Battery Module #15 B
96
Figure 3-80: Reattach Battery Module #14'S Front Cover
97
Figure 3-82: Connect Battery Module #15 B+ and Battery Module #16 B
98
Figure 3-83: Reattach Battery Module #15'S Front Cover
99
Figure 3-85: Connect Battery Module #16 B+ and Battery Module #17 B
100
Figure 3-86: Reattach Battery Module #15'S Front Cover
101
Figure 3-88: Connect SMU B+ and Module #17 B
102
Module and SMU Signal Cable Connection
103
Figure 3-91: Module #1 to Module #2 Signal Cabling
104
Figure 3-93: Module #3 to Module #4 Signal Cabling
105
Figure 3-95: Module #5 to Module #6 Signal Cabling
106
Figure 3-97: Module #7 to Module #8 Signal Cabling
107
Figure 3-99: Module #9 to Module #10 Signal Cabling
108
Figure 3-101: Module #11 to Module #12 Signal Cabling
109
Figure 3-103: Module #13 to Module #14 Signal Cabling
110
Figure 3-105: Module #15 to Module #16 Signal Cabling
111
Figure 3-107: Pre-Punched Hole for Signal Cable
112
Figure 3-108: Signal Cabling Examples of Left Alignment of SMU
113
Figure 3-109: Termination Resistor Setting for Last SMU
114
SMPS Assembly and SMU Power Cable Connection
115
SMPS Assembly and SMU Signal Cable Connection
116
Figure 3-114: Dry Contact Cable Connection to SMPS Assembly
117
SMPS Assembly AC Input Connection
118
Figure 3-118: AC Input Terminals of SMPS Assembly 1 Phase Type a
119
Figure 3-120: SMPS Assembly 3 Phase Type a - AC Input Terminals with Cables Attached
120
Figure 3-122: SMPS Assembly 1 Phase Type a - AC Input Terminals with Cables Attached
121
Figure 3-125: AC Input Terminals of SMPS Assembly 3 Phase Type B
122
Figure 3-127: AC Input Terminals of SMPS Assembly 1 Phase Type B
123
DC Link Cable Connection
124
Figure 3-129: Connecting the DC Link High Current Terminals
125
AC Input Commissioning
127
BMS Configuration
128
Table 3-10: Required Items for BMS Configuration
128
Table 3-11: Rack BMS Configuration Cable Pin Map
129
Table 3-12: System BMS Configuration Cable Pin Map
130
Table 3-13: System BMS Communication Cable Pin Map
131
Figure 3-133: BATTMON Splash Window
133
Figure 3-135: BATTMON Splash Window
134
Figure 3-138: BATTMON Splash Window : Warning Pop-Up Window
135
Figure 3-141: Cable Connections for Rack BMS Configuration
136
Figure 3-143: Rack BMS Termination Switch and CAN Cable Connection
137
Figure 3-145: BATTMON Splash Window
138
Figure 3-147: Rack BMS Config Setting Window
139
Figure 3-148: Cable Connections for System BMS Configuration
140
Figure 3-150: BATTMON Splash Window
141
Figure 3-152: System BMS Install Setting Window
142
Communication Check
143
Figure 3-154: Open "Network and Sharing Center
144
Figure 3-156: Open "Properties" for "Local Area Connection
145
Figure 3-158: Setting the Computer's IP Address
146
Figure 3-159: BATTMON Icon
147
Figure 3-162: System and Rack Information
148
Figure 3-164: Cell Information
149
Reinstall the Front Door
150
Reinstall the Front Panel
151
Switching on the MCCB
152
Advertisement
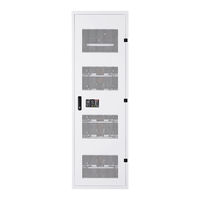
Samsung 136S Installation Manual (106 pages)
Lithium Ion Battery System for UPS
Brand:
Samsung
| Category:
Camera Accessories
| Size: 10.34 MB
Table of Contents
Important Safety Instructions
5
General Instructions
6
Safety Precautions
6
Personnel and Equipment Warnings
7
Dangerous Voltages
7
Lock Out/Tag out Guidelines
8
General Warnings
8
Table of Contents
9
Table of Contents
10
Tables
11
Figures
12
1 About this Manual
15
Purpose
15
Target Audience
15
Organization
15
Revision History
16
Acronyms and Abbreviations
16
2 Product Description
17
Major Components
17
Battery Module (Type a / Type B)
18
Figure 2-1: Battery Modules (Type a and Type B)
18
Switchgear Assembly
19
Figure 2-2: Switchgear Assembly
19
Figure 2-3: Front View of the Switchgear Assembly
19
SMPS Assembly (Type a / Type B)
20
Figure 2-4: SMPS Assembly (Type a and Type B)
20
Rack Frame
21
Figure 2-5: Rack Frame
21
3 Assembling the Product
22
Grounding the Battery System
22
Installation and Assembly Procedure
23
Figure 3-1: Installation Procedure
23
Preparation Stage-Procedure
24
Preparation Stage - Unpacking
25
Preparation Stage - Ground Wire and Tools
25
Ground Wires
25
Ground Wire Fasteners
25
Rack Fasteners (Anchors)
25
Multiple Rack Fasteners
25
Table 3-1: Ground Wire Specifications
25
Table 3-2: Ground Wire Fastener Specification
25
Table 3-3: Rack Fastener Specifications
25
Table 3-4: Rack Fastener Specifications (Side by Side)
25
Preparation Stage-Recommended Tools/Instruments
26
Table 3-5: Recommended Tools and Instruments
26
Preparation Stage - Visual Inspection
28
Inspecting the Rack Frame
28
Figure 3-2: Faulty Cases
28
Visual Inspection of the Modules
29
Inspecting the Switchgear
29
Inspecting the SMPS Assembly
29
Table 3-6: Module Voltage and Internal Impedance
29
Rack Anchoring Stage
30
Table 3-7: Rack Clearance Distances
30
Figure 3-3: Clearance Distance for Single Rack Frame
31
Figure 3-4: Clearance Distance for Multiple Rack Frames
31
Figure 3-5: Clearance Distance for Multiple Rack Frames Installed Rear-To-Rear
32
Figure 3-6: Rack Anchoring Points (4 EA)
33
Figure 3-7: Holes on the Sides of the Rack
33
Figure 3-8: Reattaching the Side Panels
33
Figure 3-9: Reattaching the Rear Panels
34
Rack Installation Stage
35
Switchgear and SMPS Assembly Installation
36
Figure 3-10: Inserting Switchgear
36
Figure 3-11: Attaching a Switchgear Assembly to a Rack Frame
36
Figure 3-12: Ground Cable Connection to the Switchgear Assembly
37
Figure 3-13: Inserting SMPS Assembly
38
Figure 3-14: Attaching the SMPS Assembly
38
Figure 3-15: Ground Cable Connection to the SMPS Assembly
39
Battery Module Installation
40
Figure 3-16: Insertion of Modules on the Ninth Shelf from the Bottom
40
Figure 3-17: Battery Module Arrangement on Eighth and Ninth Shelves
41
Figure 3-18: Battery Module Arrangement
41
Figure 3-19 : Module Number
42
Figure 3-20: Insertion of Modules on 1St Shelf
42
Busbar Installation
43
Figure 3-21: Removing the Module #1'S Cover and Switchgear B- Terminal Cover
44
Figure 3-22: Connect Switchgear B- and Module #1 B
44
Figure 3-23: Restore Switchgear's B- Terminal
45
Figure 3-24: Remove Battery Module #2'S Front Cover
45
Figure 3-25: Connect Battery Module #1 B+ and Battery Module #2 B
46
Figure 3-26: Reattach Battery Module #1'S Front Cover
47
Figure 3-27: Remove Battery Module #2'S Front Cover
47
Figure 3-28: Connect Battery Module #2 B+ and Battery Module #3 B
48
Figure 3-29: Reattach Battery Module #2'S Front Cover
49
Figure 3-30: Remove Battery Module #4'S Front Cover
49
Figure 3-31: Connect Battery Module #3 B+ and Module #4 B
50
Figure 3-32: Reattach Battery Module #3'S Front Cover
51
Figure 3-33: Remove Battery Module #5'S Front Cover
51
Figure 3-34: Connect Battery Module #4 B+ and Battery Module #5 B
52
Figure 3-35: Reattach Battery Module #4'S Front Cover
53
Figure 3-36: Remove Battery Module #6'S Front Cover
53
Figure 3-37: Connect Battery Module #5 B+ and Battery Module #6 B
54
Figure 3-38: Reattach Battery Module #5'S Front Cover
55
Figure 3-39: Remove Battery Module #7'S Front Cover
55
Figure 3-40: Connect Battery Module #6 B+ and Battery Module #7 B
56
Figure 3-41: Reattach Battery Module #6'S Front Cover
57
Figure 3-42: Remove Battery Module #8'S Front Cover
57
Figure 3-43: Connect Battery Module #7 B+ and Battery Module #8 B
58
Figure 3-44: Reattach Battery Modules #7 and #8'S Front Covers
59
Figure 3-45: Remove Front Covers from Battery Modules #9 and #10
59
Figure 3-46: Connect Battery Module #9 B+ and Battery Module #10 B
60
Figure 3-47: Reattach Battery Module #9'S Front Cover
61
Figure 3-48: Remove Battery Module #11'S Front Cover
61
Figure 3-49: Connect Battery Module #10 B+ and Battery Module #11 B
62
Figure 3-50: Reattach Battery Module #10'S Front Cover
63
Figure 3-51: Remove Battery Module #12'S Front Cover
63
Figure 3-52: Connect Battery Module #11 B+ and Battery Module #12 B
64
Figure 3-53: Assemble Module #11'S Front Cover
65
Figure 3-55: Connect Battery Module #12B+ and Battery Module #13 B
66
Figure 3-56: Assemble Module #12'S Front Cover
67
Figure 3-58: Connect Battery Module #13 B+ and Battery Module #14 B
68
Figure 3-59: Reattach Battery Module #13'S Front Cover
69
Figure 3-61: Connect Battery Module #14 B+ and Battery Module #15 B
70
Figure 3-62: Assemble Battery Module #14'S Front Cover
71
Figure 3-64: Connect Battery Module #15 B+ and Battery Module #16 B
72
Figure 3-65: Reattach Battery Module #15'S Front Cover
73
Figure 3-67: Connect Battery Module #15 B+ and Battery Module #16 B
74
Figure 3-68: Reattach Battery Module #15'S Front Cover
75
Figure 3-70: Connect Switchgear B+ and Module #17 B
76
Module and Switchgear Signal Cable Connection
77
Figure 3-73: Opening for Cable Installation
78
Figure 3-75: Module #2 to Module #3 Signal Cabling
79
Figure 3-77: Module #4 to Module #5 Signal Cabling
80
Figure 3-79: Module #6 to Module #7 Signal Cabling
81
Figure 3-81: Module #11 to Module #12 Signal Cabling
82
Figure 3-83: Module #13 to Module #14 Signal Cabling
83
Figure 3-85: Module #15 to Module #16 Signal Cabling
84
SMPS Assembly and Switchgear Power Cable Connection
89
SMPS Assembly and Switchgear Signal Cable Connection
90
SMPS Assembly AC Input Connection
92
Rack Fuse and Additional Module Signal Cable Connection
94
DC Link Cable Connection
99
AC Input Commissioning
101
Table 4-1: Control Power Range of Operation
102
Table 4-2: Hardware Description
102
Performance
102
Advertisement
Related Products
Samsung 132010
Samsung 1357B-BD-P1200-XAC
Samsung Digimax 130
Samsung 138FM
Samsung 1362450
Samsung 1362449
Samsung 14H5
Samsung 1171689
Samsung 1132904
Samsung SAMSUNG 16~45mm
Samsung Categories
Cell Phone
Monitor
Microwave Oven
Air Conditioner
LCD TV
More Samsung Manuals
Login
Sign In
OR
Sign in with Facebook
Sign in with Google
Upload manual
Upload from disk
Upload from URL